NOTICE
Garmin® strongly recommends having an experienced installer with the proper knowledge of camper installations and waterproofing install the mount. Incorrectly installing the mount can result in damage to the vehicle or the camera.
NOTICE
Failure to heed the installation considerations could result in damage to the camera or the vehicle.
Garmin is not responsible for any damage caused to the camera or vehicle during installation or as a result of the camera mount detaching from the vehicle.
To install the mount, you need a drill with a 3.2 mm (1/8 in.) drill bit, a pencil, a Philips screwdriver, outdoor waterproofing sealant, and two M4 screws (included for some vehicles).
-
Place the mount base against the mounting surface in the location where you want to mount the camera, and mark the location of the two mounting holes
 using a pencil or other writing instrument.
You should ensure the mount is level and correctly positioned.
-
Remove the mount base from the mounting surface, and use a 3.2 mm (1/8 in.) drill bit to drill pilot holes in the two locations you marked.
NOTICE
If you are drilling into a fiberglass surface, you may need to use a specialized drill bit or drill counter-clockwise to avoid damaging the fiberglass. For more information, contact your vehicle manufacturer or a professional installer.
-
Apply waterproofing sealant around the drilled pilot holes, and all the way around the edge of the back surface of the mount base, where it will contact the vehicle.
You must use an outdoor waterproofing sealant that will bond with your vehicle's exterior surface and not damage it. For more information, contact your vehicle manufacturer or a professional installer.
-
Place the mount base against the surface, aligning the mounting holes in the base with the drilled pilot holes.
-
Fasten the mount base to the vehicle using two M4 screws.
NOTE:
The included screws are intended for installation on a camper with a fiberglass shell. You must verify the screws are the correct length and appropriate for the exterior mounting surface of your vehicle. For more information, contact your vehicle manufacturer or a professional installer.
-
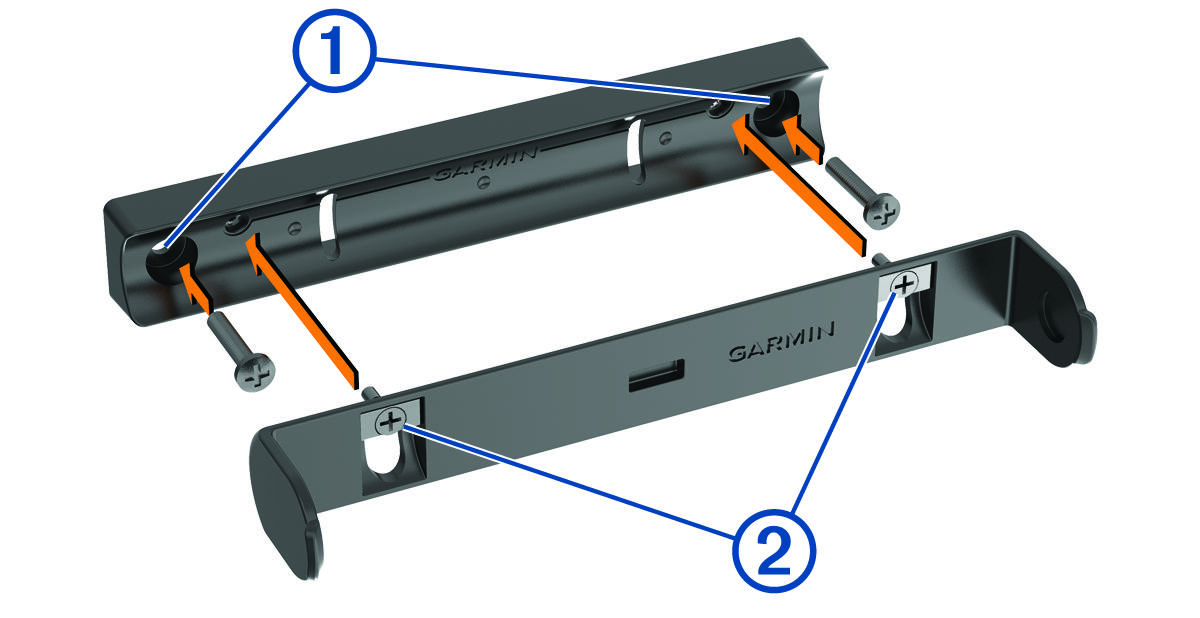
Fasten the camera clip to the mount base using the two pre-installed screws
 .
.