Installing the Camera at the Bottom of Your License Plate

To allow for proper camera angle adjustment, the Garmin® logo on the camera clip must be right-side up when the mount is installed on your vehicle. Out of the box, the camera mount is assembled for installing the camera at the top of your license plate. When installing the camera at the bottom of your license plate, you must remove, rotate, and reattach the camera clip. This allows you to properly adjust the camera angle.

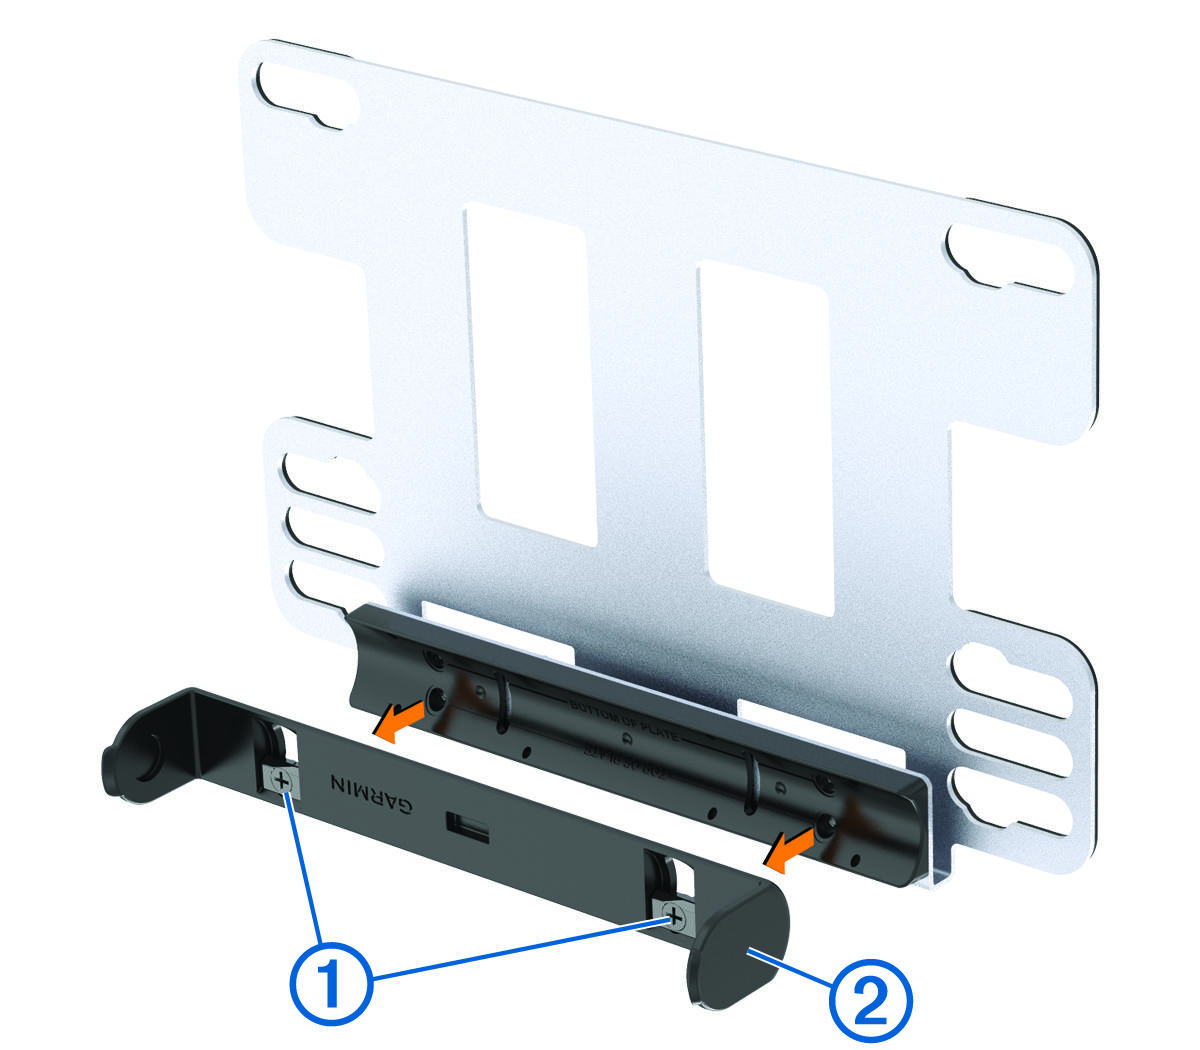
  1. Using a Phillips screwdriver, fully loosen the two camera clip screws Callout number one, and remove the camera clip Callout number two from the metal bracket.


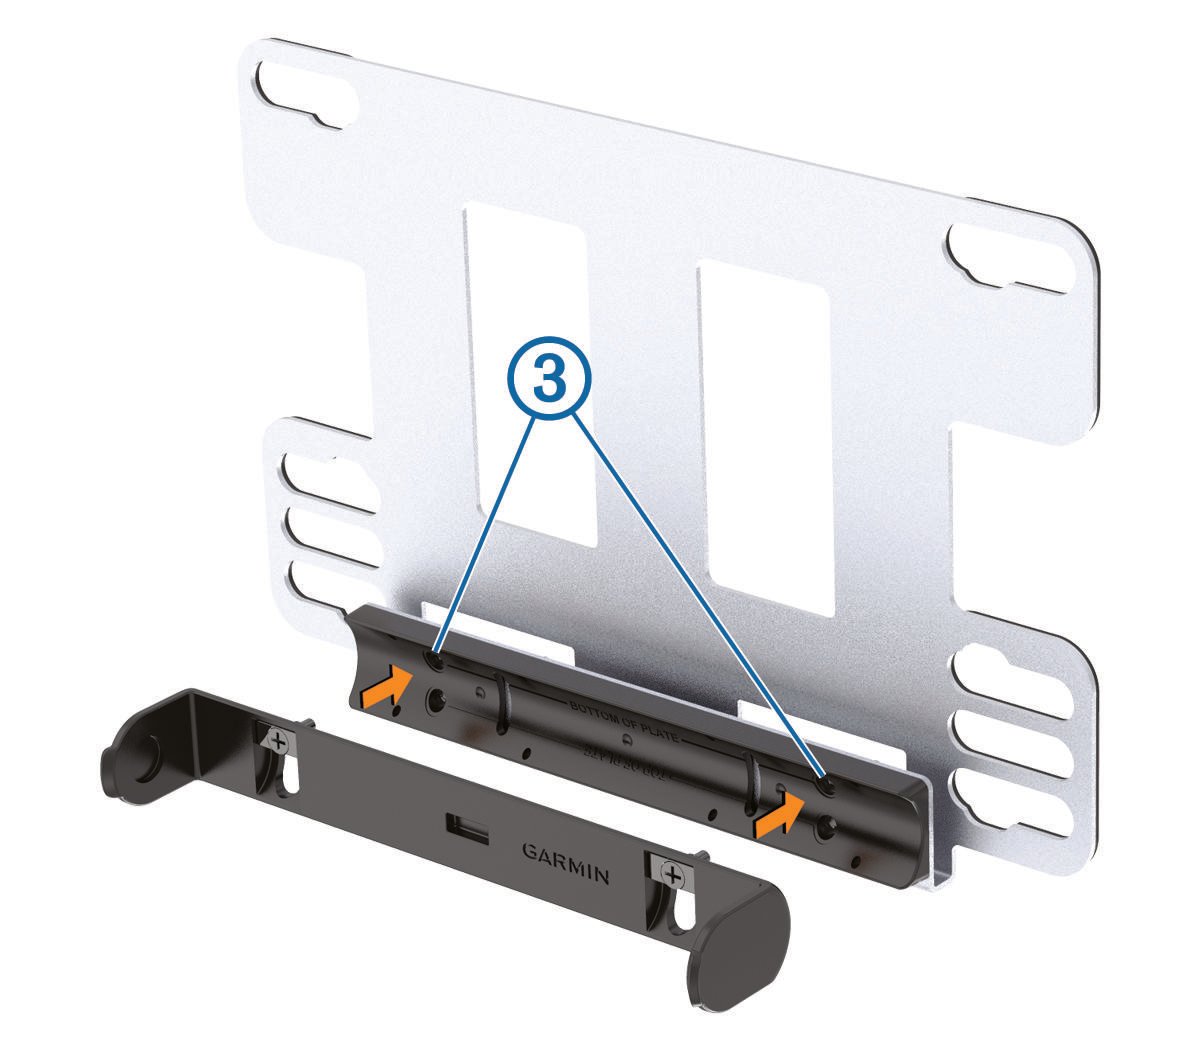
  2. Rotate the camera clip 180 degrees, so the Garmin logo is facing right-side-up.
  3. Insert the two camera clip screws into the holes labeled BOTTOM OF PLATE Callout number three.


  4. Tighten both screws.
  5. Apply one or two layers of the included adhesive mounting tape to the back of the flat mounting bracket, near the bottom (optional).

    The mounting tape secures the back of the mounting bracket to your vehicle using double-sided adhesive. This helps reduce camera vibration, especially if your vehicle does not provide mounting holes at the bottom of the license plate. You can stack two layers of mounting tape if one layer is not thick enough to stick to your vehicle. 

    NOTE: The mounting tape does not replace the license plate screws. You must fasten the mount and license plate to the vehicle using at least two license plate screws, whether or not you attach the mounting tape.
Copyright © Garmin. All rights reserved.GUID-A52DB25D-9CB5-49CA-8926-E861641EF176 v3