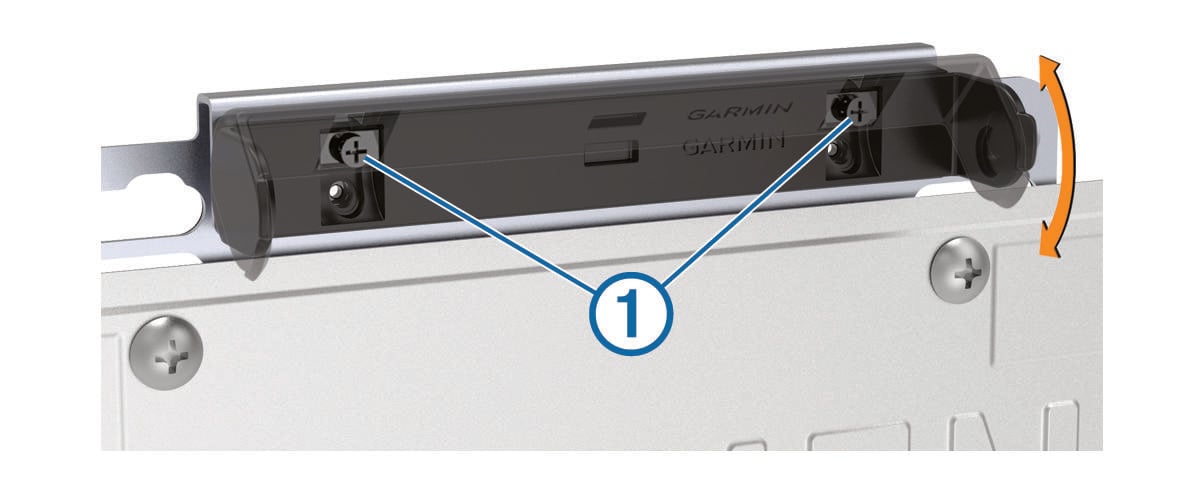
Adjusting the Camera Angle

You can adjust the camera angle up and down to provide the best view for your vehicle.

  1. Drive to a level area with a clear view behind the vehicle.
  2. Remove the camera from the mount (Removing the Camera from the Mount).
  3. Use a Phillips screwdriver to loosen the two adjustment screws Callout number one.

    Device assembly with a callout
  4. Tilt the mount up or down.

    For most vehicles, the camera should face straight out or slightly downward.

  5. Tighten the adjustment screws to lock the mount in the new position.
  6. Install the camera into the mount.
  7. View the camera using your Garmin® navigation device (Viewing the Backup Camera), and verify the camera angle.

    When the camera is angled correctly, the bottom edge of the video frame should align with the rearmost part of the vehicle, such as the bumper or trailer hitch. Objects above the horizon should appear in the top one-quarter to one-third of the frame.

  8. If necessary, repeat this procedure until the camera angle is correct.
WARNING

After you adjust the camera angle, you must align the guidance lines (Aligning the Guidance Lines). If you previously set up guidance lines, they are not accurate after the camera angle changes. Failure to properly align the guidance lines could result in an accident or collision, resulting in death, serious injury, or property damage.

Copyright © Garmin. All rights reserved.GUID-A52DB25D-9CB5-49CA-8926-E861641EF176 v3