Installing and Setting Up the Garmin Dash Cam

NOTICE

Before installing the Garmin Dash Cam™ , you must install the mount and allow the adhesive to bond to the windshield for 24 hours. Failure to allow adequate bonding time may cause the mount to detach from the windshield, which could result in damage to the product or mount.

  1. Place the camera and mount onto the metal disc.
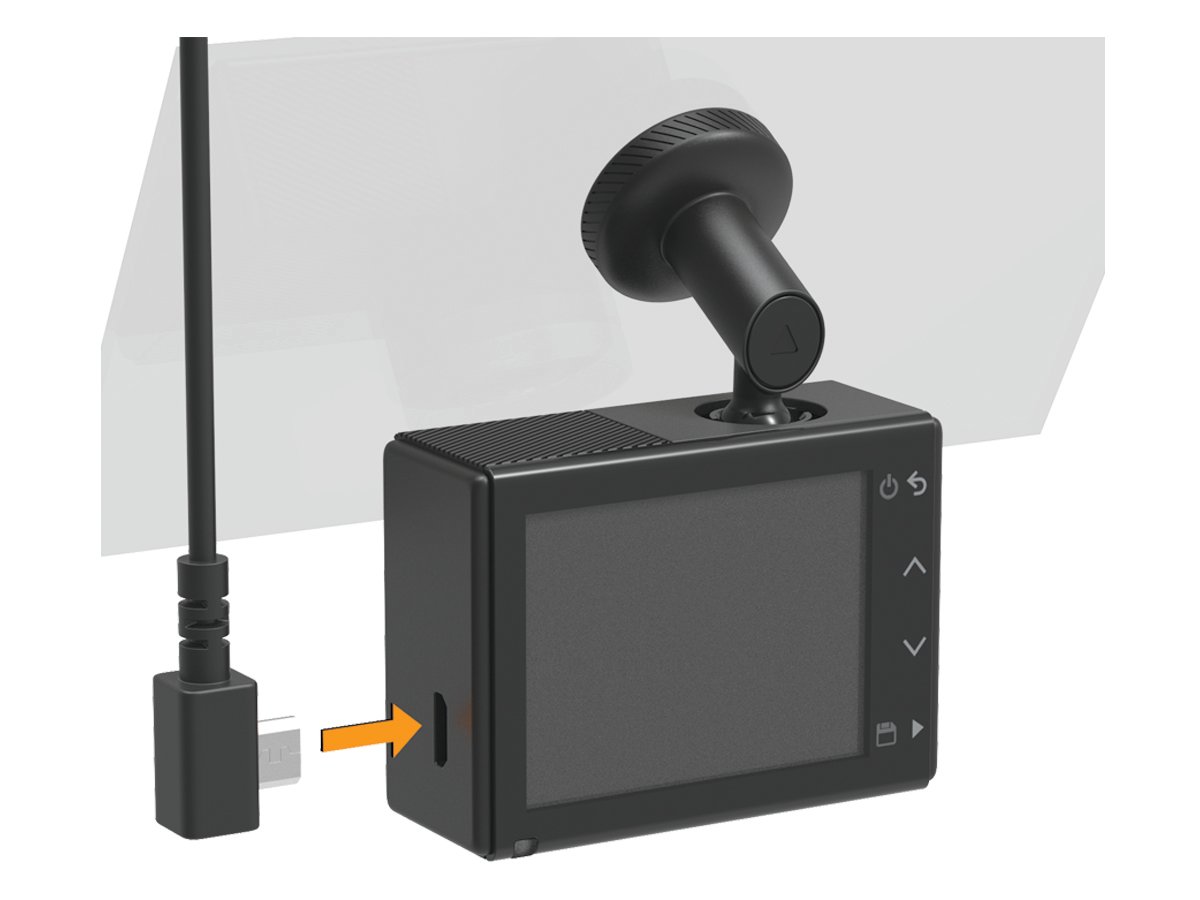
  2. Plug the vehicle power cable into the USB port on the device.

    Power cabled connection to the micro-USB port on the side of the camera
  3. Route the power cable to your vehicle power outlet.

    The included vehicle power cable is designed to be routed out of sight. It is long enough to route around the windshield in most vehicles, and you can hide the thin cable along or behind the trim or headliner.

  4. Plug the other end of the vehicle power cable into a power outlet in your vehicle.
  5. If necessary, turn on the vehicle ignition switch to provide power to the power outlet in your vehicle.

    The device turns on.

  6. Follow the on-screen instructions to complete the initial device setup.

    The camera view appears.

  7. Adjust the position of the camera to capture the desired field of view.
Copyright © Garmin. All rights reserved.GUID-5EB75E2C-D1BA-42ED-A87E-377A6EBB425C v7