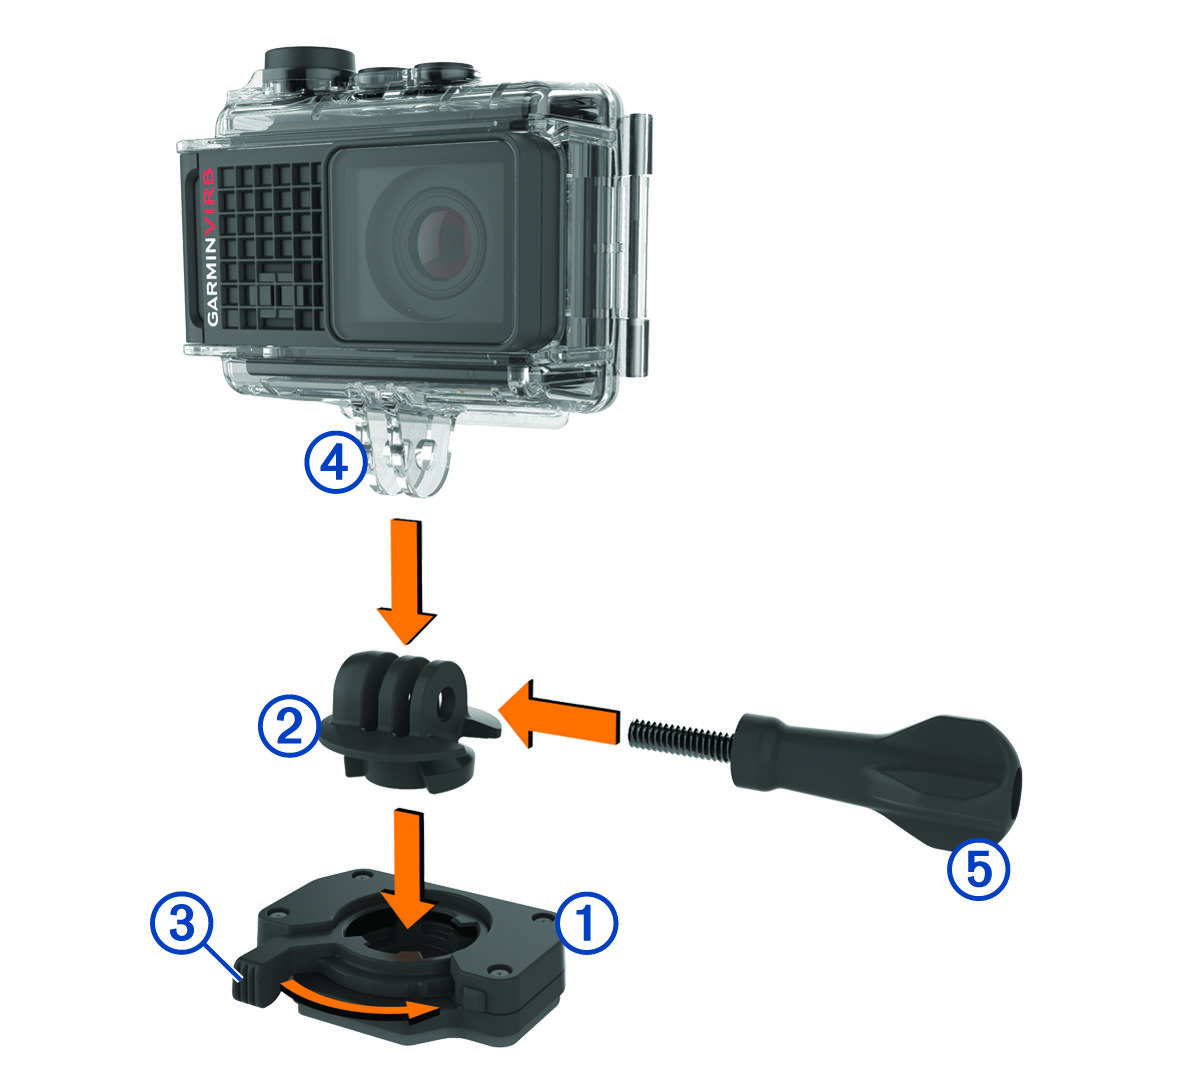
Attaching the Device to the Mount
To prevent product loss or damage, do not use the adhesive mounting base when the temperature is below -15°C (5°F).
The permanent mounting adhesive is extremely difficult to remove after it is installed.
Before you can install the adhesive mounting base onto a surface, the ambient temperature must be from 21° to 38°C (from 70° to 100°F).
Your device includes an assortment of mounting bases and arms, which can be used in many configurations. These instructions provide an example of one possible configuration. You can also purchase additional mounts for your device, such as wearable mounts, vehicle mounts, or a tripod mount. Go to www.garmin.com/VIRB for more information.
-
Remove the film from the adhesive mounting base
 , and press the base firmly onto the mounting surface.
You can use either the flat base or the curved base, depending on the contour of the mounting surface.
-
Insert the adapter
 into the base.
The lever
 must be in the open position.
-
Insert the camera mount
 into the top of the adapter.
The device should be horizontal for the proper aspect ratio when recording video.
-
Insert a thumbscrew
 into the larger opening of the joint, and tighten the thumbscrew to lock the angle of the joint.
NOTE: The metal fitting indicates the smaller opening of the joint.
into the larger opening of the joint, and tighten the thumbscrew to lock the angle of the joint.
NOTE: The metal fitting indicates the smaller opening of the joint.