Installing the Pedals
This procedure is for the Vector™ 3 system. The Vector 3S system installation is the same, but the power sensor components are in the left pedal only. For more information, see About the Vector 3S System.
-
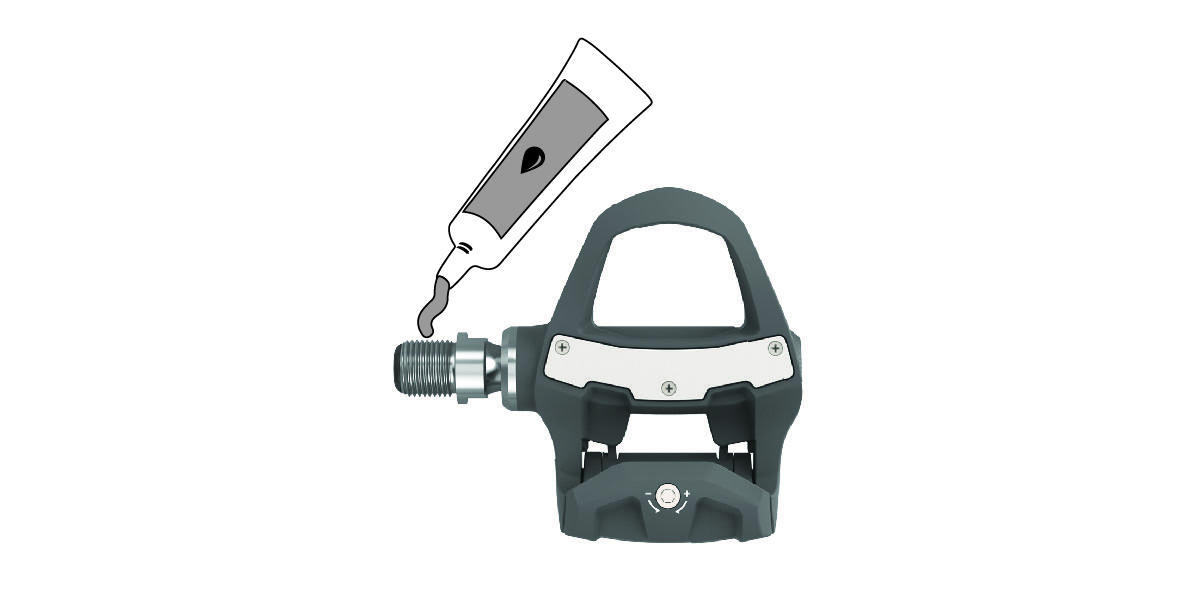
Apply a thin layer of grease on the pedal spindle threads.
-
Use the pedal wrench to tighten the spindle.
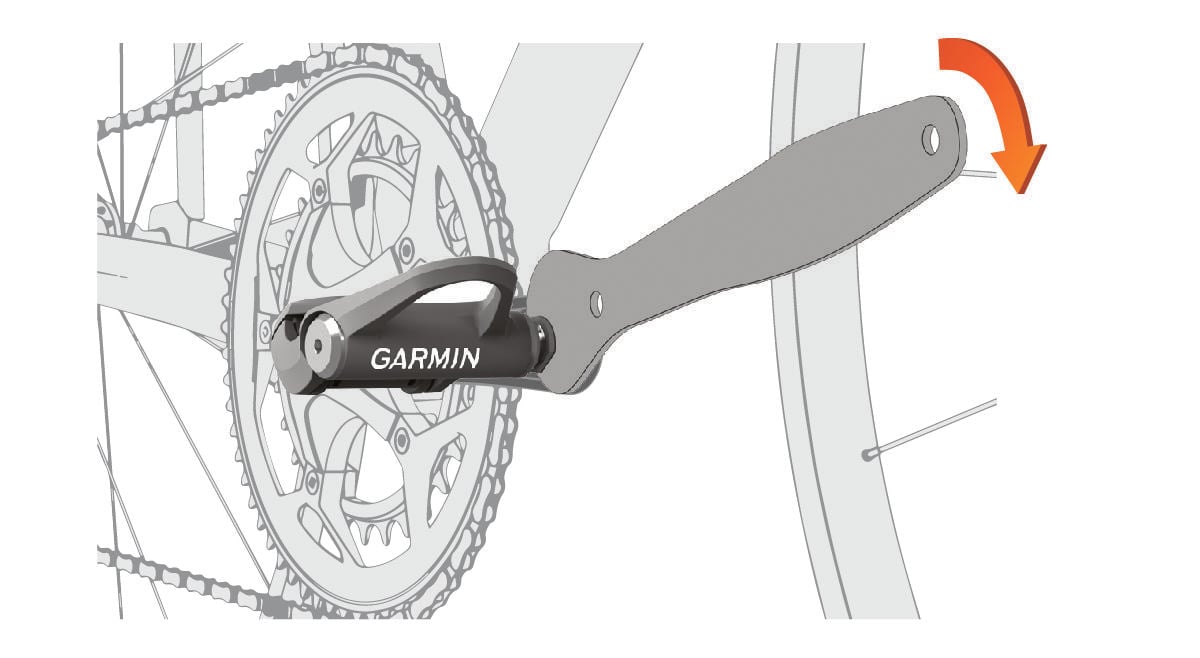
NOTE: Garmin® recommends torque of 25 lbf-ft. (34 N-m). -
Rotate the crank arm to check for clearance.
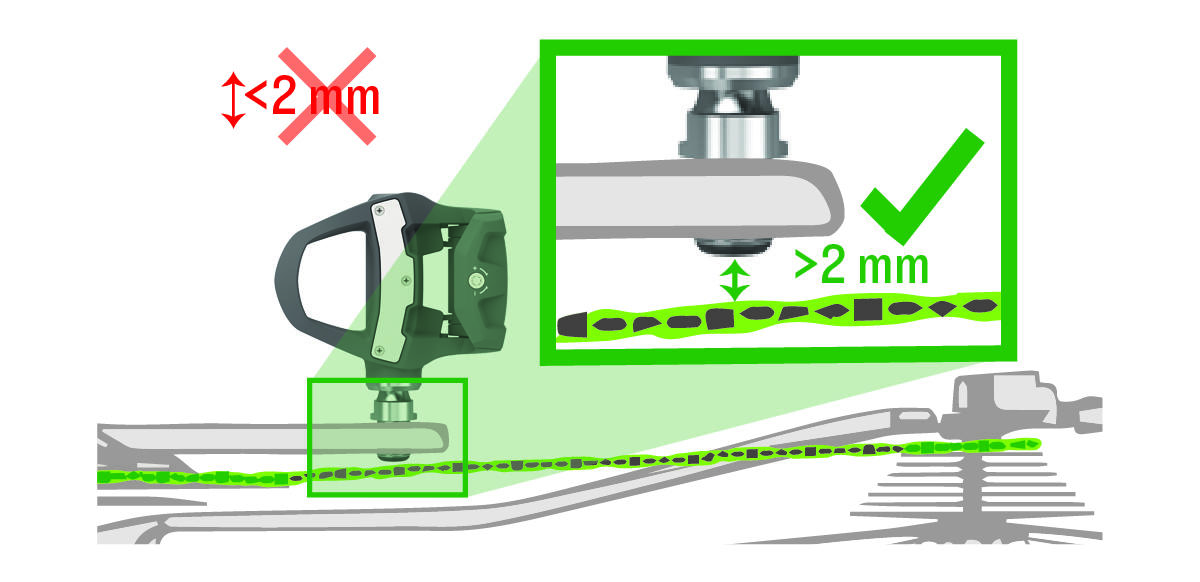
NOTE: Garmin recommends 2 mm or more between the pedal and the chain. If the pedal rubs the chain, you can add one washer (included) between the spindle and the crank arm to increase clearance. To maintain an equal q factor, you can add one washer to the left pedal spindle. Do not use more than one washer on each pedal.