Installing the Pedals
These instructions show the Rally™ RK pedal body. The steps are the same for any Rally 110/210 pedal body type.
Do not install the Rally 110/210 pedals with pedal boots or extenders. Pedal boots or extenders may damage the electronics in the spindles, leading to product malfunction.
-
Apply a thin layer of grease to
the pedal spindle threads.
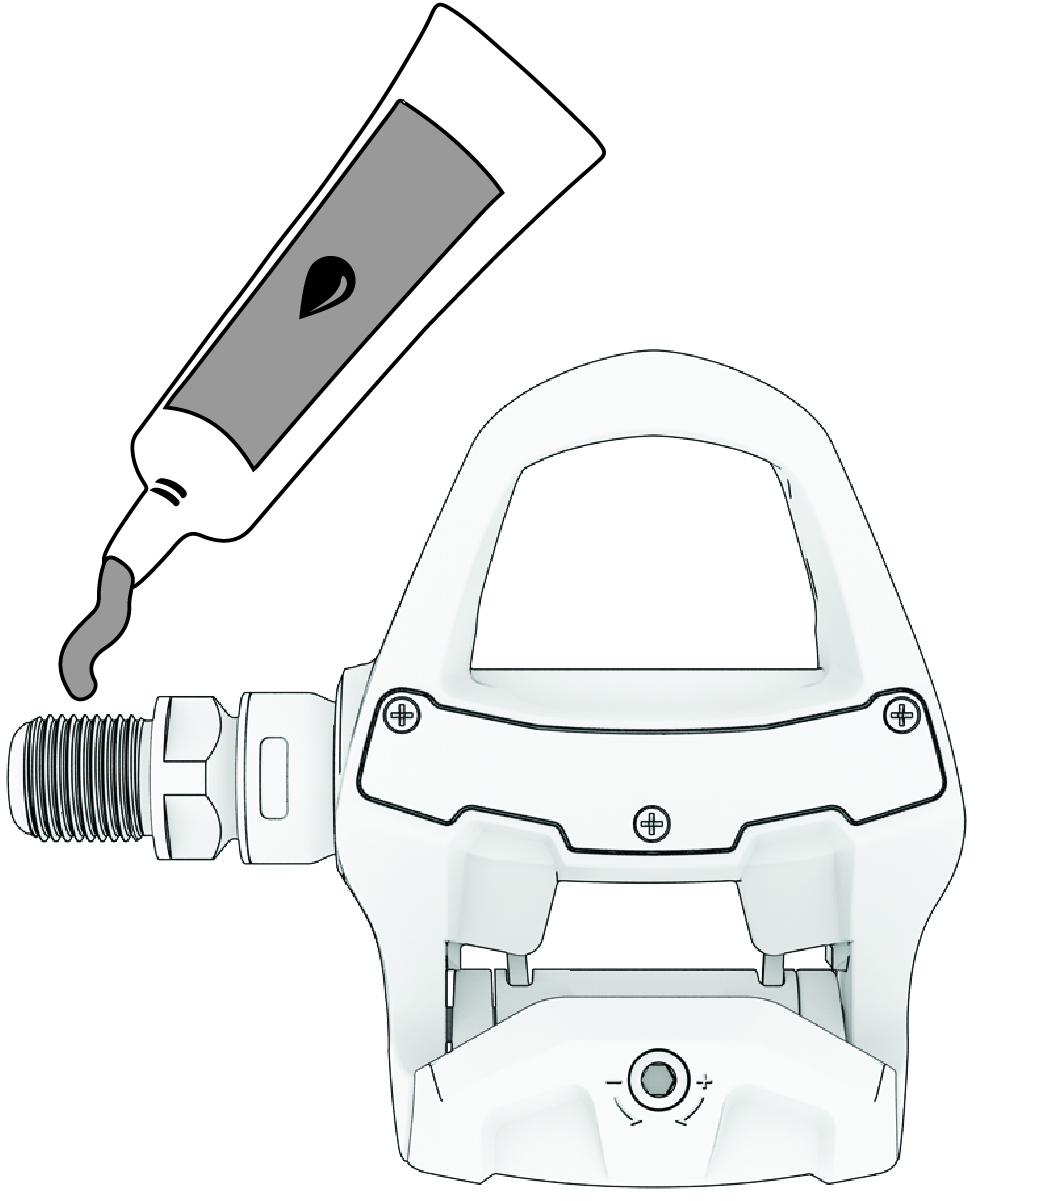
You must apply grease to the threads on the pedal before installing them. Installing the pedals without grease may lead to product damage.
-
Use a 15 mm wrench to tighten
the spindle.
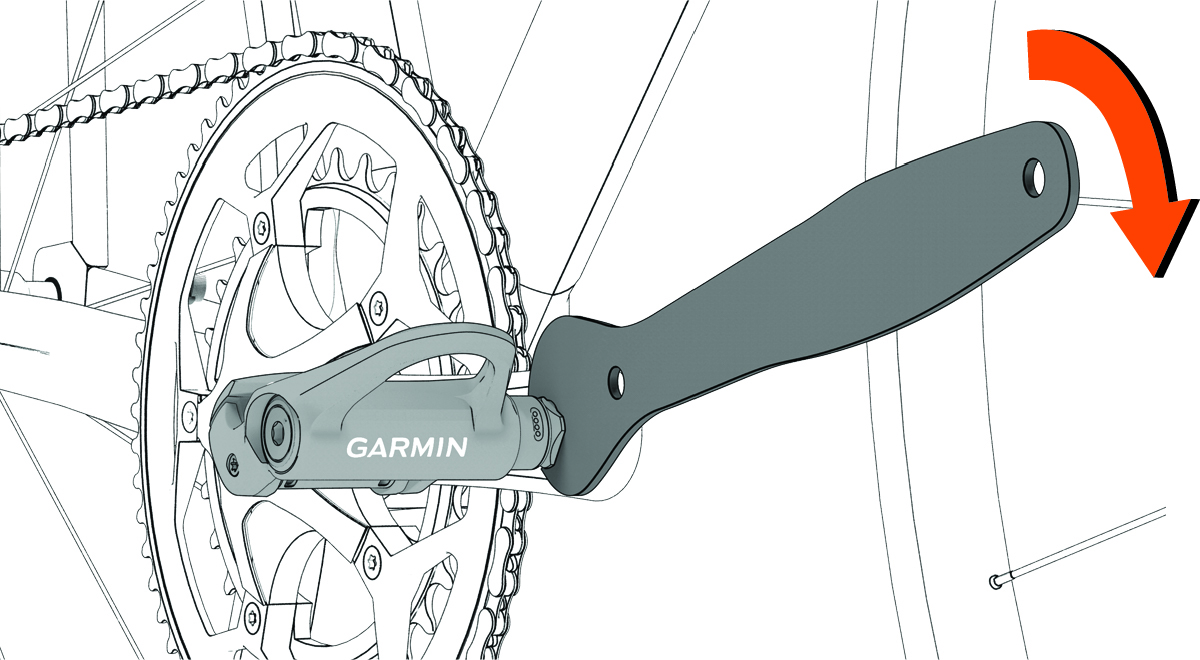
NOTE: To ensure accurate power measurements, you must tighten the pedals onto the crank arms to the recommended torque of 35 N-m (26 lbf-ft.). -
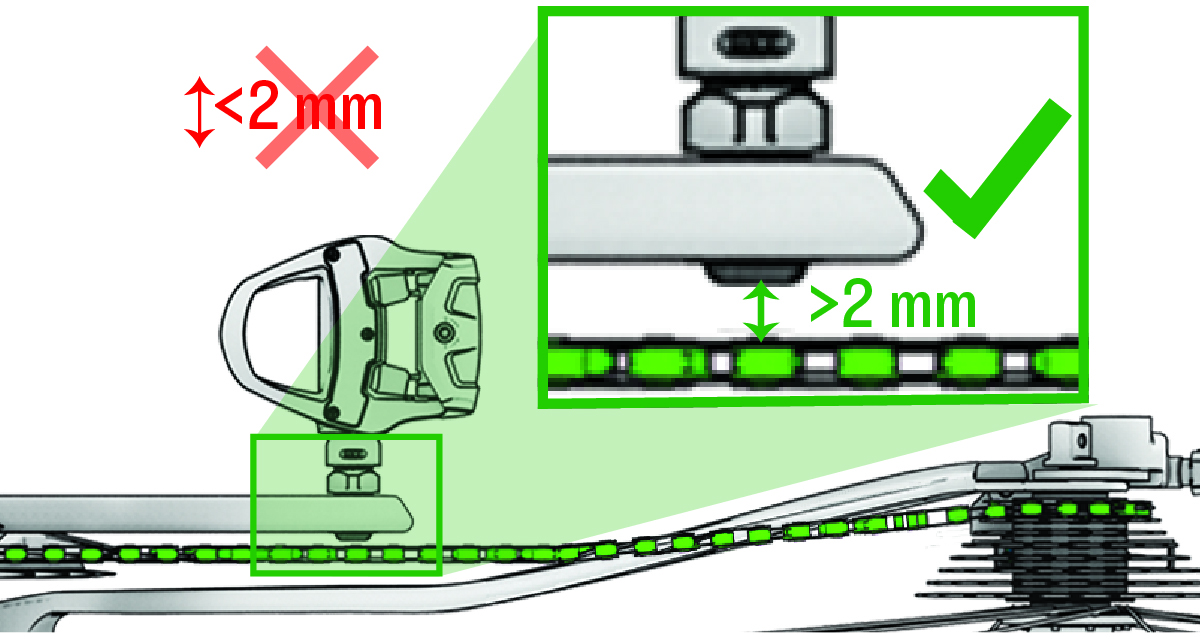
Rotate the crank arm to check for clearance.
You must make sure there is at least a 2 mm clearance between the pedal spindle and any part of the bike, such as the chain, groupset or frame. If any part of the bike frame, chain, or groupset touches the spindle while you are riding, it may damage the electronics in the spindle, causing product malfunction.