Shoe Cleats

Installing the Shoe Cleats for Rally RK and Rally RS Pedal Bodies

NOTE: The left and right cleats are the same.
  1. Apply a thin layer of grease on the cleat bolt threads.
  2. Align the cleat 1, washers 2, and bolts 3.

    Exploded view of the shoe cleat with glyphs
  3. Use a 4 mm hex key to loosely attach each bolt to the sole of the shoe.
  4. Adjust the cleat to the shoe in your preferred position.

    This can be adjusted after a trial ride.

  5. Tighten the cleat firmly to the shoe.
    NOTE: Garmin® recommends a torque of 4 to 6 lbf-ft. (5 to 8 N-m).

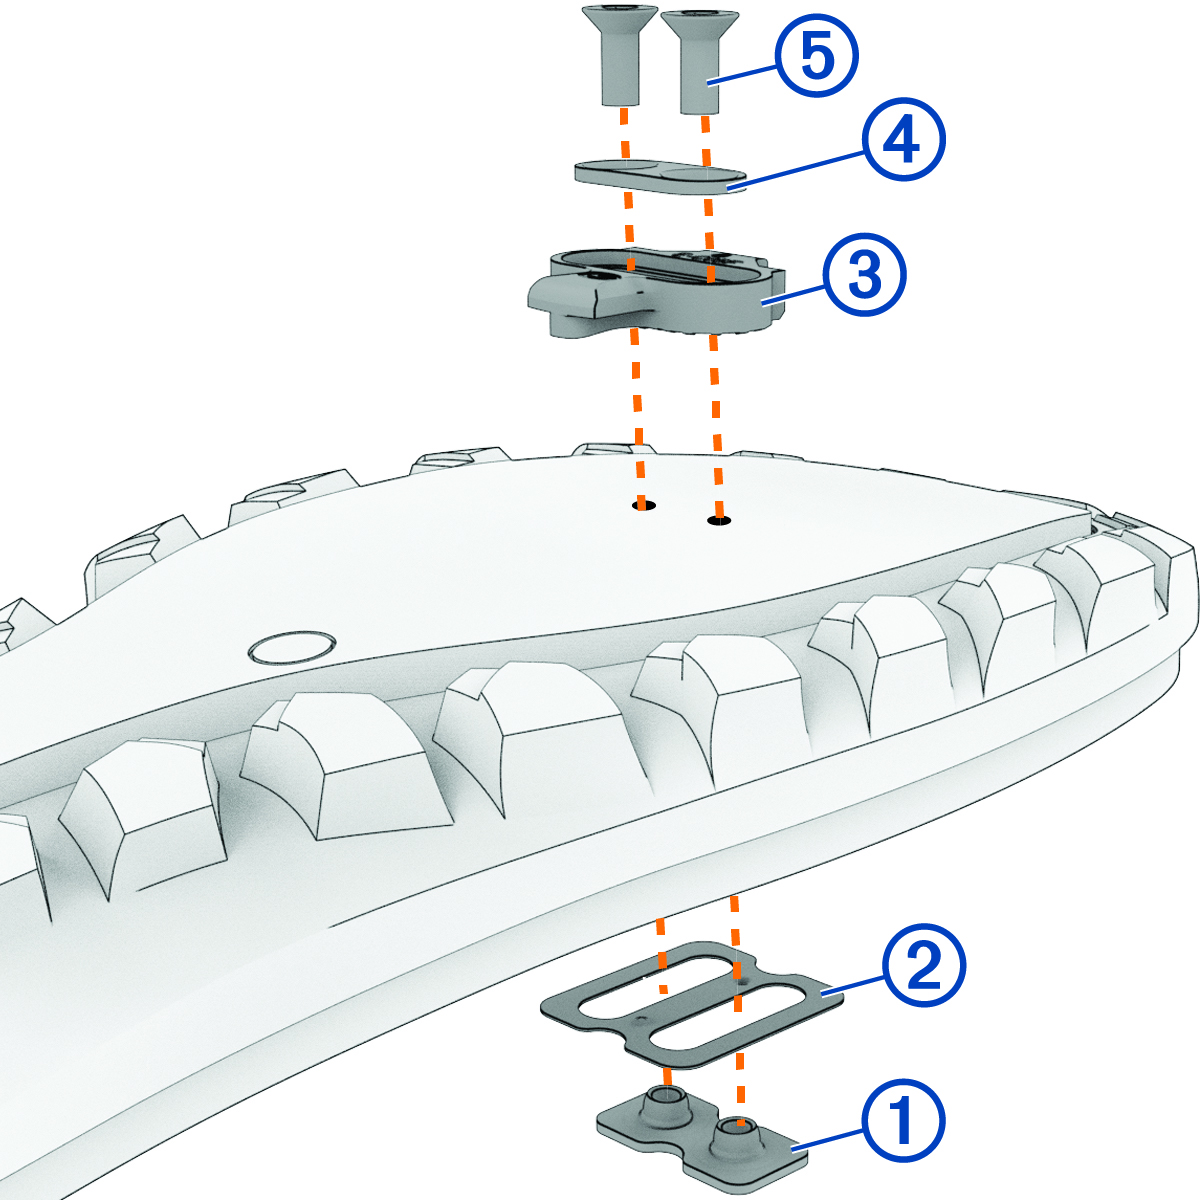
Installing the Shoe Cleats for Rally XC Pedal Bodies

NOTE: The left and right cleats are the same.
  1. If necessary, lift the insole inside your shoe and insert the 2-hole cleat mount 1 and the insole washer 2.
  2. Apply a thin layer of grease on the cleat bolt threads.
  3. Align the cleat 3, washer 4, and bolts 5.

    Exploded view of the shoe cleat with glyphs
  4. Use a 4 mm hex key to loosely attach each bolt to the sole of the shoe.
  5. Adjust the position of the cleat, as needed.

    You can adjust the cleat position after a trial ride.

  6. Tighten the bolts to attach the cleat firmly to the shoe.
    NOTE: Garmin recommends a torque of 5 to 8 N-m (4 to 6 lbf-ft.).
GUID-E17670DF-416F-455E-8444-29845F375EBD v1
August 2025