Installing the Handlebar


E symbol

Before you install the handlebar, see the topics on posture (Cycling Posture) and geometry (Adjusting the Trainer Geometry).

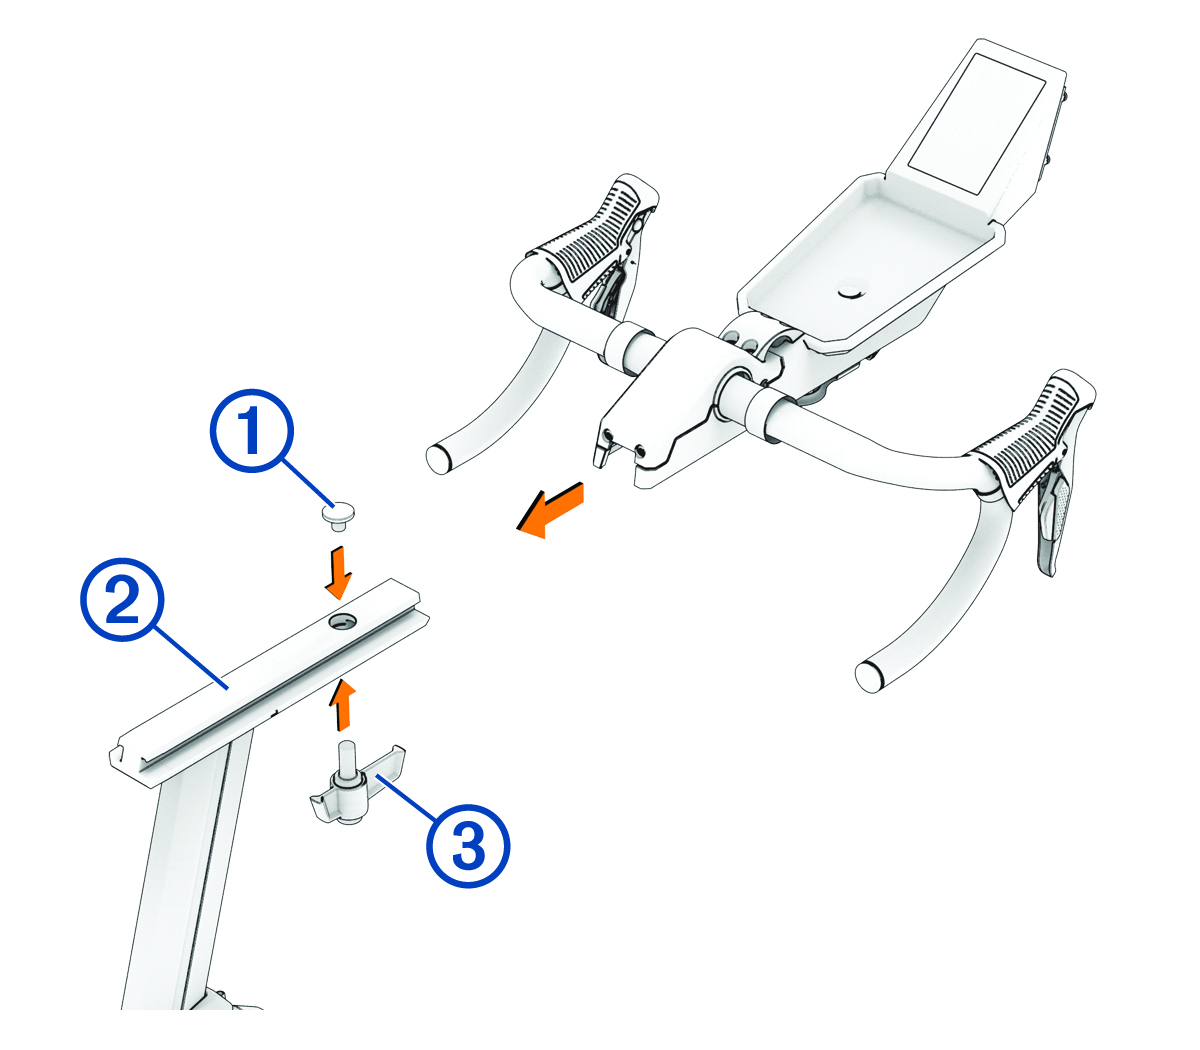
  1. Open the assembly kit Tools symbol.
  2. Use the 6 mm hex key to remove the set screw.
  3. Place the cap 1 on the handlebar rail 2.

    Handlebar assembly with callouts
  4. Slide the handlebar onto the handlebar rail.
  5. Adjust the handlebar reach, and secure the M12 x 25 handle 3.

    The maximum handlebar distance is 15 cm.

  6. Use the 8 mm hex key to remove the set screw from the handlebar post.
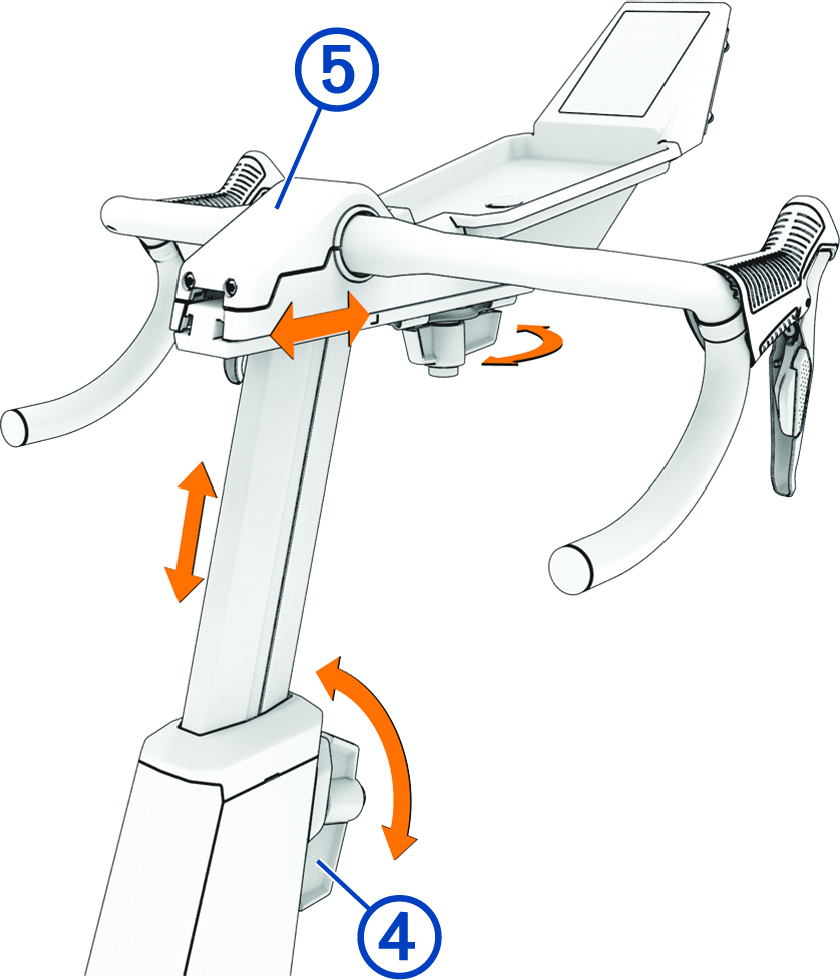
  7. Adjust the handlebar height, and secure the M16 x 22 handle 4.

    The maximum handlebar height is 26 cm.


    Handlebar assembly with callouts
  8. If necessary, follow these steps to adjust the handlebar angle.
  9. Use the Torx 20 to remove the handlebar cover 5.
  10. Use the 5 mm hex key to loosen the 4 screws.
  11. Adjust the angle of the handlebar.
  12. Tighten the 4 screws.
  13. Replace and secure the handlebar cover.
GUID-8AA4B804-1987-45AC-8B9D-71AE54BD62B0 v2
July 2025