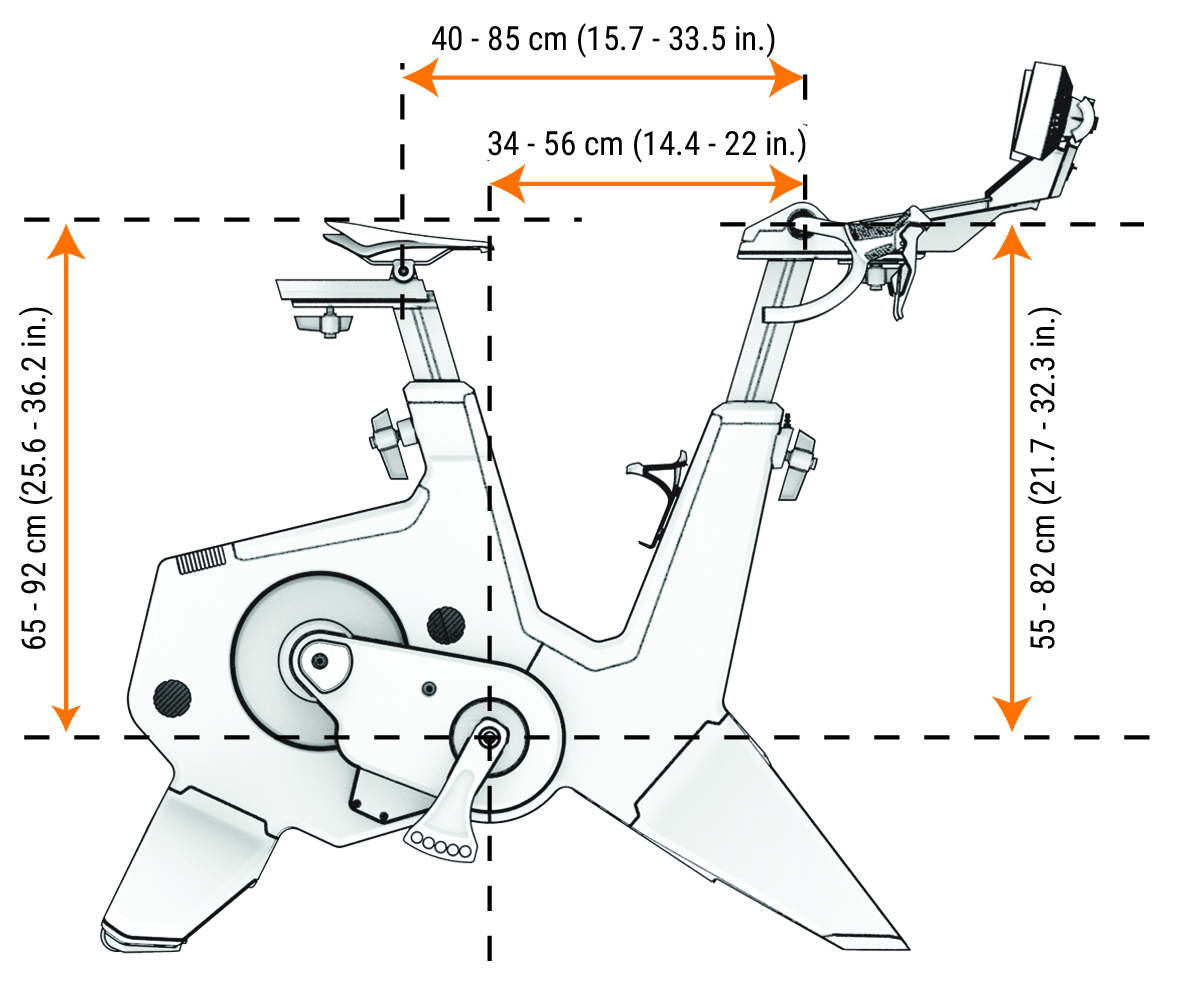
Adjusting the Trainer Geometry
Before you assemble the Tacx® NEO Bike Plus trainer, consider that the saddle and handlebar have set screws installed from the factory that can be adjusted and tightened using a hex key. To install the 4 handles, you must remove the 4 set screws using a hex key.
NOTE:
If multiple riders will use the trainer,
Tacx recommends installing the handles for easy adjustments. The handles are packaged in the assembly kit with the screws and washers. If you are the only rider that will use the trainer and you do not make geometry or posture adjustments, you can use the set screws and a hex key.
- Get off the trainer before adjusting the saddle or handlebar.
- Remove your tablet before adjusting the handlebar height, reach, or angle.
- Match the geometry of the trainer to your road bike (Tips for Proper Bike Fit).
- If you adjust your saddle more than 1 cm, check the saddle height and the handlebar reach again.
- Do not exceed the maximum range of the saddle or handlebar.
- If you change your pedals or saddle, check the geometry of the trainer again.
After you tighten each handle bolt, you should align the handle to be parallel to the frame or rail. You can pull out and twist the handle.