-
From the transducer replacement kit, select the cable gland that fits your transducer cable:
-
For a 4-pin transducer, select the cable gland with the smaller hole.
-
For an 8- or 12-pin transducer, select the cable gland with the larger hole.
NOTE:
A cable gland without a hole is provided if you are not installing a transducer or not routing the transducer cable through the shaft.
-
Measure 20 cm (8 in.) from the point the transducer cable enters the transducer, and mark the transducer cable using a permanent marker.
-
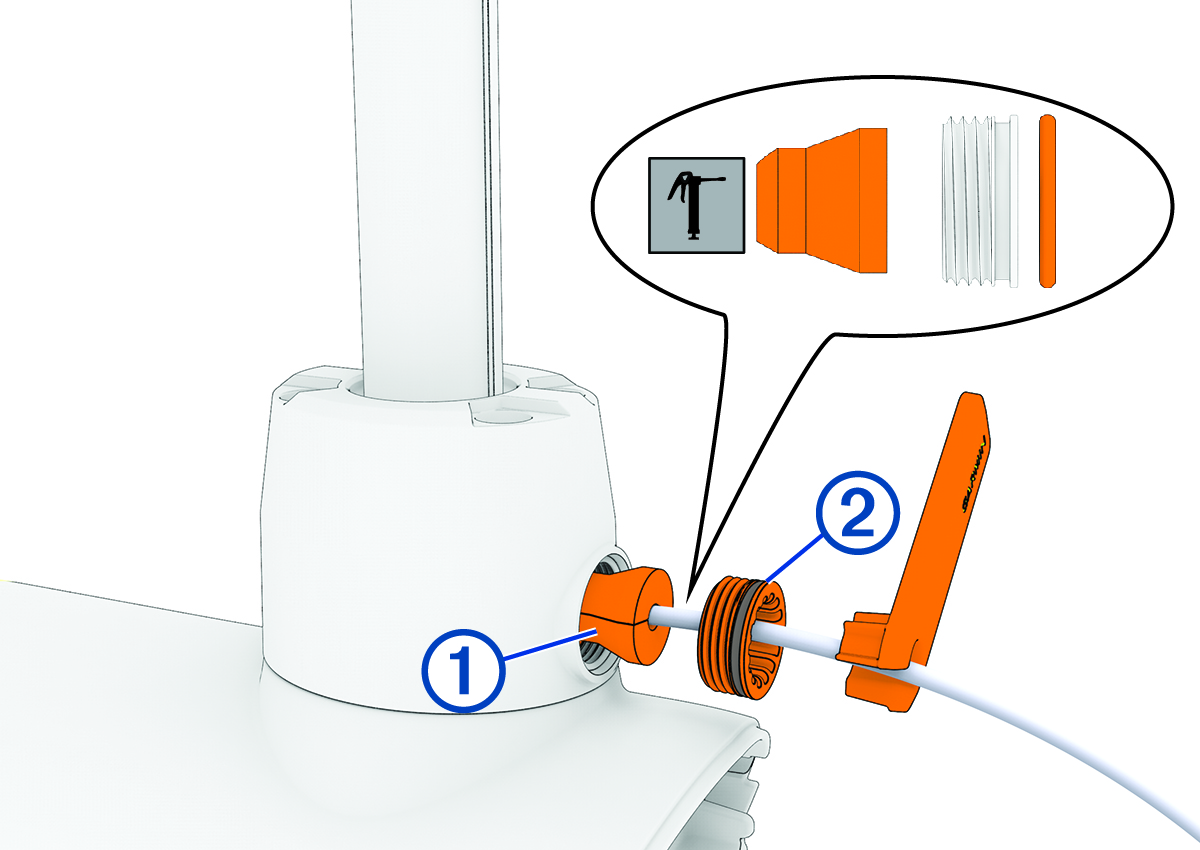
Using the packet included in the transducer replacement kit, apply grease completely to all surfaces of the cable gland you selected to fit your transducer cable.
-
Place the cable gland
 at the marked location on the transducer cable.
-
While keeping the cable gland aligned with the mark on the transducer cable, gently pull the excess cable through the top of the shaft until the cable gland fits into the hole on the shaft base.
-
Using the packet included in the transducer replacement kit, apply grease to the 25 mm (1 in.) O-ring on the recessed nut
 on the transducer cable.
-
Place the recessed nut into the hole on the shaft base, and tighten it using the included tool.
-
Tighten the recessed nut until it stops.
-
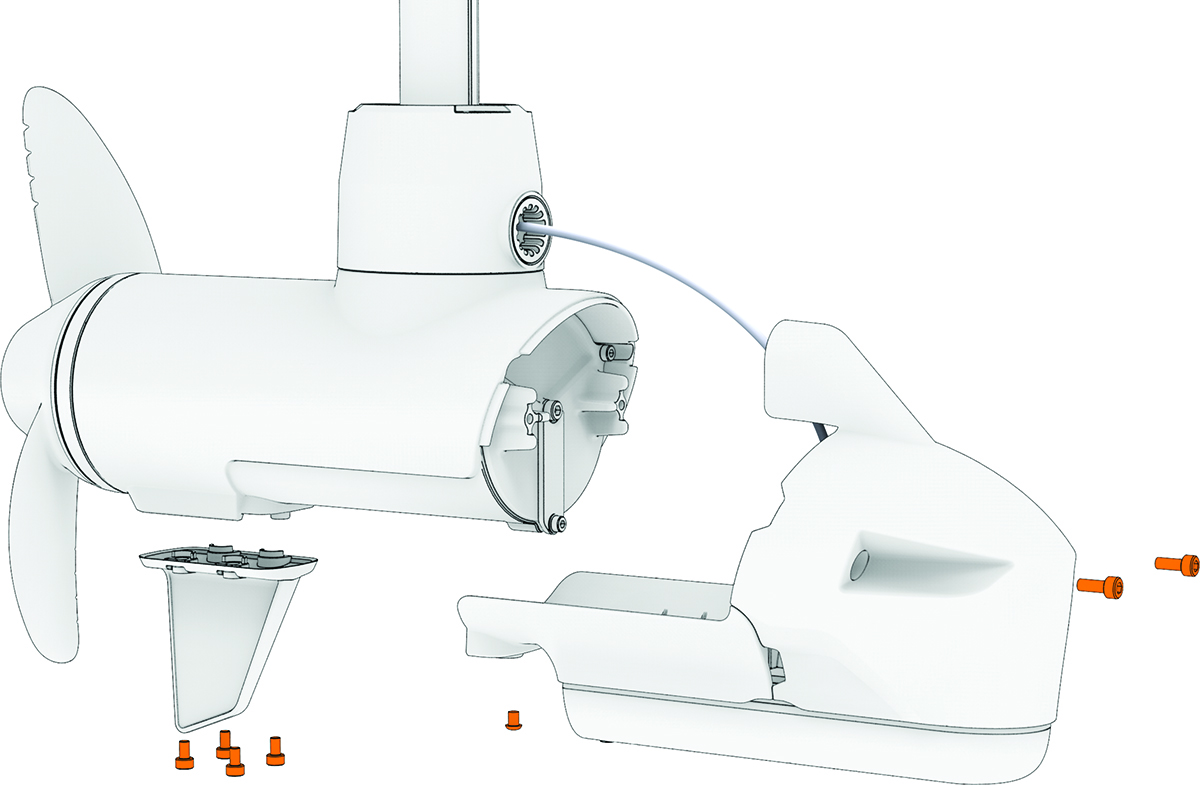
Place the nose cone onto the propeller drive motor.
-
Using a 4 mm hex bit or wrench, secure the front of the nose cone to the propeller drive motor using the two existing screws.
-
Using a 3 mm hex bit or wrench, secure the bottom of the nose cone to the propeller drive motor using the existing screw.
-
Using a 4 mm hex bit or wrench, secure the skeg to the bottom of the propeller drive motor using the four existing screws.