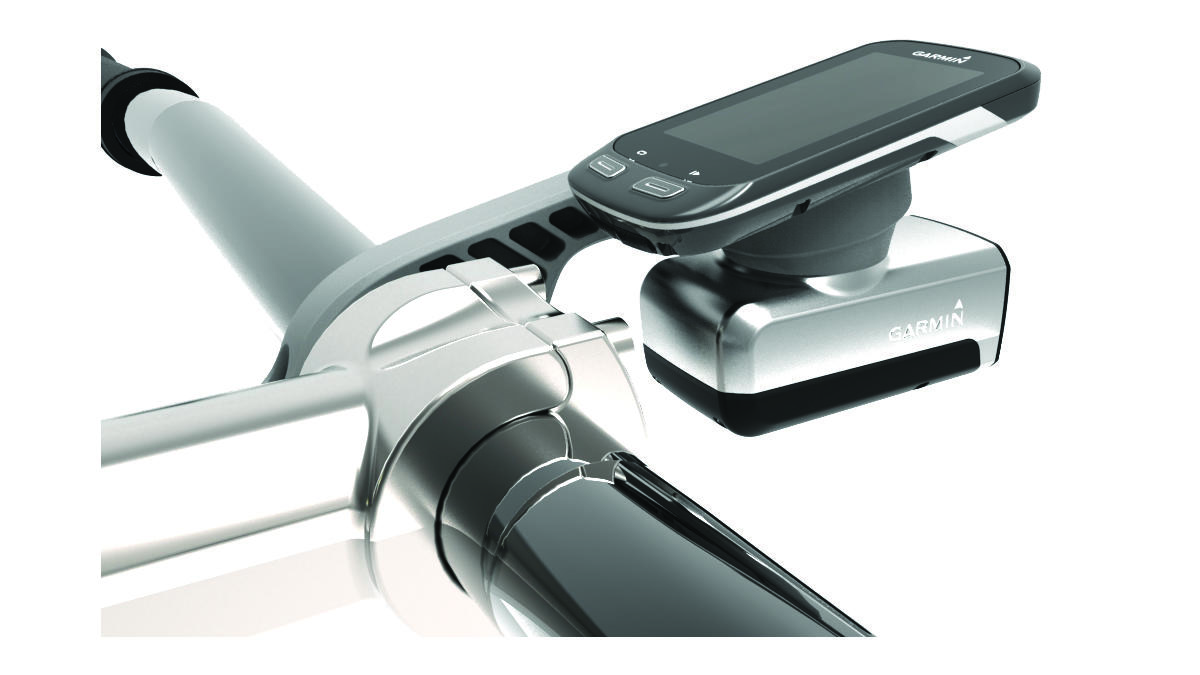
You can use the out-front mount to install both an
Edge® device and a headlight.
-
Select a secure location to mount the
Edge device and headlight where they do not interfere with the safe operation of your bike.
-
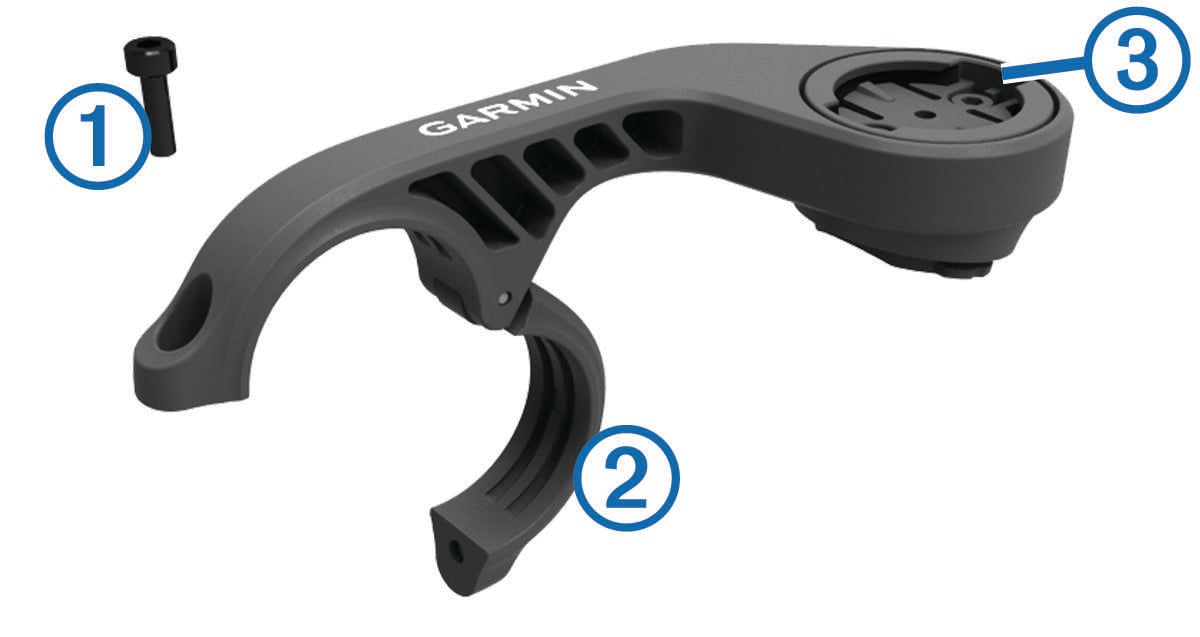
Use the hex key to remove the screw
 from the handlebar connector
  .
.
-
If necessary, remove the two screws on the top of the mount
 , rotate the connector, and replace the screws to change the orientation of the mount for an
Edge device.
, rotate the connector, and replace the screws to change the orientation of the mount for an
Edge device.
-
Place a rubber pad around the handlebar:
-
Place the handlebar connector around the rubber pad.
NOTE:
You should align the contours on the rubber pad with the grooves on the inside of the handlebar connector.
-
Adjust the mount on the handlebar so the headlight is mounted horizontally, parallel to the road.
-
Replace and tighten the screw.
NOTE:
Garmin® recommends a torque specification of 7 lbf-in. (0.8 N-m). You should check the tightness of the screw periodically.
-
Align the notches on the top of the headlight with the tabs on the bottom of the mount.
-
Press up slightly and turn the headlight clockwise until it locks into place.
-
If installing an
Edge device, align the tabs on the back of the
Edge device with the notches on the top of the mount.
-
Press down slightly and turn the
Edge device clockwise until it locks into place.