Before you can install the
Varia™ eRTL615 tail light, you need 3 mm and 4 mm hex keys and a cable to connect your device.
-
Complete the required steps based on the configuration of your rear rack:
-
If the rear rack can accommodate the friction flange adapter, complete steps 2 through 5.
-
If the device can be attached directly to the rear rack, complete steps 6 through 9.
-
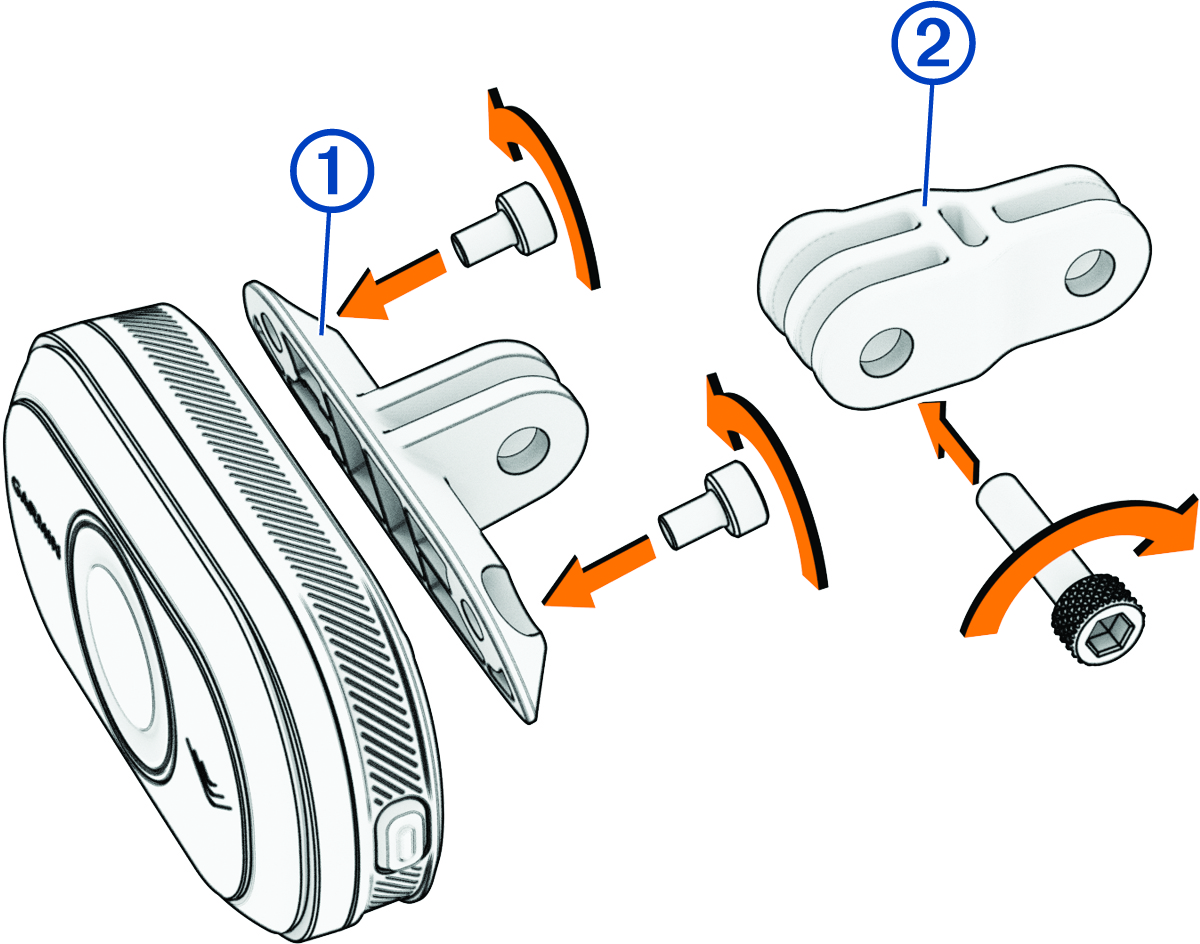
Attach the friction flange adapter
 to your
Varia eRTL615 tail light using two M4 screws.
to your
Varia eRTL615 tail light using two M4 screws.
TIP:
For longer bike racks or if you have other attachments on the back of your bike, attach the extender  to the friction flange adapter.
-
Using a 3 mm hex key, tighten the two M4 screws to 1 N-m (9 lbf-in.).
-
Align the hole in the friction flange adapter or extender with the hole in the rear rack of your bike.
-
Using a 4 mm hex key, tighten the M5 screw to 3 N-m (27 lbf-in.).
-
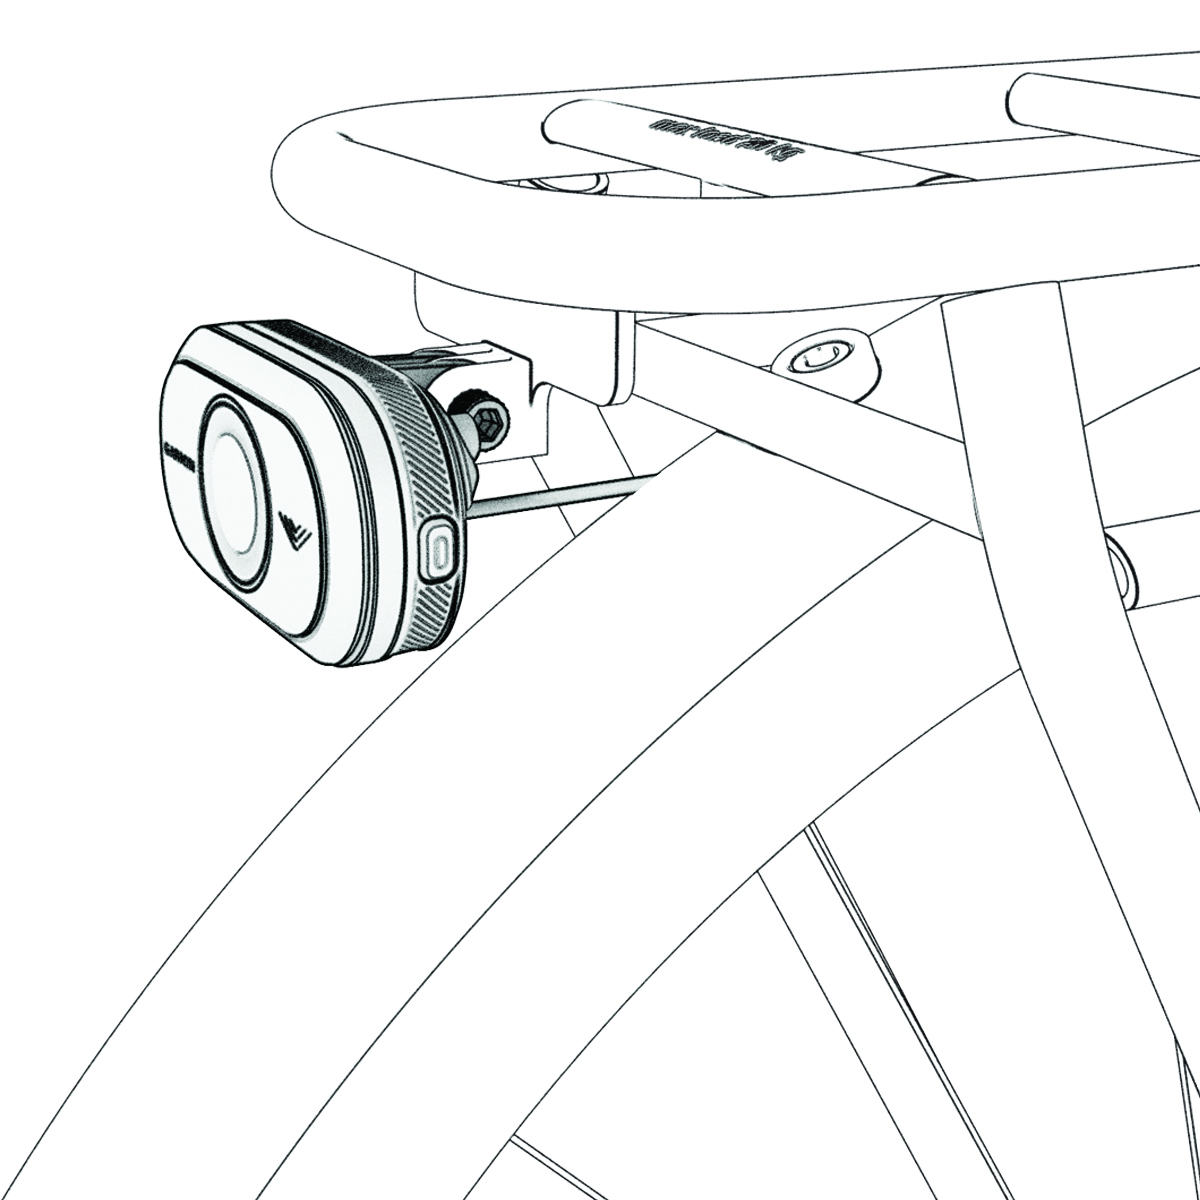
If you are not using a friction flange adapter, align the holes in the rear rack of your bike with the holes on the back of your
Varia eRTL615 tail light.
-
Using a 3 mm hex key, tighten the two M4 screws to 1 N-m (9 lbf-in.).
-
Connect the cable to your bike.
Consult the owner's manual for your bike for additional information on connecting devices.
-
Secure the cable so that it does not interfere with any moving parts of the bike.