Servicing the Anodes

WARNING

Always disconnect the motor from the battery before handling or working with the propeller, propeller drive motor, electrical connections, or electronics enclosures to avoid serious injury or death.

The sacrificial anodes protect the motor components from corrosion. Each season they must be examined and cleaned or replaced if necessary. You can purchase replacement anodes from your Garmin® dealor or you can go to garmin.com .

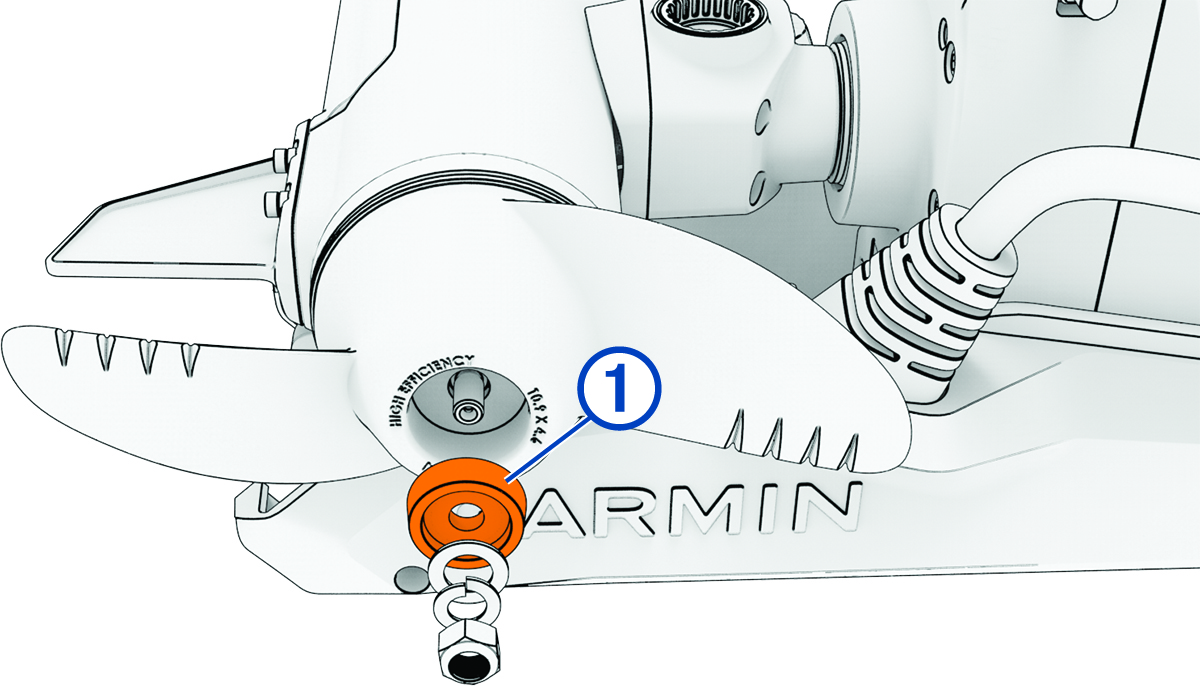
Servicing the Propeller Anode

  1. Using a 9/16 in (15 mm) socket, loosen the nut on the end of the propeller.
  2. Remove the propeller and set aside the nut, the lock washer and the flat washer.
  3. Remove and examine the anode 1.

    Anode with Callout
  4. Select an option:
    • If the anode is half of the original size or larger, clean the anode using a wire brush or sandpaper.

      NOTICE

      Remove the anode from the motor before cleaning it with a wire brush or sandpaper. Cleaning the anode while installed on the motor could damage the motor, accelerate corrosion, and shorten the life of the motor.

    • If the anode is smaller than half of the original size, discard the anode and purchase a replacement.

  5. Place the cleaned or new anode back on the propeller drive shaft, followed by the flat washer, the lock washer and the nut.
  6. Using a 9/16 in (15 mm) socket, tighten the nut to 16.27 N-m (12 lbf-ft) to secure the propeller.

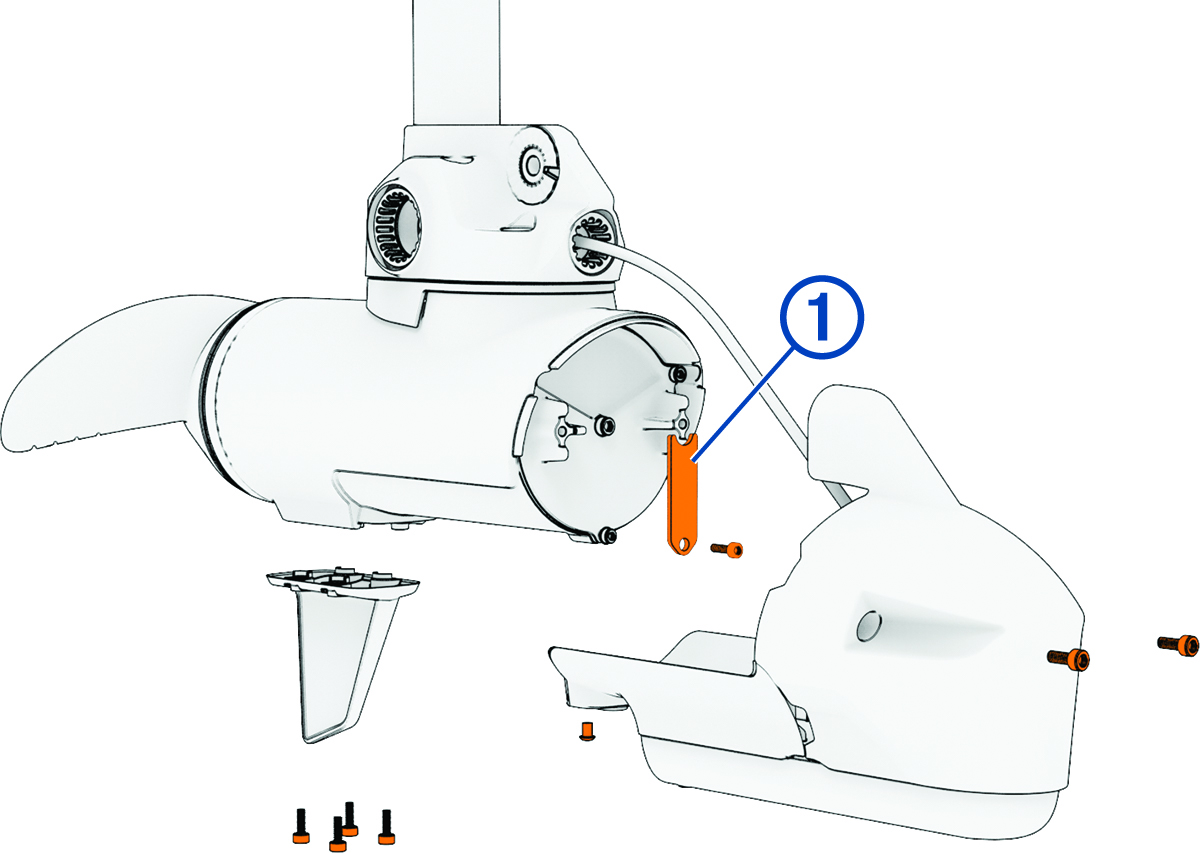
Servicing the Nose Cone Anode

NOTE: Trolling motors built after 2024 use two screws to secure the anode to the propeller drive motor housing. If your replacement anode has two holes, but your propeller drive motor only has one hole, you can install the new anode using only one screw, and discard the other screw.
  1. Using a 4 mm hex bit or wrench, remove the four screws securing the skeg on the bottom of the motor.
  2. Using a 3 mm hex bit or wrench, remove the screw that secures the transducer and nose cone to the bottom of the motor .
  3. Using a 4 mm hex bit or wrench, remove the screws to disconnect the nose cone from the front of the motor.
  4. Using a 3 mm hex bit or wrench, uninstall the anode 1 on the front of the motor.

    Assembly Diagram with Callouts
  5. Examine the anode, and complete an action:
    • If the anode is half of the original size or larger, clean the anode using a wire brush or sandpaper.

    • If the anode is smaller than half of the original size, discard the anode and purchase a replacement.

  6. Secure the new or cleaned anode to the propeller drive motor using one or two screws.
    NOTE: If your propeller drive motor has two mounting points for the anode, you should always use two screws to secure the anode.
  7. Reinstall the nose cone, using two screws to secure it to the front of the propeller drive motor.
  8. Reinstall the screw that secures the transducer and nose cone to the bottom of the propeller drive motor.
  9. Reinstall the skeg on the bottom of the propeller drive motor.
GUID-B3BCDA2E-E3B8-4864-840E-DA1DB2C5C670 v7
November 2025