Flush Mounting the Device
You must have access to the back of the mounting surface to install the hardware needed to flush mount this device. If you are not able to access the back of the mounting surface, you should not attempt to flush mount this device because you may cut a hole in your dashboard and then be unable to complete the installation, causing damage to the vessel.
Be careful when cutting the hole to flush mount the device. There is only a small amount of clearance between the edge of the hole and the edge of the bezel that secures the device to the mounting surface. Cutting the hole too large could compromise the stability of the device after it is mounted.
If you will not have easy access to the microSD® memory card slots on the back of the device after installation, you should insert a microSD memory card in one or both of the card slots prior to installation, or install an optional Garmin® card reader so users can easily insert and remove cards after installation.
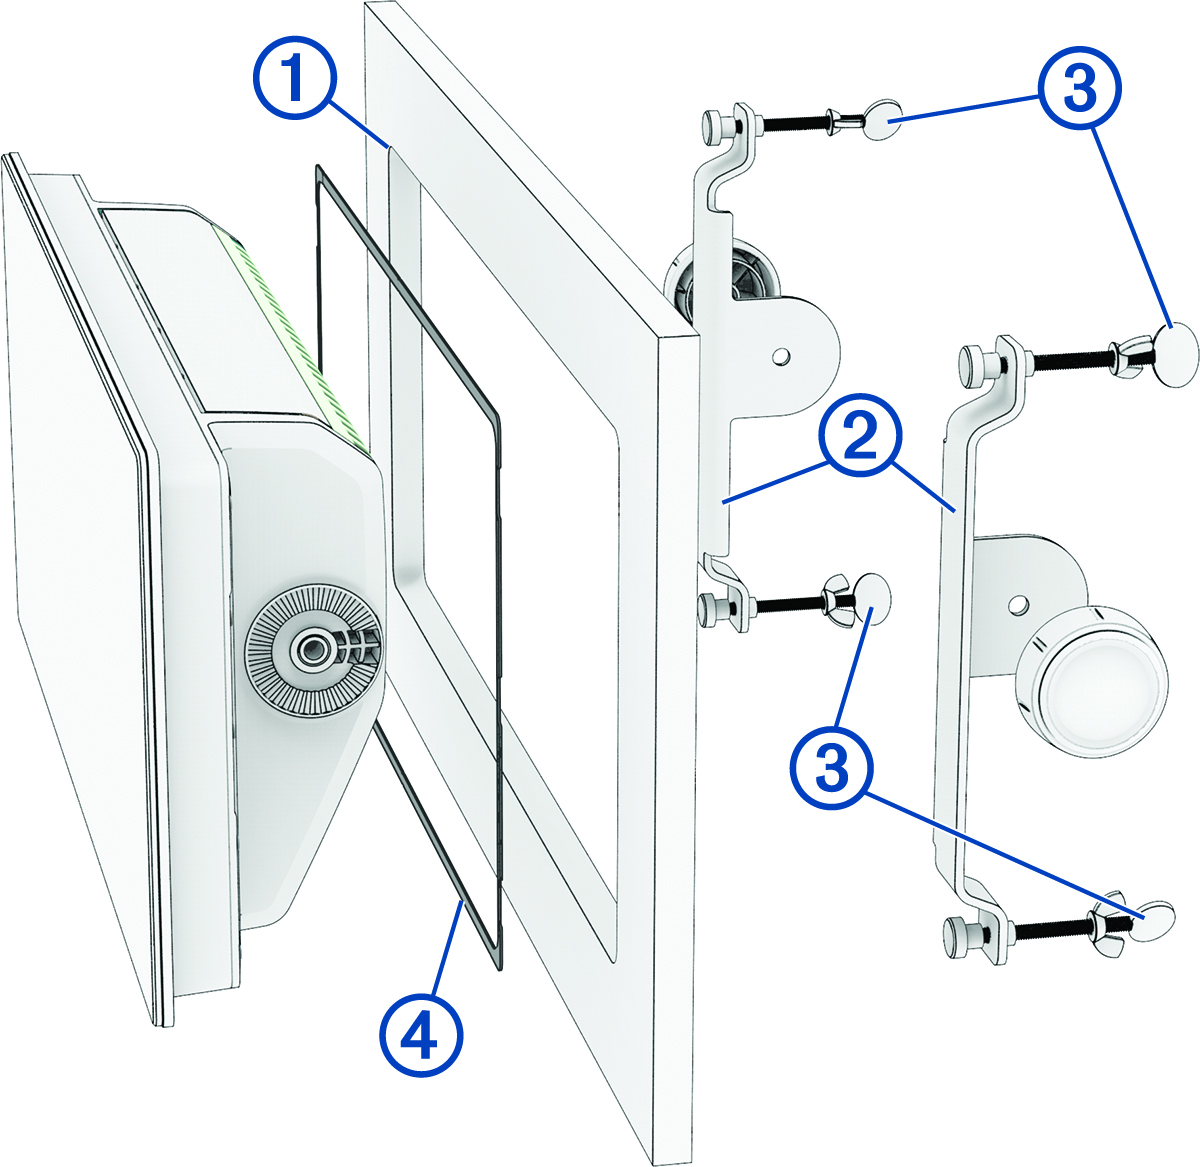
You can use the included template and brackets to mount the device in your dashboard.
The included brackets are designed to secure the device in a mounting surface less than or equal to a thickness of 25 mm (1 in.). If the mounting surface is thicker than 25 mm (1 in.), you can purchase brackets to accommodate a surface with a thickness up to 50 mm (2 in.) from your Garmin dealer or from garmin.com
-
Place the device in the cutout
 to test the fit.
-
After the device fits correctly in the cutout, place the brackets
 against the sides of the device, and adjust the screws
  closer to the back of the mounting surface to make the final tightening easier (optional).
-
Install the foam gasket
 on the back of the device.
The pieces of the foam gasket have adhesive on the back. Make sure you remove the protective liner before installing them on the device.
-
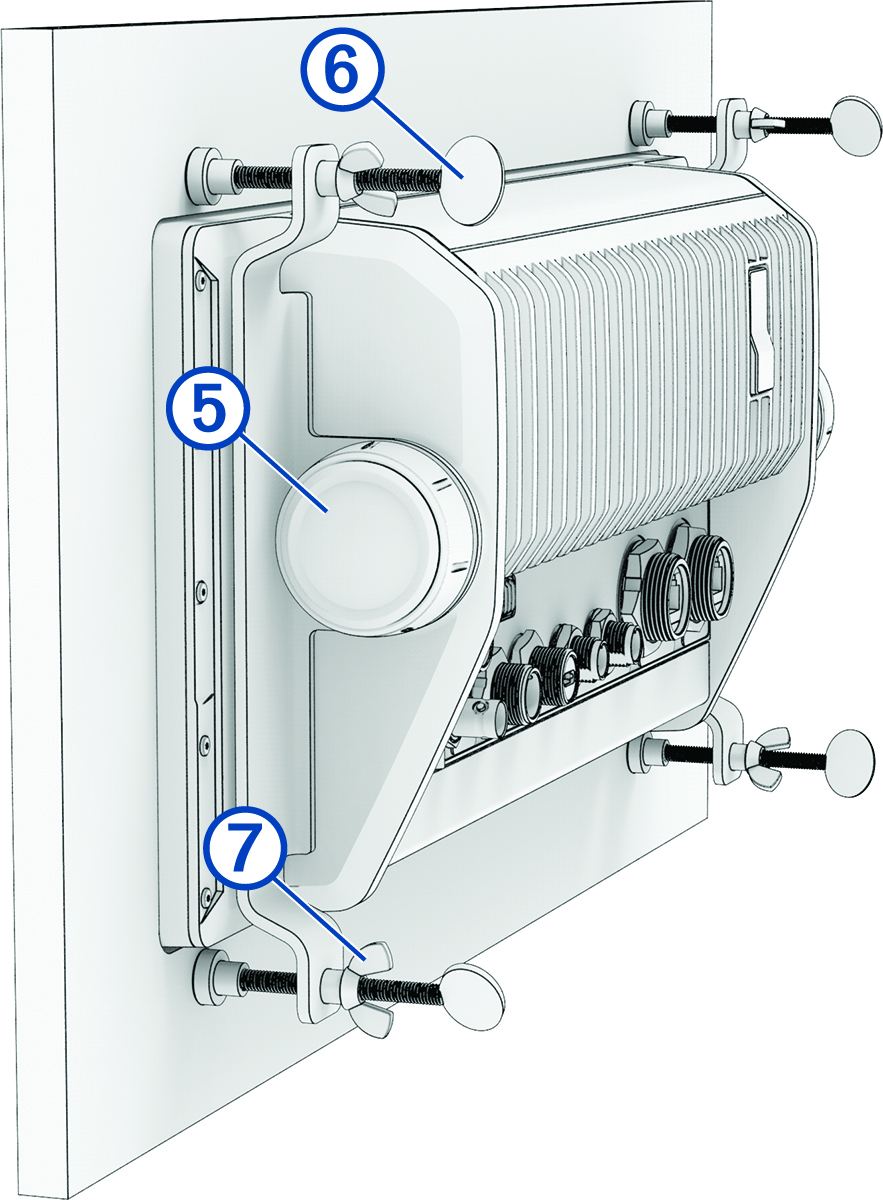
Place one of the brackets against the side of the device and secure it using one of the included knobs
 .
.
-
Tighten one of the thumbscrews
 until it contacts the back of the mounting surface until it stops.
Do not fully tighten the screw at this time. You will fully tighten them all later.
-
Tighten the four wingnuts
 on each thumbscrew to lock the thumbscrews at their present depths.
NOTE: The wingnuts do not provide tension to hold the device to the surface. They are designed to keep the thumbscrews from loosening over time.
on each thumbscrew to lock the thumbscrews at their present depths.
NOTE: The wingnuts do not provide tension to hold the device to the surface. They are designed to keep the thumbscrews from loosening over time.