Installation
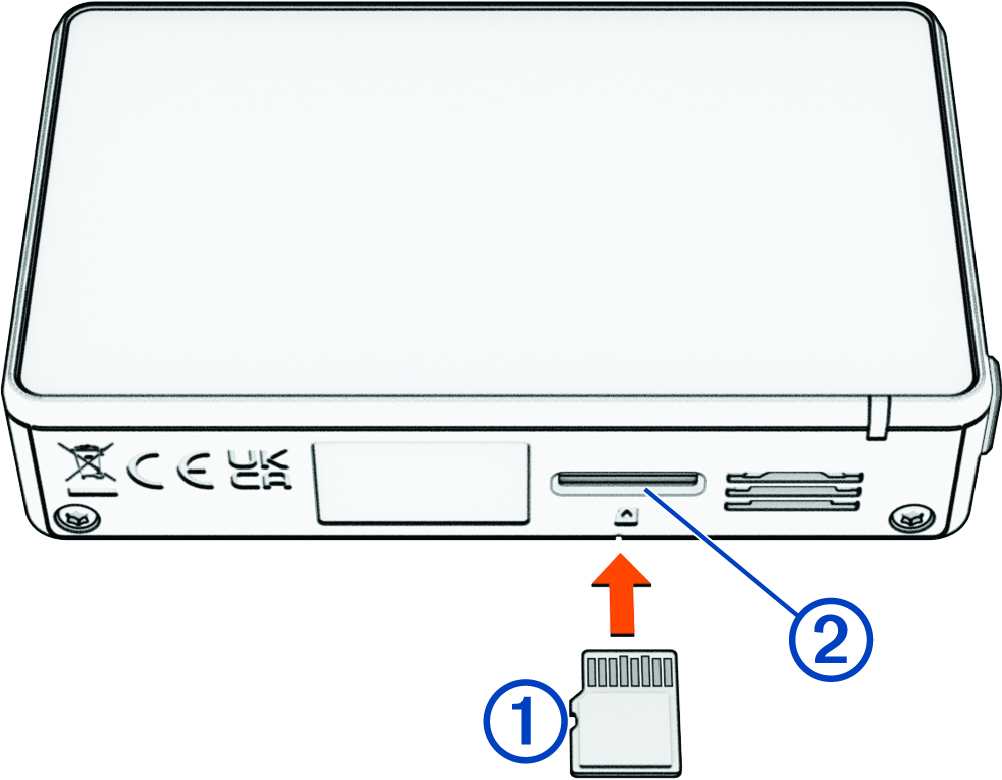
Installing a Memory Card
To record video, you must install a compatible memory card (Memory Card Specifications). A memory card is included with some device models.
-
Insert the memory card into the slot .
Formatting the Memory Card
The camera requires a memory card formatted using the exFAT file system. You can use the camera to format your card using this file system.
You must format a brand new memory card if it is not formatted using the exFAT file system.
- Connect the camera to power.
- Swipe left to open the menu.
- Select .
- Keep the camera connected to power until the formatting is complete.
Removing the Memory Card
Removing the memory card while the device is turned on can result in a loss of data or damage to the device.
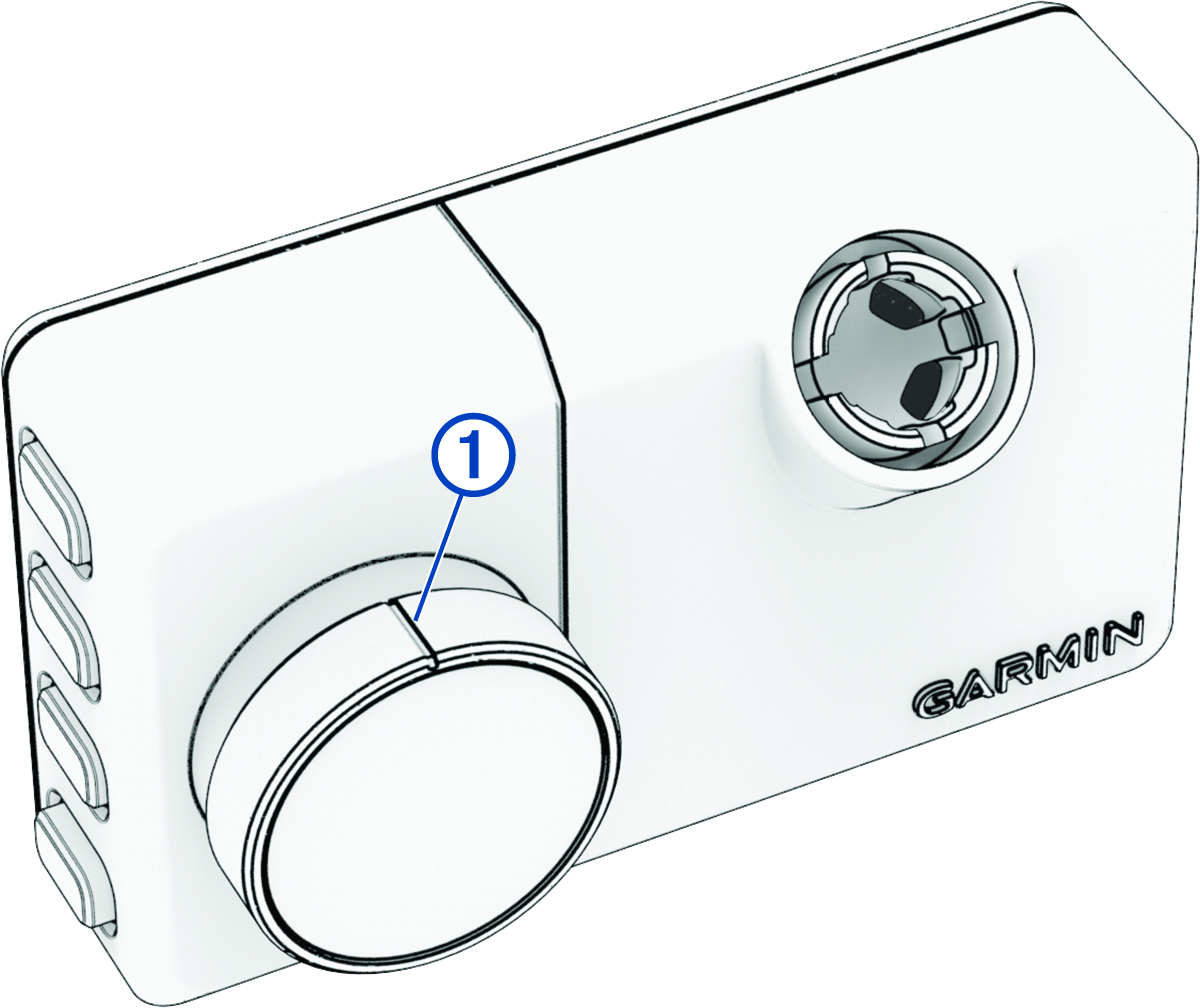
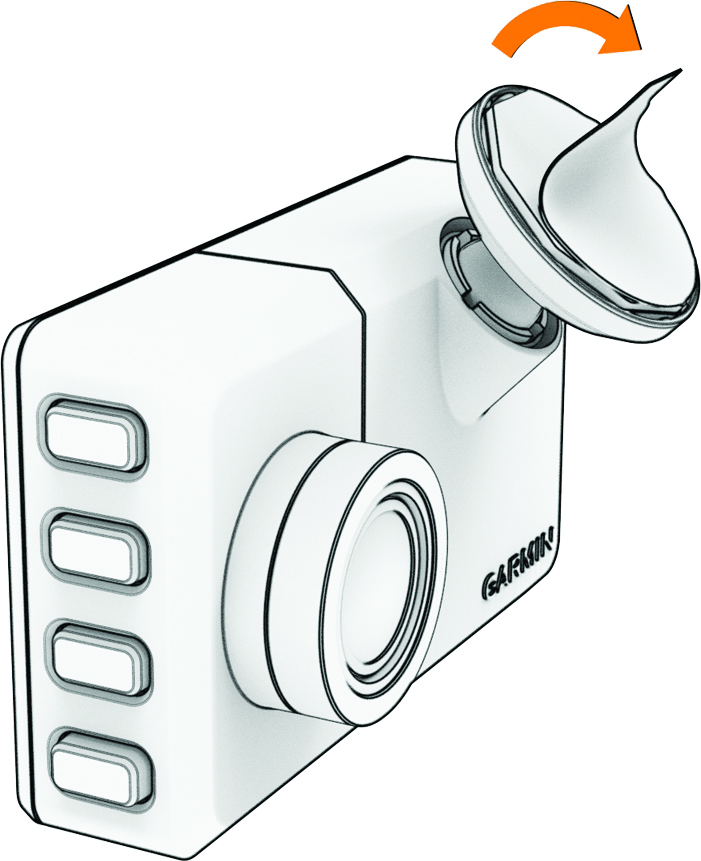
Installing the Polarizing Filter on the Camera
The camera comes with a polarizing filter to help reduce glare from your windshield.
Do not rotate the polarizing filter while it is installed on the camera, because doing so could damage the camera lens.
-
Position the filter so the line on the outer rim is facing up.
-
Verify the line on the outer rim of the
filter is facing
up and the Garmin® logo on the filter is right
side up.
After installing the polarizing filter, you should update the Camera Lens Cover video setting to ensure the best quality video footage (Video Settings).
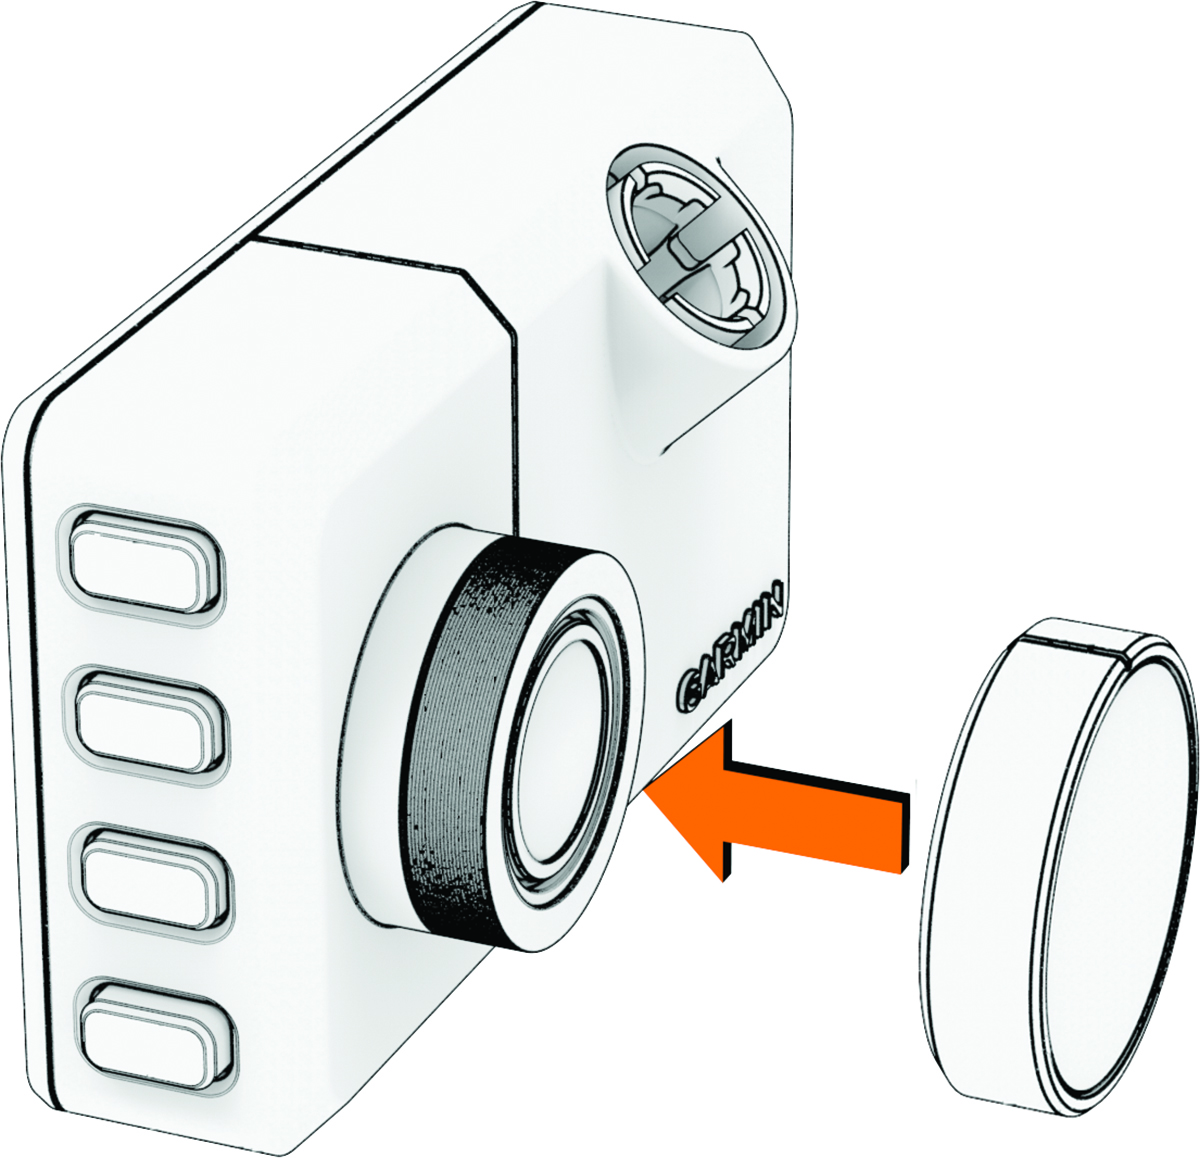
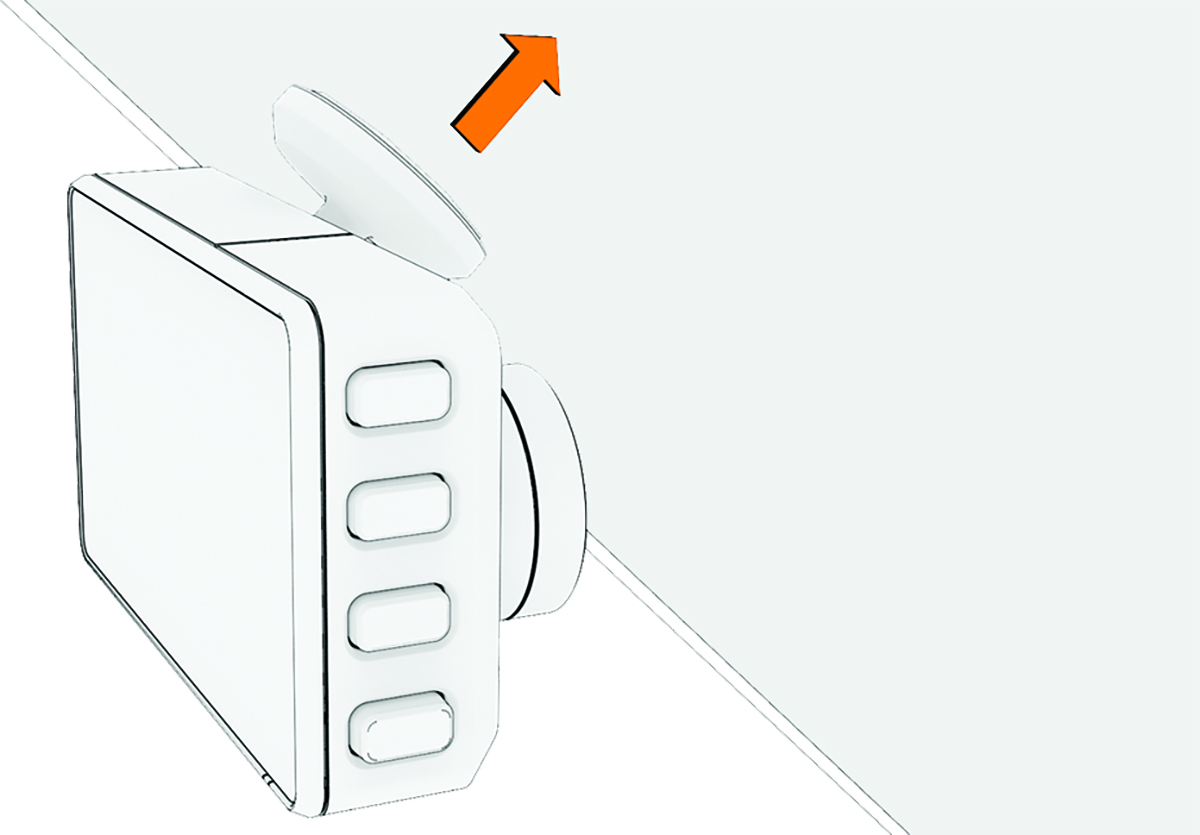
Removing the Polarizing Filter from the Camera
You can remove the polarizing filter for night races or races with low light.
- Firmly grip the camera in one hand and the polarizing filter in the other hand.
- Pull the filter away from the camera.
After removing the polarizing filter, you should update the Camera Lens Cover video setting to ensure the best quality video footage (Video Settings).
Mounting Considerations
When installing the device in a vehicle, do not place the device where it obstructs the driver’s view of the road or interferes with vehicle operating controls, such as the steering wheel, foot pedals, or transmission levers. Do not place the device unsecured on the vehicle dashboard. Do not place the device in front of or above any airbag.
The camera affixes to the windshield using the included adhesive mount. The adhesive mount is difficult to remove after it is installed. You should carefully consider the mounting location before you install the mount.
-
Do not mount the camera in a location that interferes with the driver's view of the road.
-
You should choose a mounting location that provides the camera a clear view of the road ahead.
-
You should choose a mounting location that is as high as possible on the center of the windshield.
-
If you have a rearview mirror, you should place the camera below the rearview mirror.
-
You should verify the area of the windshield in front of the camera is cleared by the windshield wipers.
-
You should avoid placing the camera behind a tinted area of the windshield.
Installing the Camera on Your Windshield
The adhesive mount is intended for a long-term installation and can be difficult to remove. You should carefully consider the mounting location before you install the mount.
Before you can install the adhesive mount onto your windshield, you should review the windshield mounting considerations (Mounting Considerations).
For the best results, the ambient temperature should be from 21° to 38°C (from 70° to 100°F) while installing the camera on your windshield. The adhesive may not bond correctly if the temperature is outside this range. If you need to install the camera at lower temperatures, you must clear all snow, ice, and moisture from the windshield and warm the windshield using the vehicle defroster before installing the camera.
The camera attaches to the windshield using the included adhesive mount.
-
After you have selected a mounting location with a clear view, remove the protective film from the mount adhesive.
-
Press the mount firmly onto the windshield, and maintain pressure for 30 seconds.
This helps to ensure the mount adhesive has proper contact with the windshield.
Connecting the Camera to Vehicle Power
-
Plug the power cable into the
USB-C® port on the camera.
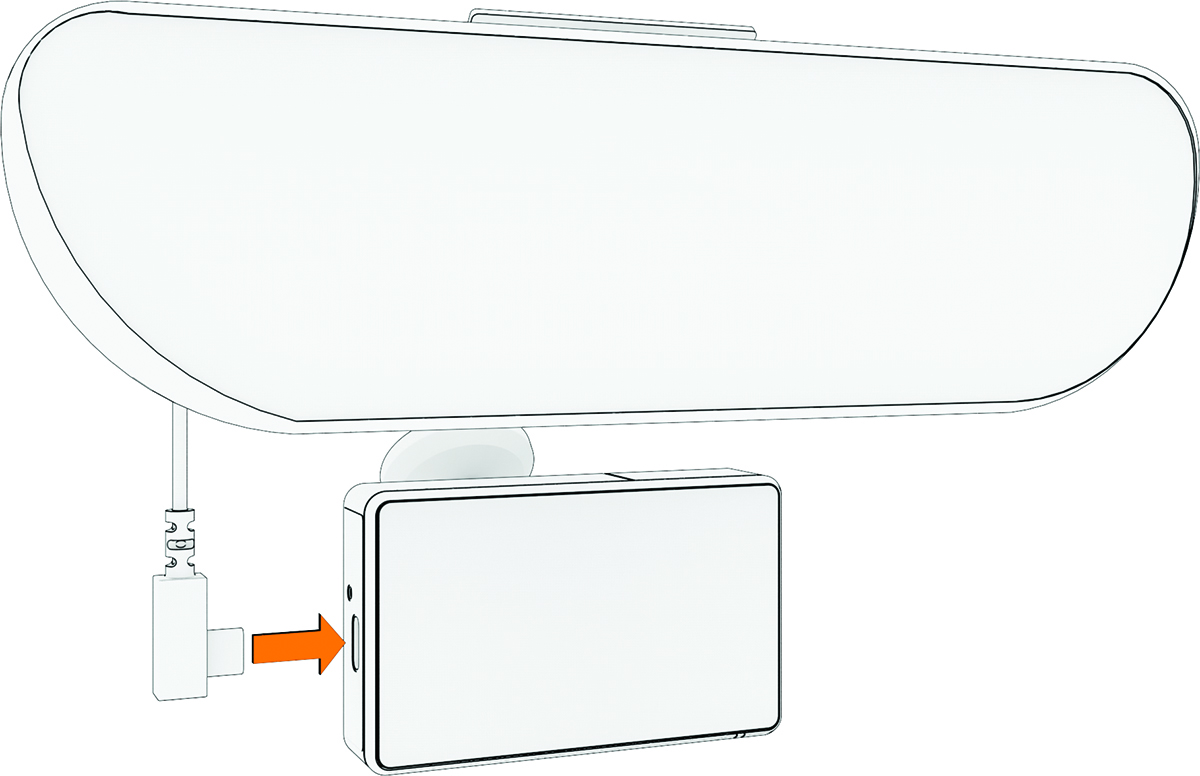
-
Route the power cable to your vehicle power outlet.
You should power the camera using the included vehicle power adapter and avoid using a vehicle USB port. A vehicle USB port may not provide enough power for reliable camera operation.
The included lightweight power cable is designed to be routed out of sight. To hide the power cable, route it behind the vehicle trim along the windshield, doorframe, or dash.

Turning On the Device Manually
 .
.
The device turns on.
Turning Off the Device Manually
-
Hold
for 3 seconds.
- Select Off.
Pairing a Wireless Headset or Car Stereo
You can pair a wireless headset or stereo with your Garmin Catalyst 2 device to hear coaching tips and audible lap times as you drive.
- Place your Garmin Catalyst 2 device and your headset or stereo within 10 m (33 ft.) of each other.
- On your Garmin Catalyst 2 device, swipe the screen left to open the menu.
- Select .
- On your headset or stereo, enable Bluetooth® technology and make it visible to other Bluetooth devices.
- On your Garmin Catalyst 2 device, select OK, and select your headset or stereo from the list of devices.
- Follow the on-screen instructions to complete the pairing process.