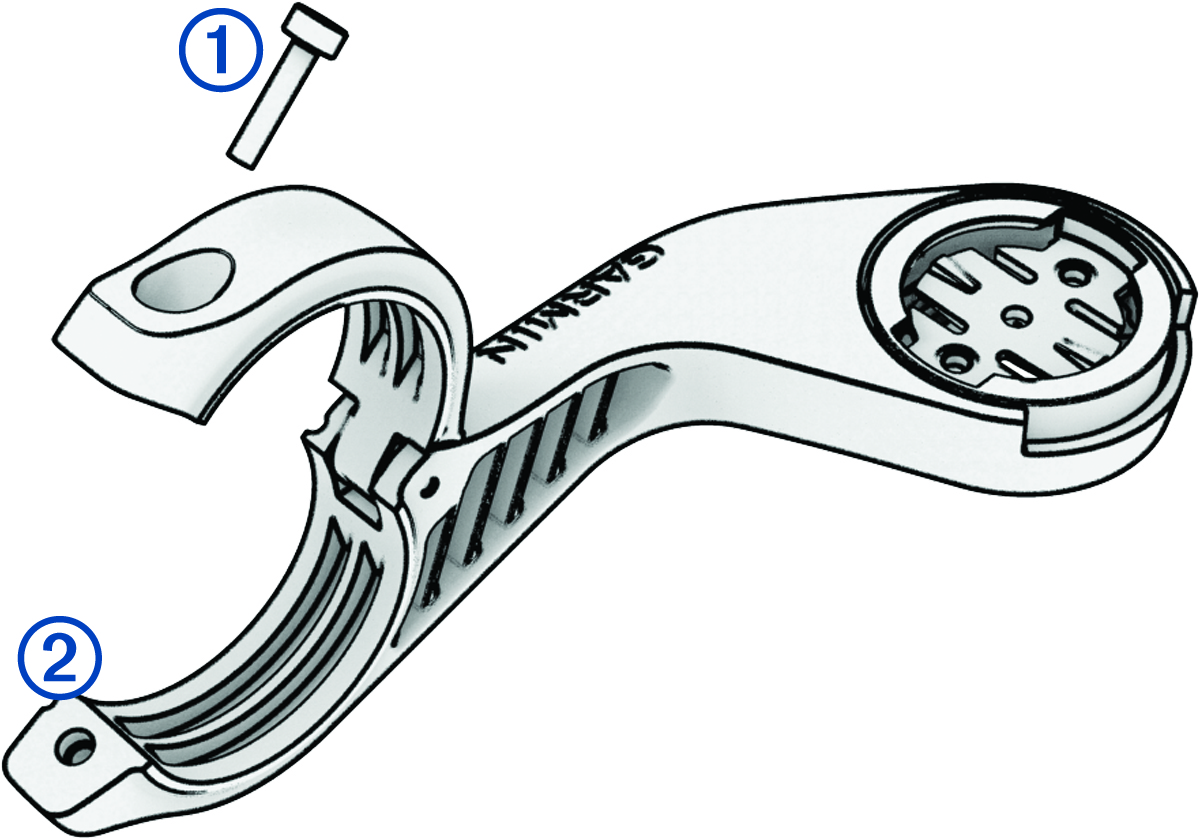
Installing the Out-Front Mount
You can use the out-front mount to install the headlight and your Edge® bike computer. Garmin® recommends that you adjust the mount for the viewing angle of the Edge bike computer before you install and adjust the headlight angle.
-
Use the 2.5 mm hex key to remove the screw
 from the handlebar connector
  .
.
-
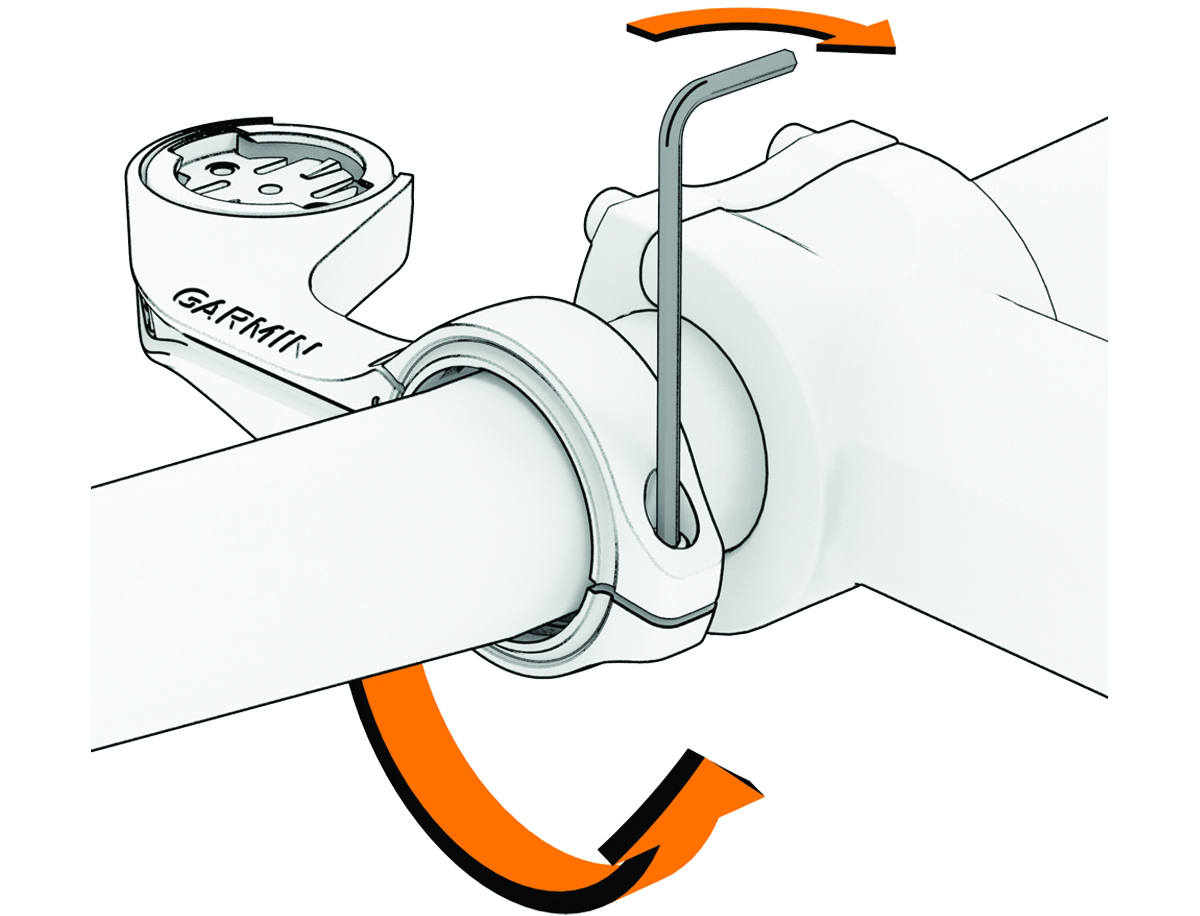
Replace the screw, and use the 2.5 mm hex key to tighten the screw.
NOTE: You should check the tightness of the screw periodically. Garmin recommends a torque specification of 7 lbf-in. (0.8 N-m).
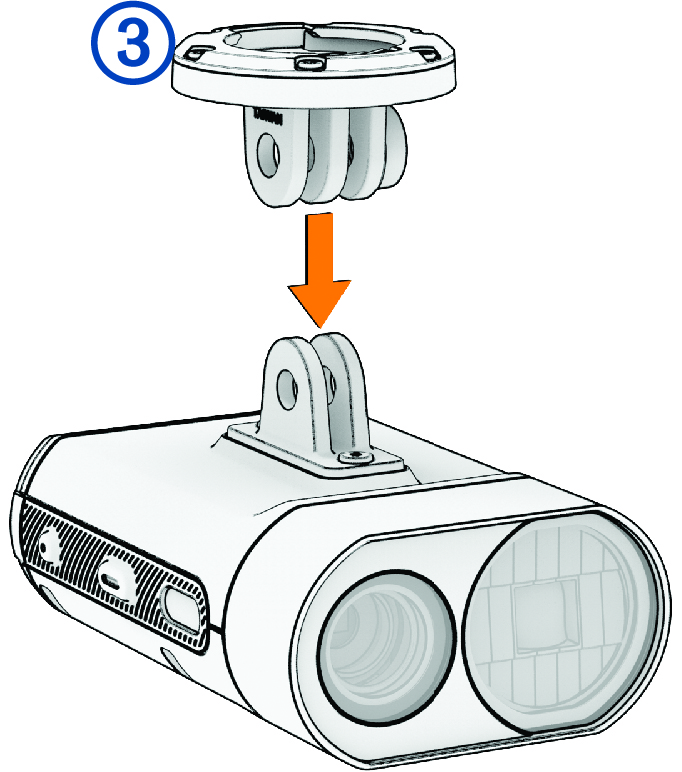
-
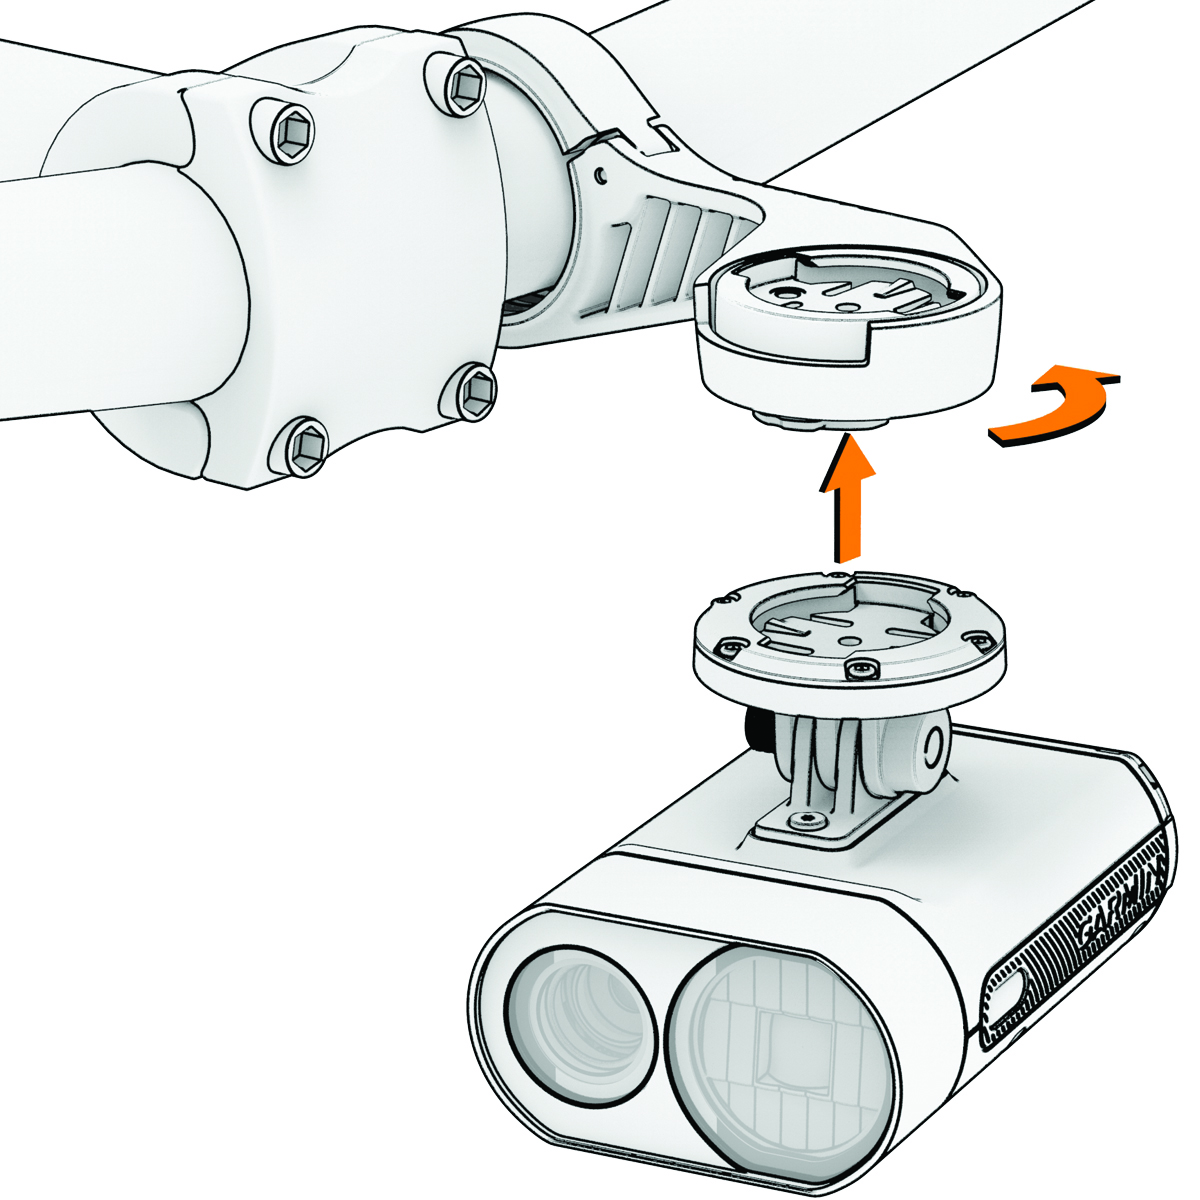
Connect the quarter-turn adapter
 to the headlight.
-
Insert the screw
 , and hand tighten.
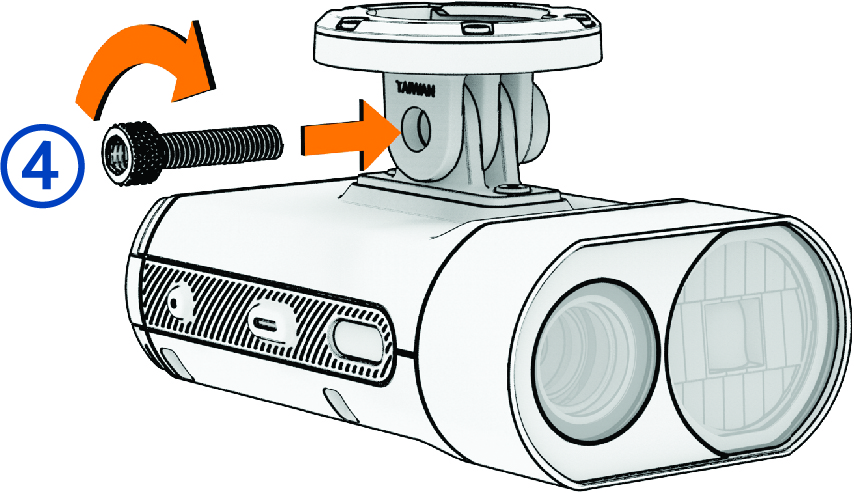
-
Press up slightly, and turn the adapter counterclockwise until it locks into place.
-
Adjust the headlight angle so it is parallel to the ground, and use the 4 mm hex key to tighten the screw.
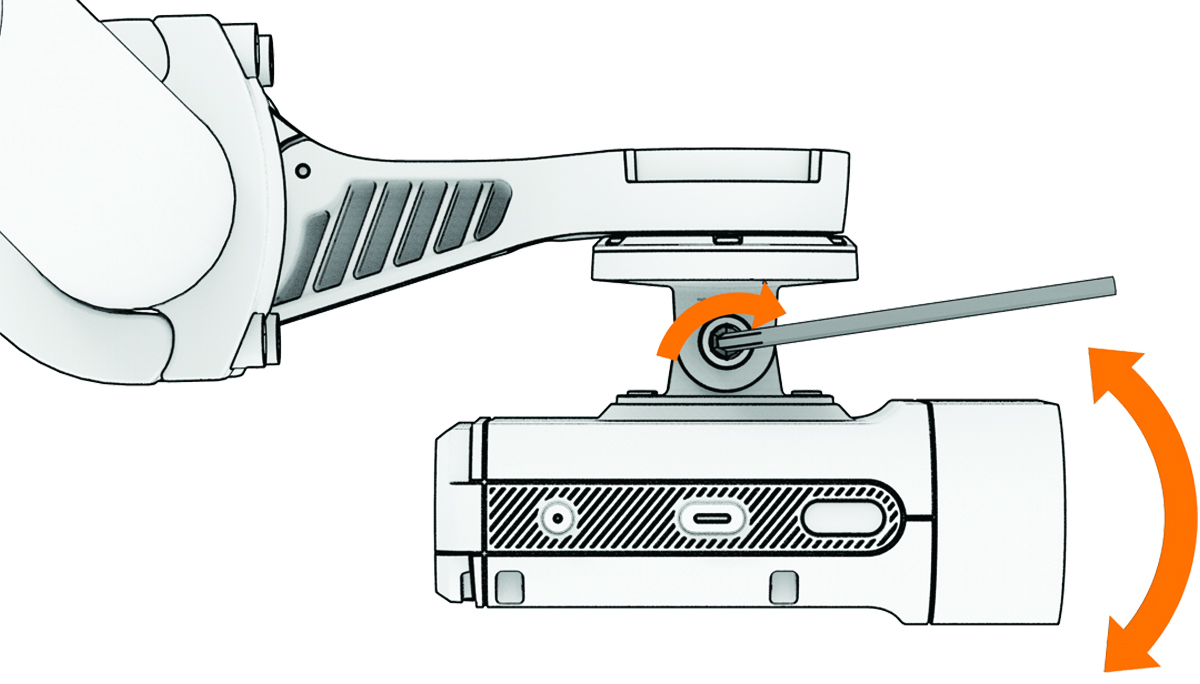
NOTE: You should check the tightness of the screw periodically.