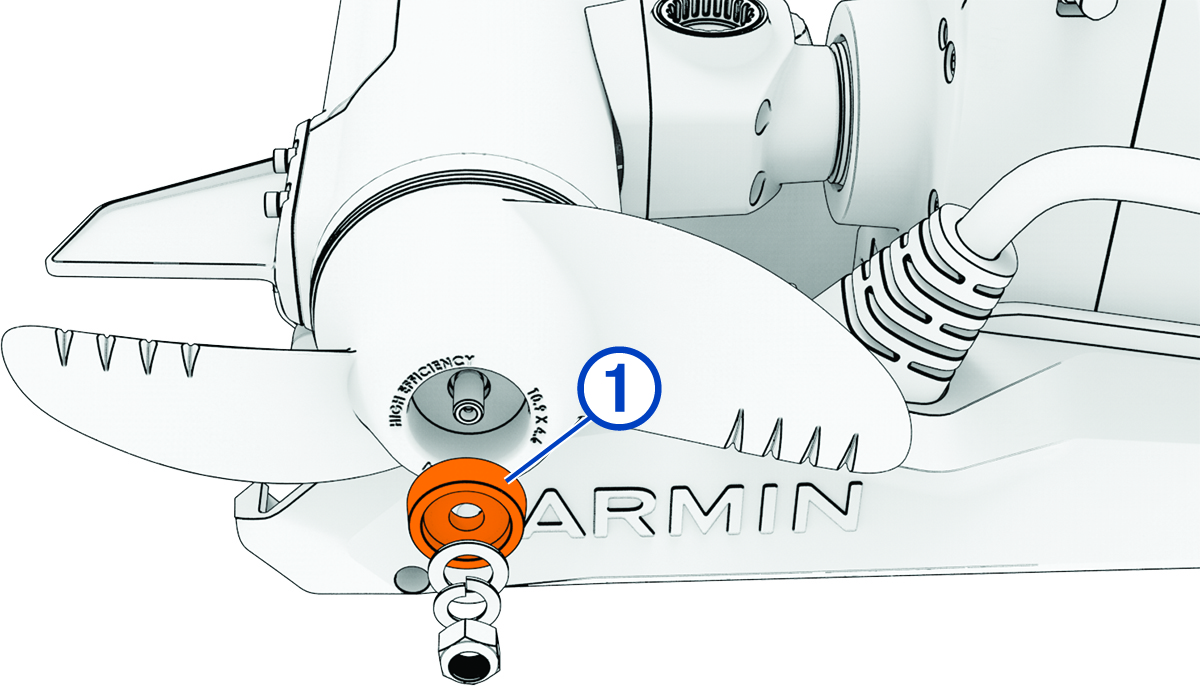
Servicing the Anodes

The anodes protect the motor components from corrosion, and each season they must be examined and cleaned or replaced if necessary.

  1. Using a 9/16 in (15 mm) socket, loosen the nut on the end of the propeller.
  2. Remove the nut, lock washer, flat washer, and anode Callout number 1.

    Anode with Callout
  3. Examine the anode, and complete an action:
    • If the anode is more than half of the original size, clean the anode using a wire brush or sandpaper.

      NOTICE

      Remove the anode from the motor before cleaning it with a wire brush or sandpaper. Cleaning the anode while installed on the motor could damage the motor, accelerate corrosion, and shorten the life of the motor.

    • If the anode is less than half of the original size, discard the anode and purchase a replacement.

  4. Place the cleaned or new anode on the propeller shaft, and secure the propeller with the flat washer, lock washer, and nut.
  5. Using a 9/16 in (15 mm) socket, tighten the nut to 8.13 N-m (6 lbf-ft).
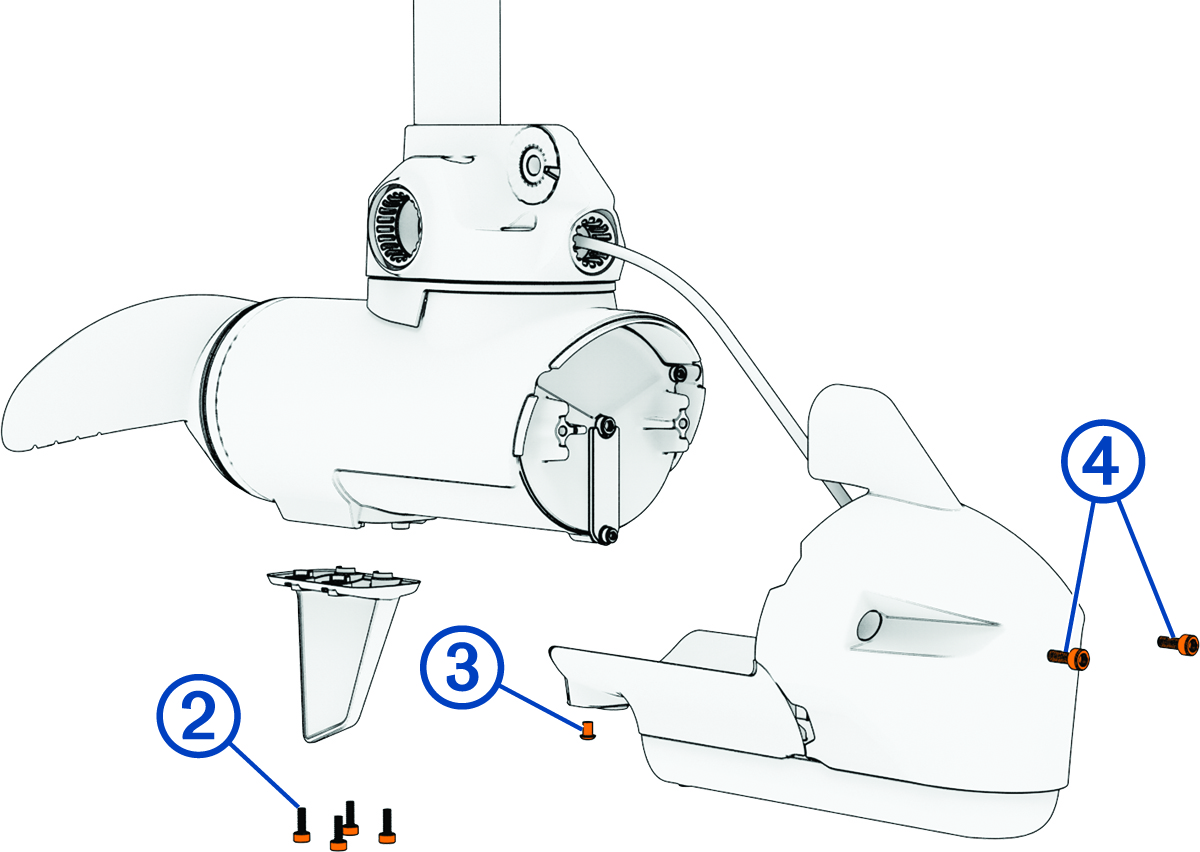
  6. Using a 4 mm hex bit or wrench, remove the four screws Callout number 2 securing the skeg on the bottom of the motor.

    Assembly Diagram with Callouts
  7. Using a 3 mm hex bit or wrench, remove the screw Callout number 3 that secures the transducer and nose cone to the bottom of the motor .
  8. Using a 4 mm hex bit or wrench, remove the screws Callout number 4 to disconnect the nose cone from the front of the motor.
  9. Using a 3 mm hex bit or wrench, remove the screw and anode Callout number 5 on the front of the motor.

    Anode with Callout
  10. Examine the anode, and complete an action:
    • If the anode is more than half of the original size, clean the anode using a wire brush or sandpaper.

    • If the anode is less than half of the original size, discard the anode and purchase a replacement.

  11. Place the cleaned or new anode on the screw and secure it to the motor.
  12. Secure the nose cone to the front of the motor.
  13. Install the screw that secures the transducer and nose cone to the bottom of the motor.
  14. Install the skeg on the bottom of the motor.
GUID-828BF524-69C7-4E20-A109-CE89908F9BDD v2
June 2024