Device Overview
|
|
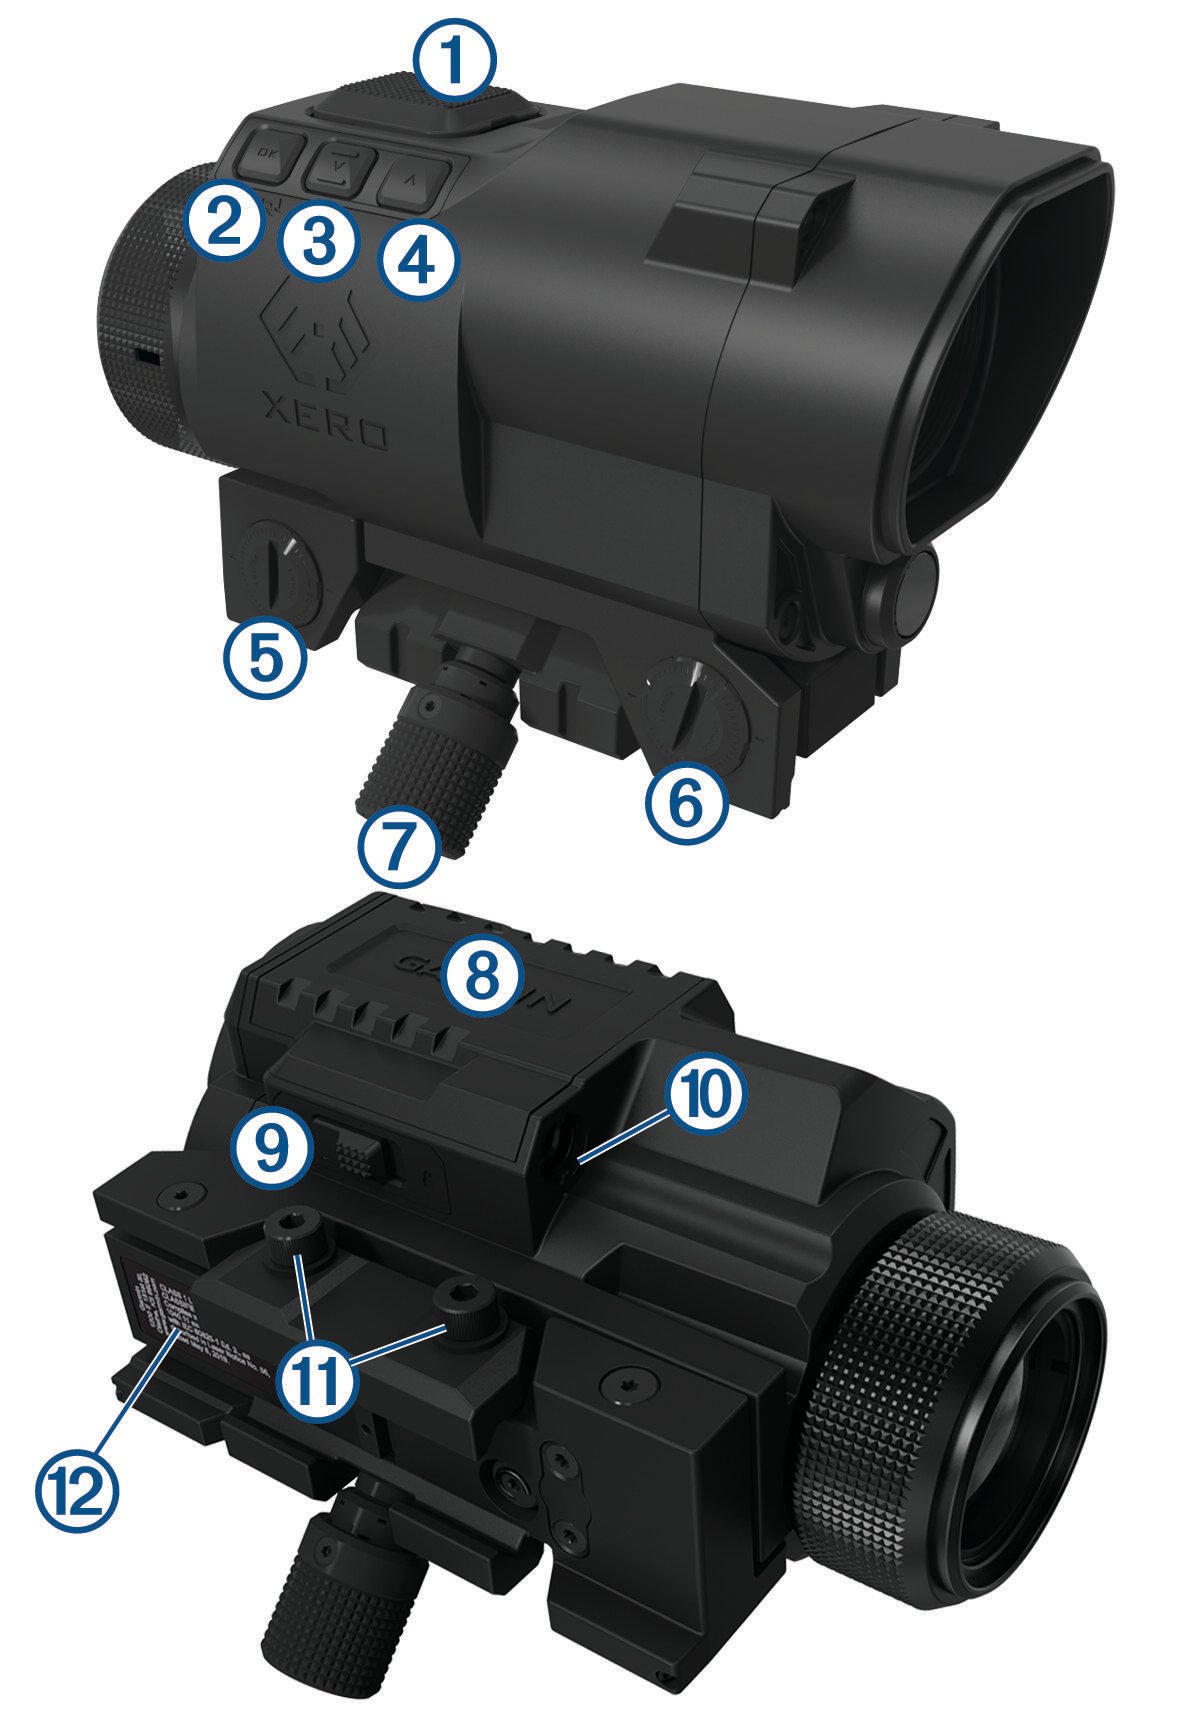
Hold to activate the laser range finder Press to return to hunt mode |
|---|---|
|
|
Press to turn on the device Press to select options and configure the device |
|
|
Press to decrease reticle brightness Press to move through menu items Hold to view the quick options menu |
|
|
Press to increase reticle brightness Press to move through menu items Hold to view the quick options menu |
|
|
Turn to adjust the scope up or down by 1/2 MOA for each click |
|
|
Turn to adjust the scope left or right by 1/2 MOA for each click |
|
|
Loosen to make windage and elevation adjustments Tighten to lock the adjustments |
|
|
Remove to install batteries or access the micro-USB port |
|
|
Move to release the battery cover |
|
|
Connects to the remote trigger cable |
|
|
Secures the scope to a Picatinny or Weaver rail |
|
|
Contains manufacturer's identification and certification information  |


