Installing the Remote Trigger Cable
You can install a remote trigger cable to activate the range finder while your hand is near the crossbow trigger. The remote trigger functions the same as the ranging button on the scope. If necessary, you can disconnect the trigger cable from the trigger cable mount to cock your crossbow.
-
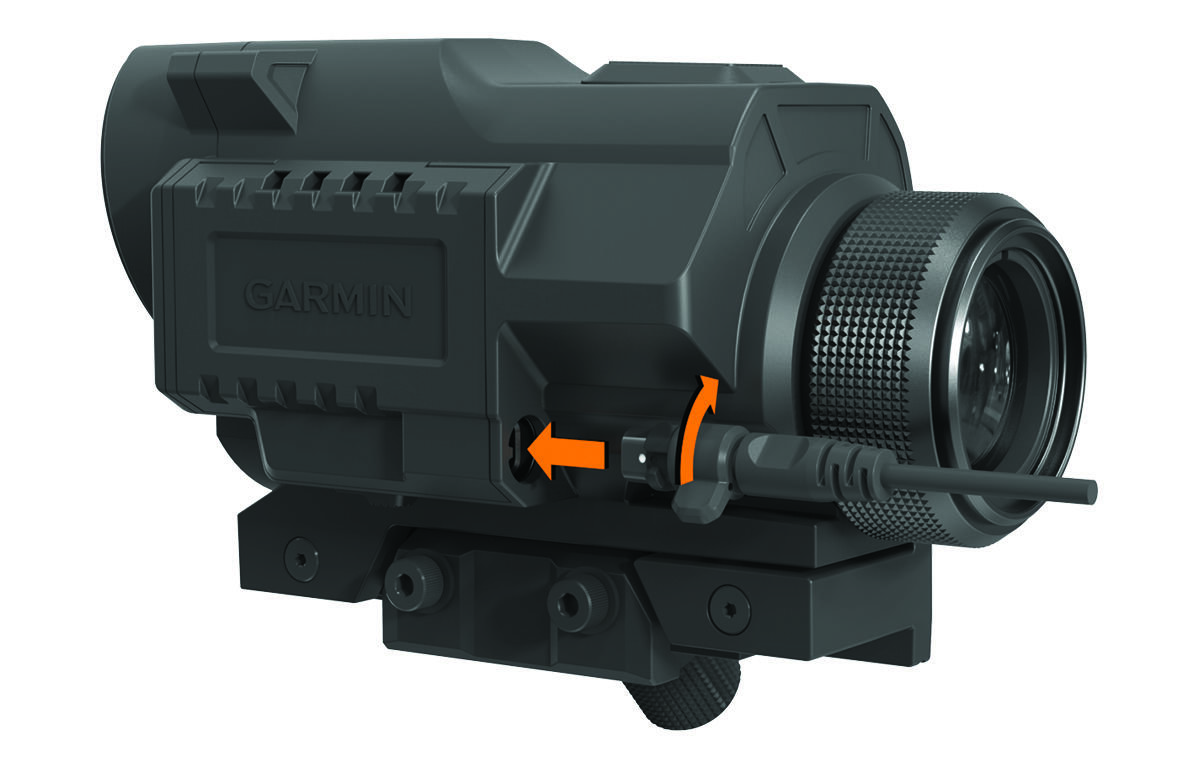
Connect the remote trigger cable to the remote trigger port.
-
Remove the adhesive backing
 from the trigger cable clip
  .
NOTE: The device includes two trigger cable clips for flat and curved mounting surfaces. You should select the trigger cable clip that best fits your mounting surface.
.
NOTE: The device includes two trigger cable clips for flat and curved mounting surfaces. You should select the trigger cable clip that best fits your mounting surface.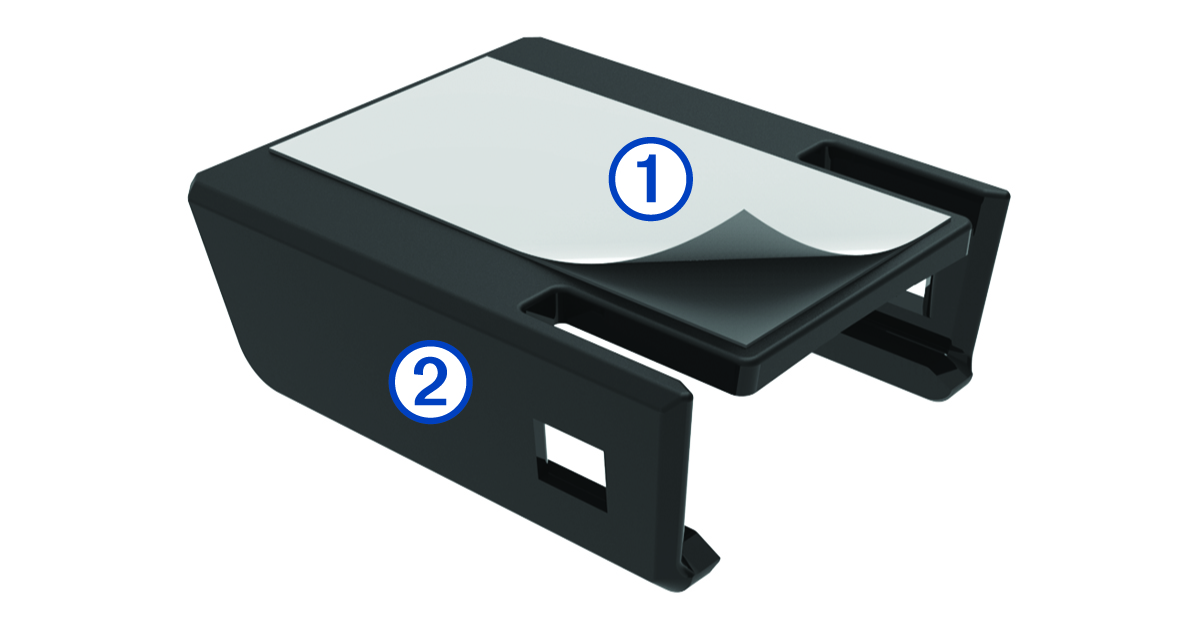
-
Press the remote trigger cable clip onto the grip of your crossbow where you can comfortably activate it while aiming.
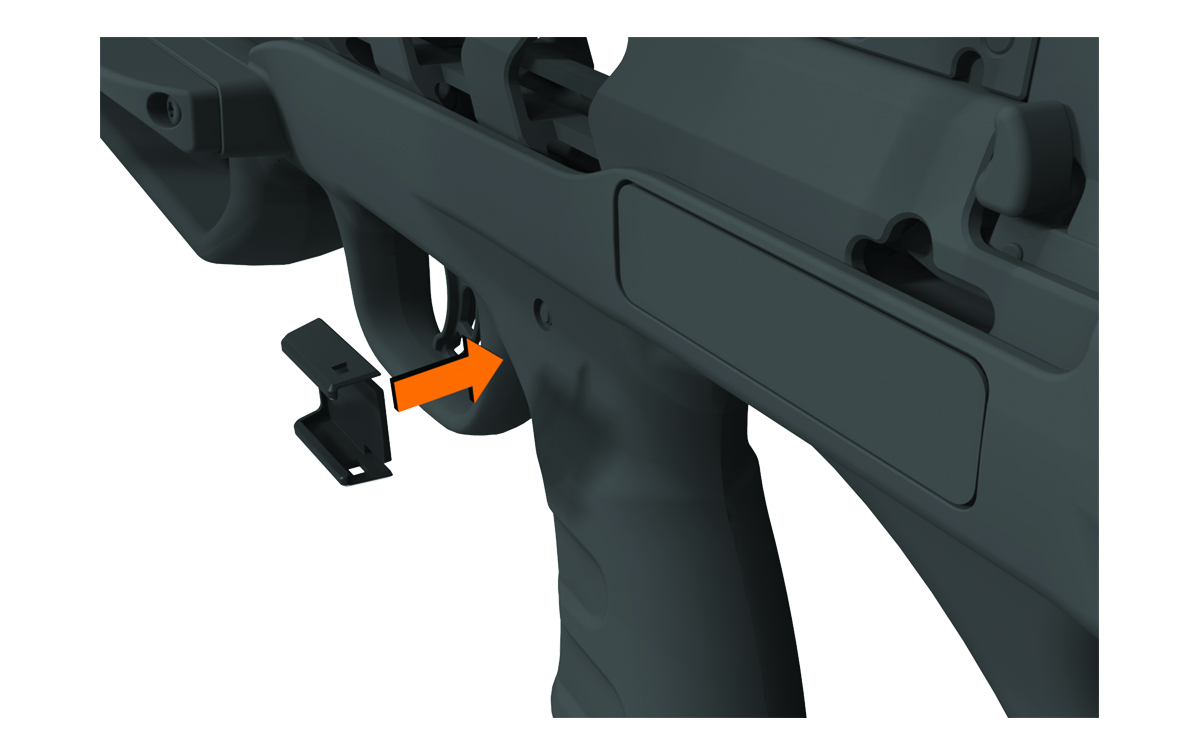
NOTE: You should confirm the remote trigger cable is positioned so that it does not interfere with the operation of the crossbow. -
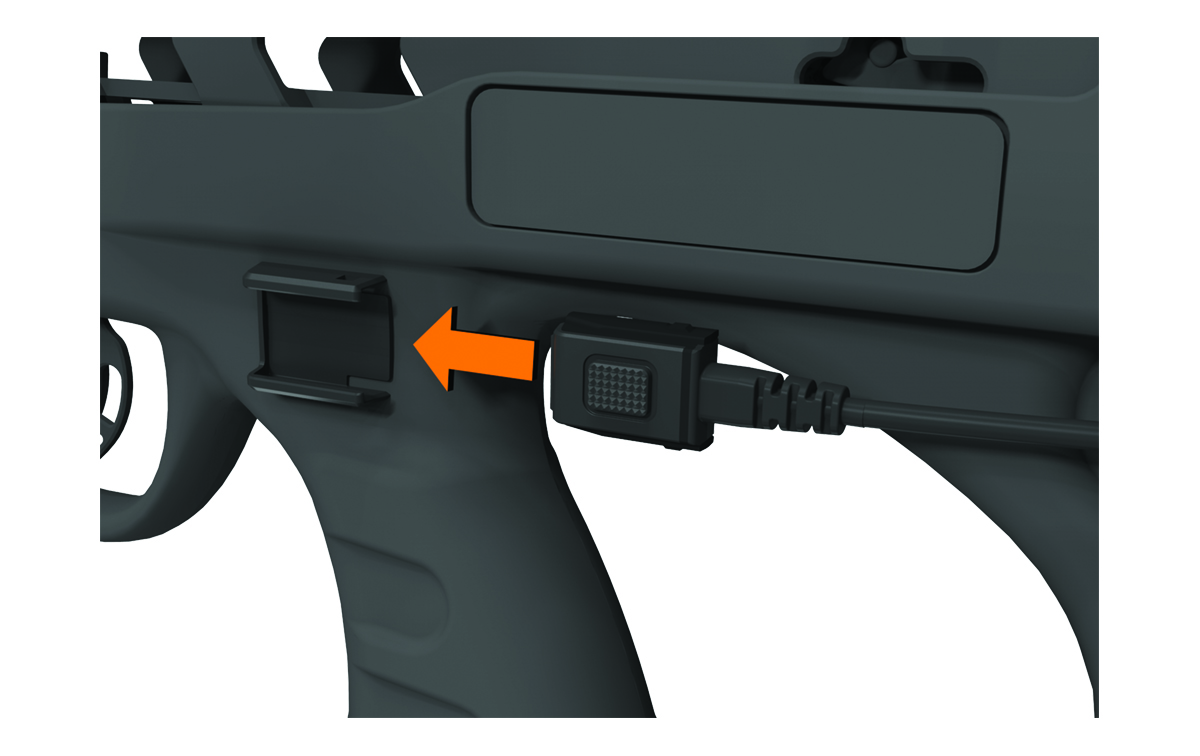
Slide the remote trigger cable into the trigger cable clip until it clicks.