Installing Jack Nuts
The Force® Current trolling motor is packaged with hardware that can be used to install the included 1/4 in.–20 jack nuts using common tools. If preferred, you can purchase a specialized jack nut installation tool. When using a specialized tool, you should follow the tool manufacturer's instructions for installing jack nuts.
The included jack nuts are intended for mounting surfaces between 0.020 and 0.190 in. thick. If the mounting surface thickness is outside that range, you must purchase appropriate jack nuts to ensure a secure installation and avoid the possibility of damage to the kayak.
-
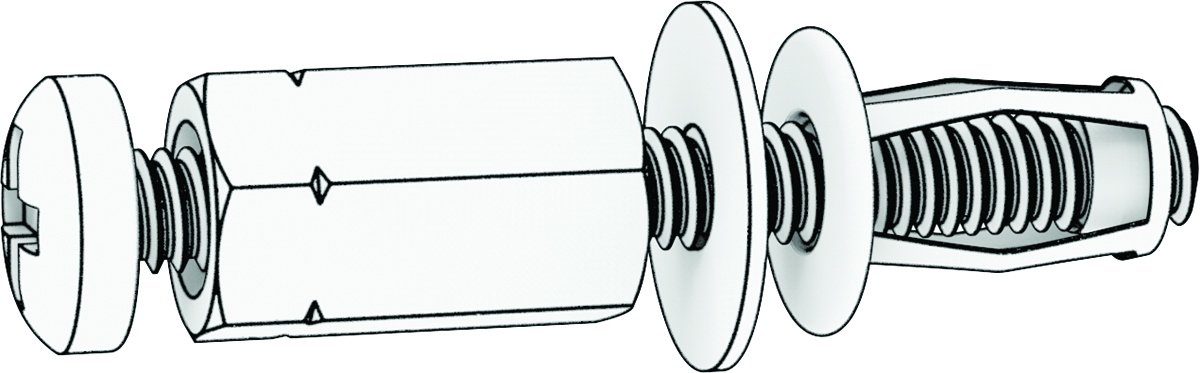
Retrieve the coupling nut, screw, and washer from bag
 .
.
-
Thread the screw through the coupling nut, the washer, and the jack nut.
-
While maintaining downward pressure on the head of the screw to keep it from rotating, turn the coupling nut clockwise using the wrench.
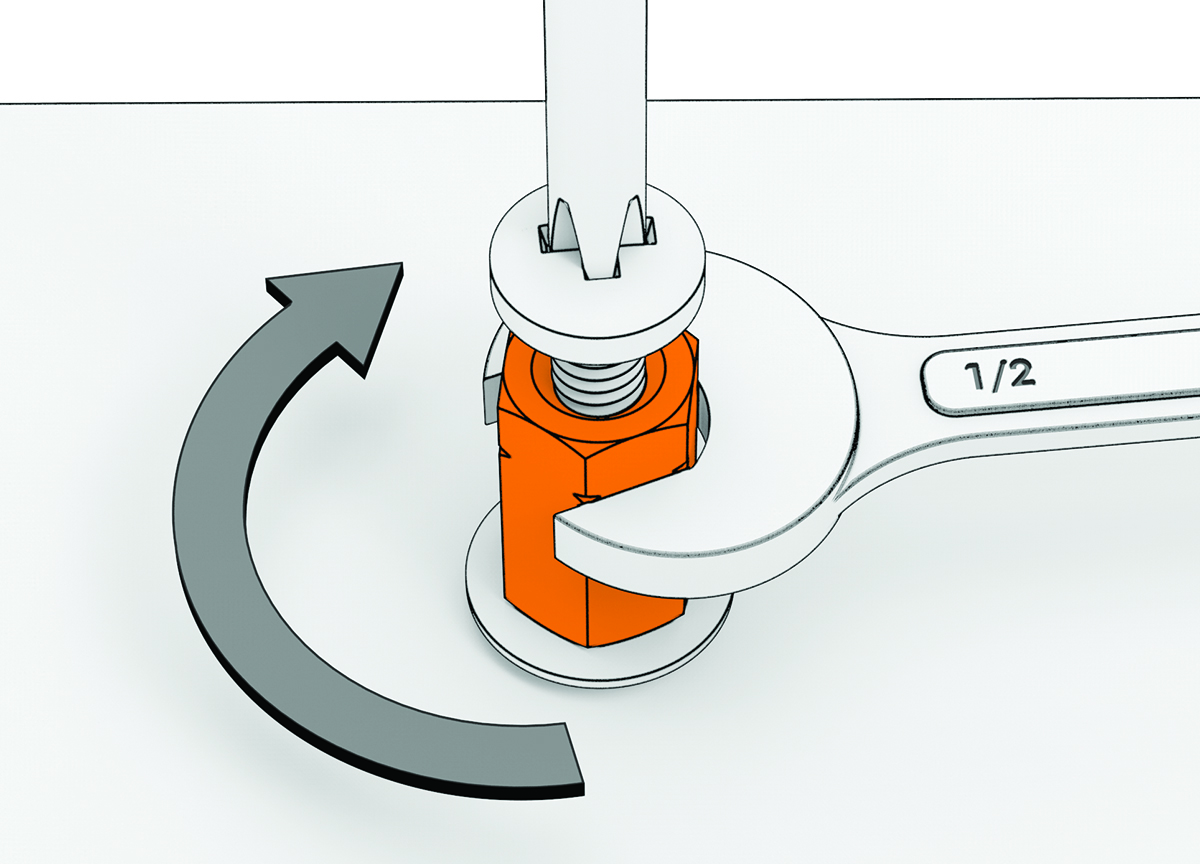
As you tighten the coupling nut down, the screw is pulled up, causing the jack nut to collapse under the mounting surface.