Securing the Lower Gas Spring
Label identifying the parts bag required for this procedure:

NOTE:
This procedure uses the rest of the hardware in the parts bag that you used when installing the upper gas spring.
-
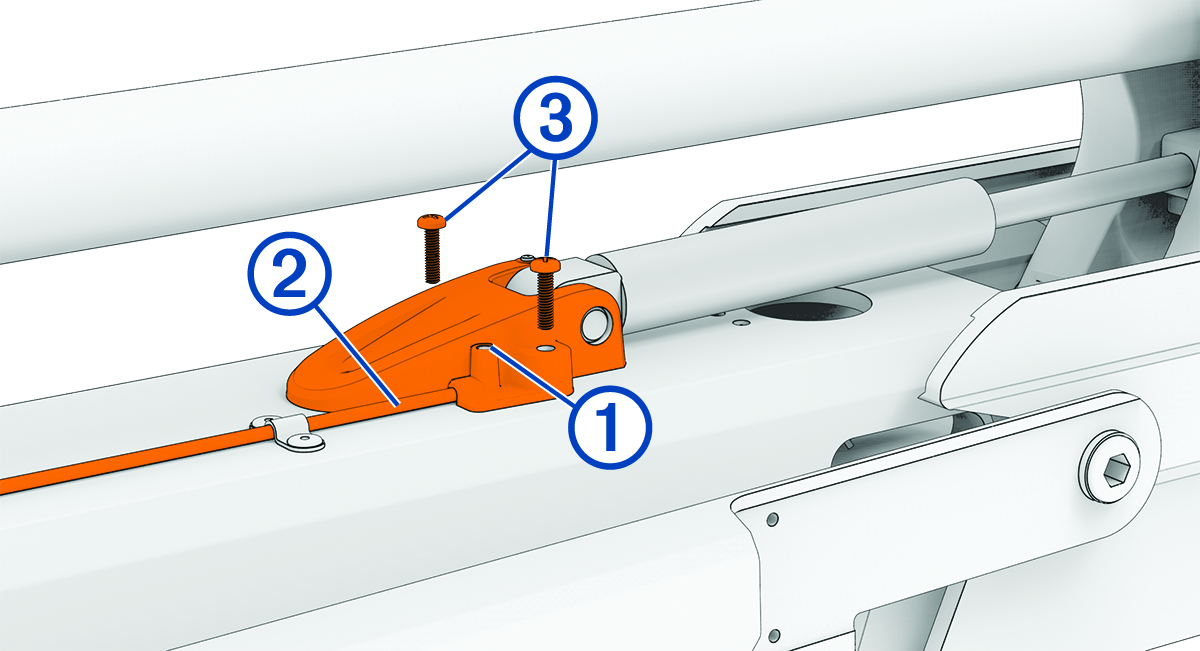
Align the hole on the base of the lower gas spring
 with the safety rod
  , and press down.
If you must rotate the gas spring so the base aligns with the mount, rotate the spring in a clockwise direction only. Rotating the gas spring in a counter-clockwise direction may loosen the fittings, potentially leading to a premature failure of the gas spring, which could lead to personal injury or property damage while stowing or deploying the motor.
-
Using a #2 Phillips screwdriver, secure the base of the lower gas spring to the mount using the included screws
 .
.