Removing the Propeller Drive Motor
NOTE:
When removing the propeller drive motor, using a ball-head hex bit or wrench is highly recommended because of the angle needed to reach the head of the screws.
-
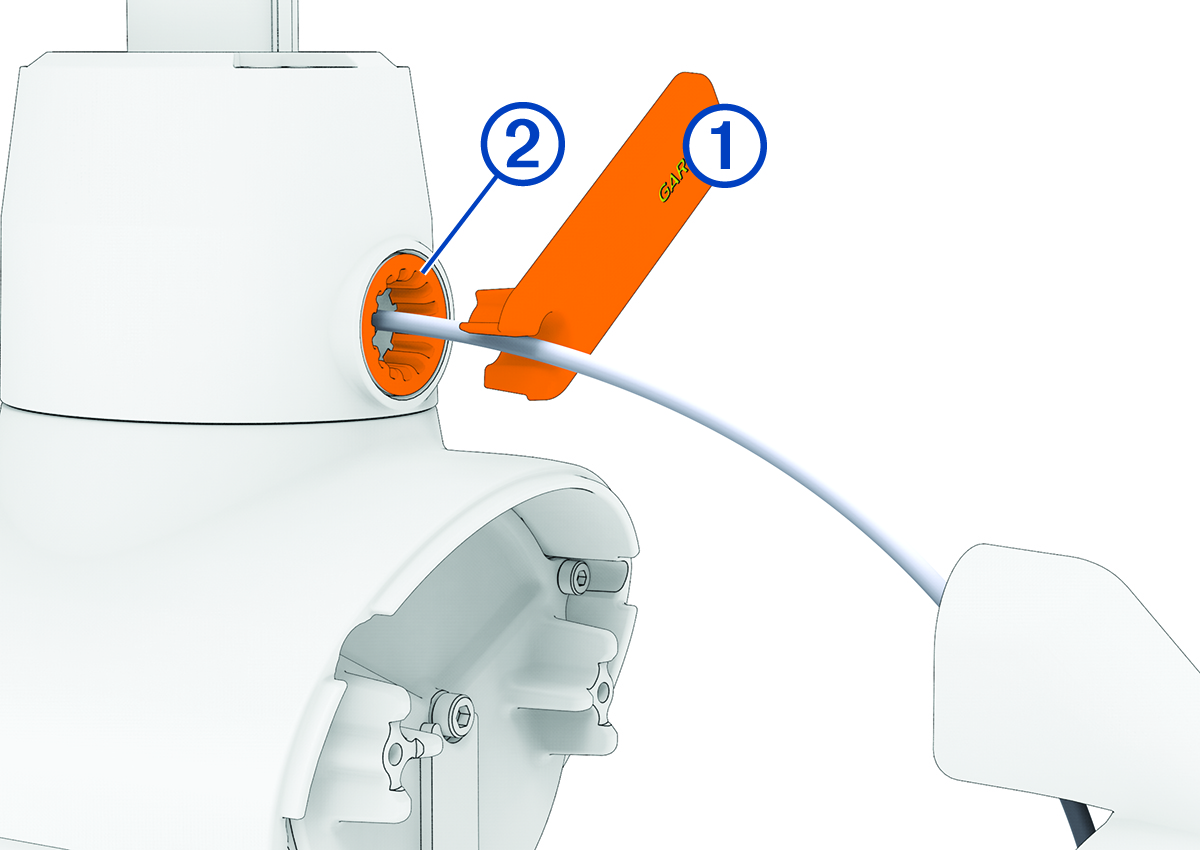
Using the tool
 included in the transducer replacement kit, remove the recessed nut
  that secures the transducer cable to the shaft.
-
Using a ball-head 4 mm hex bit or wrench, remove the screws
 that secure the shaft base to the propeller drive motor.
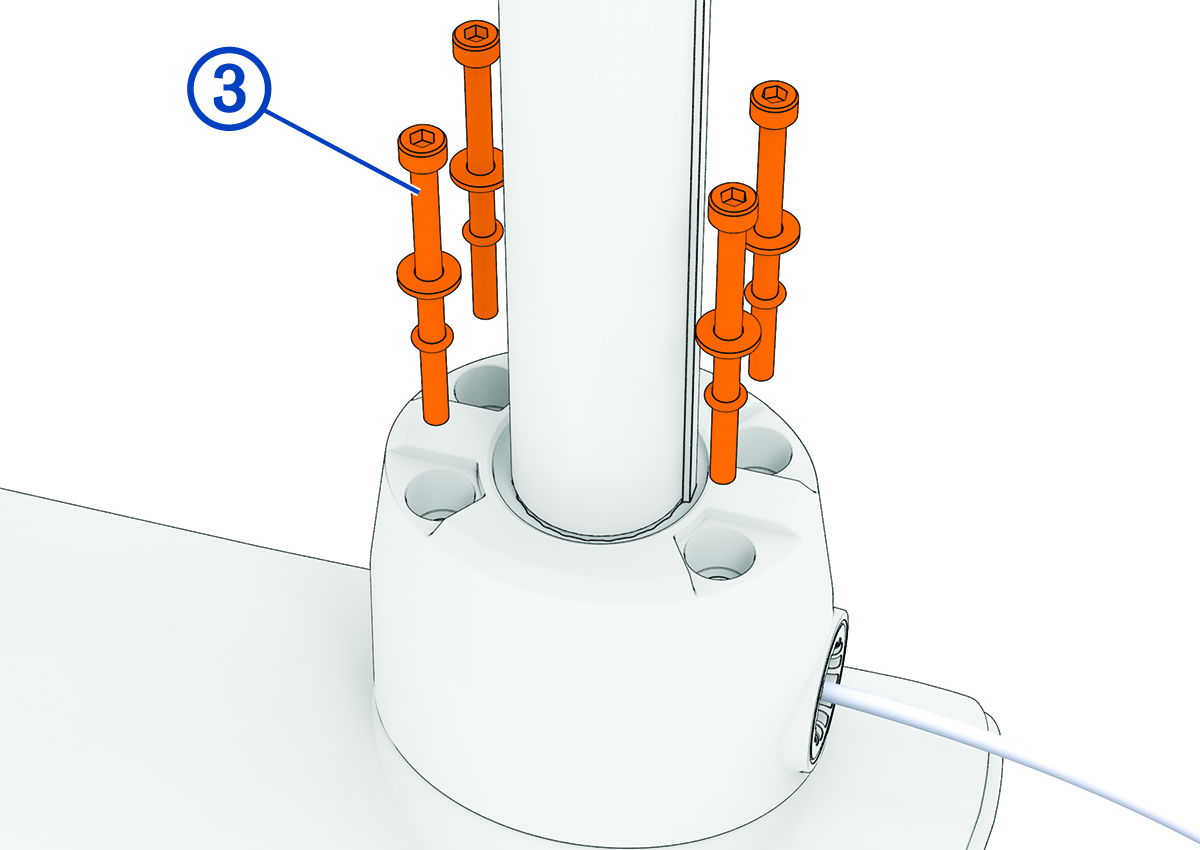
When replacing the transducer, you should dispose of these screws, washers and O-rings. New parts are included with the transducer replacement kit.
-
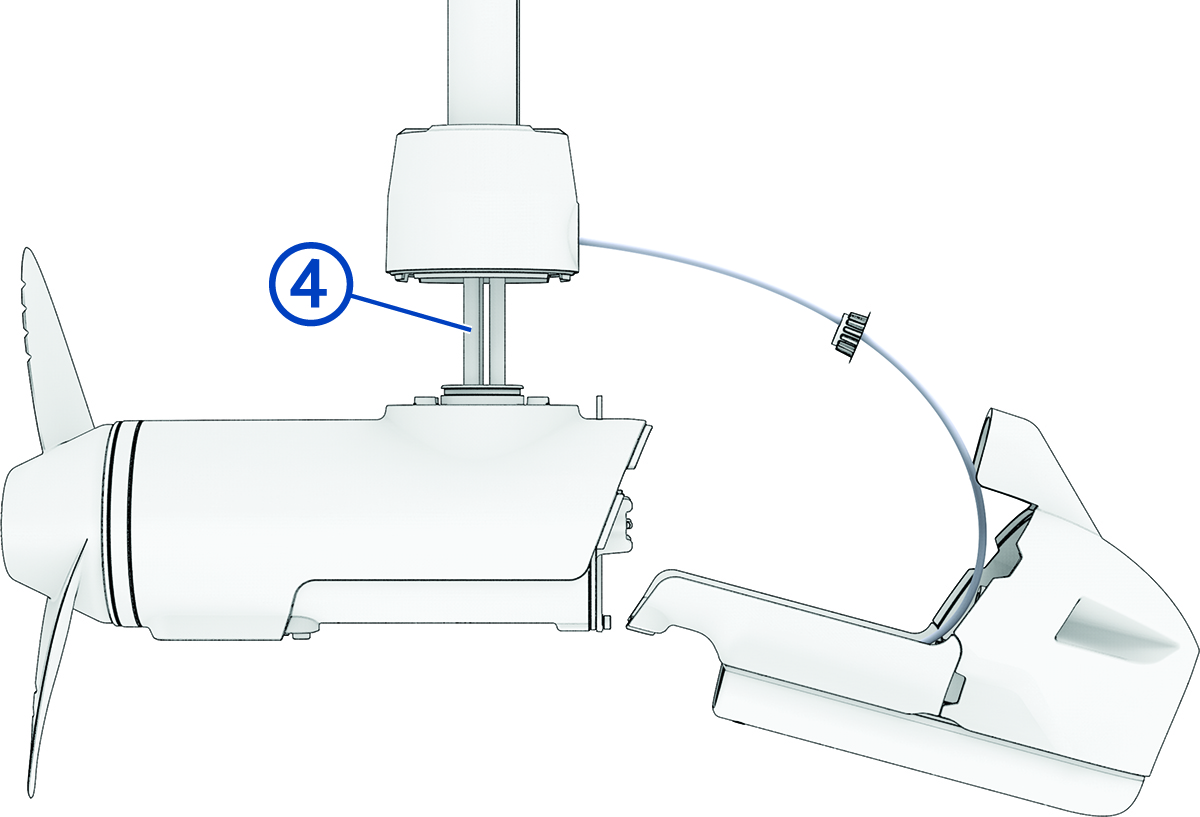
Straighten the cables at the top of the shaft, and slowly pull the propeller drive motor away from the shaft base until you can see the power and data cables
 connected to the propeller drive motor.