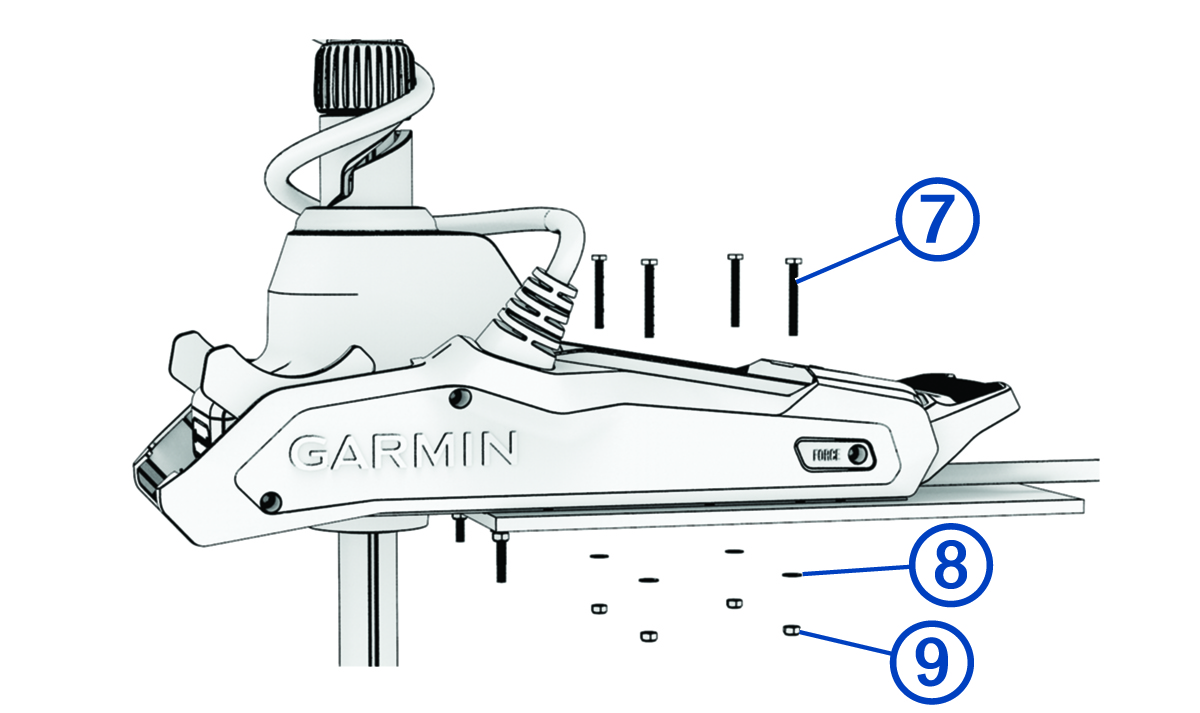
Installing the Motor on the Deck
When securing the mount to the deck, you must use pan-head or rounded-head screws, and you must install them from above the deck and secure them with washers and nuts below the deck. If the screws are installed from under the mounting surface pointing upward, the ends of the screws may come into contact with the motor when stowing or deploying. If the motor comes into contact with the mounting screws during operation, it may damage the motor and lead to corrosion of the housing.
NOTE:
If the supplied screws are not long enough for the mounting surface, you must obtain stainless steel pan-head or rounded-head
5/16–20 (M8x1) screws of the appropriate length.
-
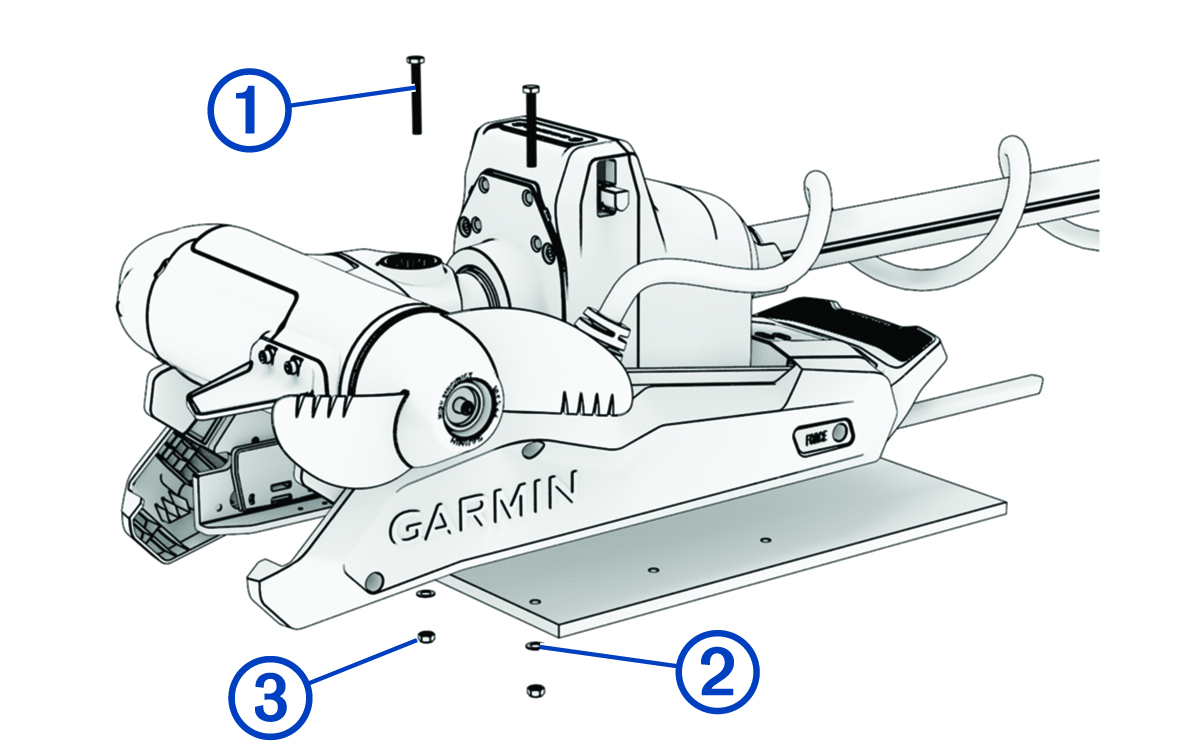
Insert the included screws from above deck and install washers and locking nuts from below deck, starting with the two holes closest to the edge of the bow.
-
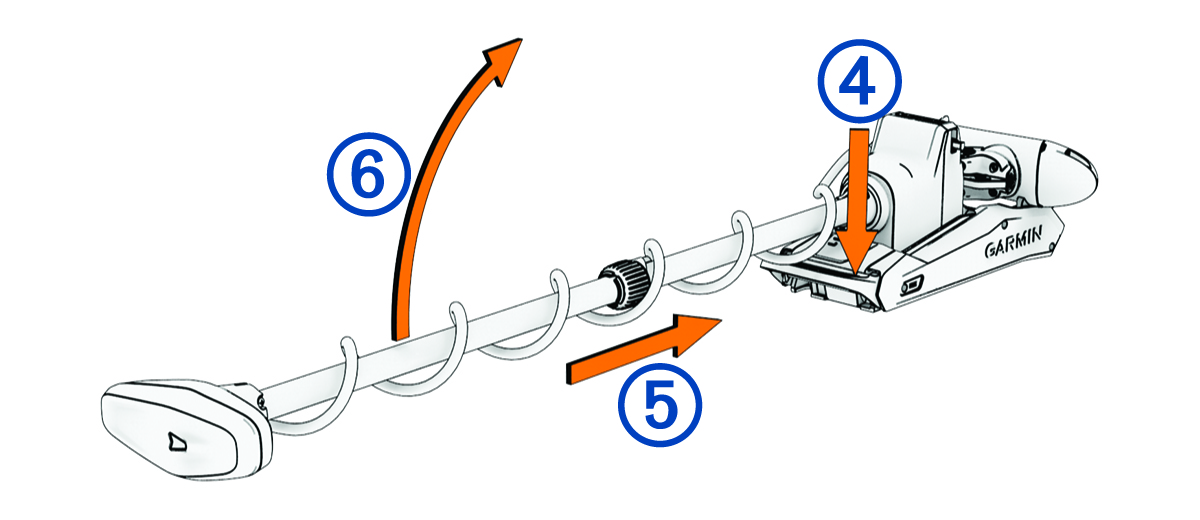
Press the release , slide the propeller drive motor head out , and gently pivot the trolling motor into the deployed position .
-
Insert the remaining screws , and secure them below the deck using washers , and locking nuts .