Edge Bike Computer Installation

To obtain the best product performance, you should read all installation instructions before mounting your Edge® bike computer on your bike. You can also go to www.garmin.com/manuals/edge1050 to print a mounting template.

Installing the Standard Mount

For the best GPS reception and screen visibility, position the bike mount so the device is horizontal to the ground and the front of the device is oriented toward the sky. You can install the bike mount on the stem or the handlebar.

NOTE: If you do not have this mount, you can skip this task.
  1. Select a secure location to mount the device where it does not interfere with the safe operation of your bike.
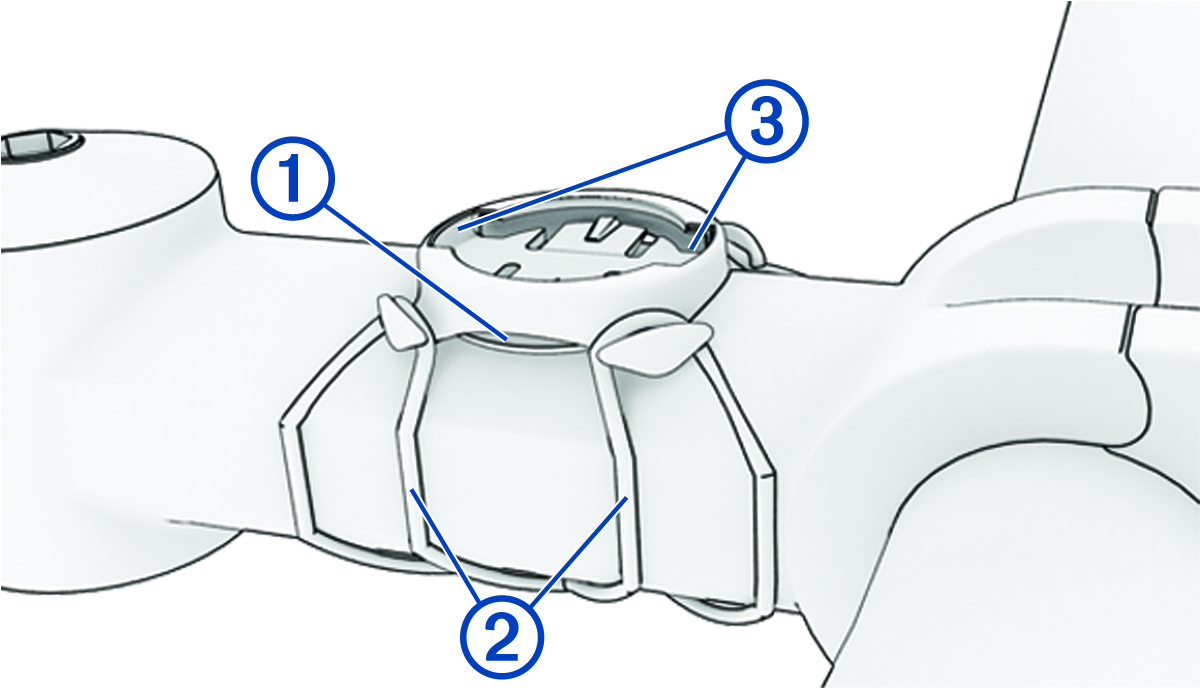
  2. Place the rubber disk Callout number 1 on the back of the bike mount.

    Two rubber disks are included, and you can select the disk that best fits your bike. The rubber tabs align with the back of the bike mount so it stays in place.


    Bike mounts with callouts
  3. Place the bike mount on the bike stem.
  4. Attach the bike mount securely using the two bands Callout number 2.
  5. Align the tabs on the back of the device with the bike mount notches Callout number 3.
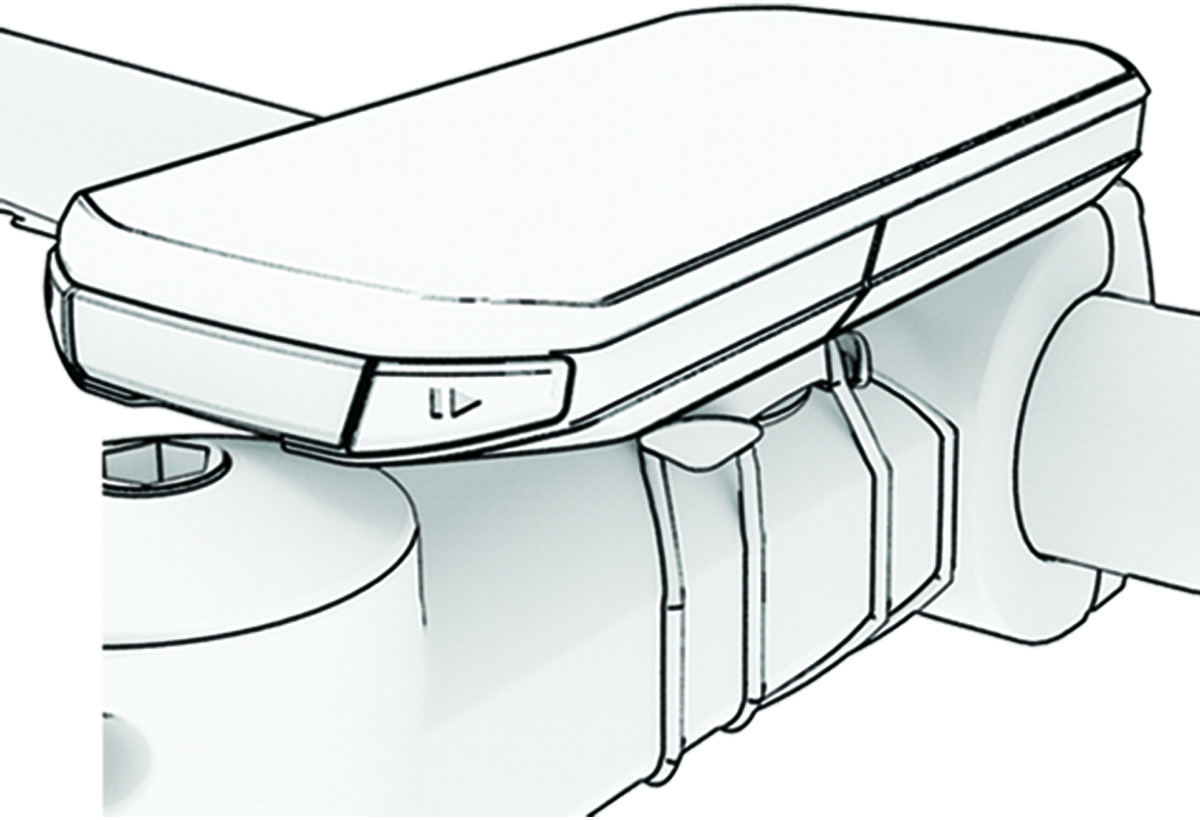
  6. Press down slightly and turn the device clockwise until it locks into place.

    Device mounted on the bike

Installing the Mountain Bike Mount

NOTE: If you do not have this mount, you can skip this task.
  1. Select a secure location to mount the Edge device where it does not interfere with the safe operation of your bike.
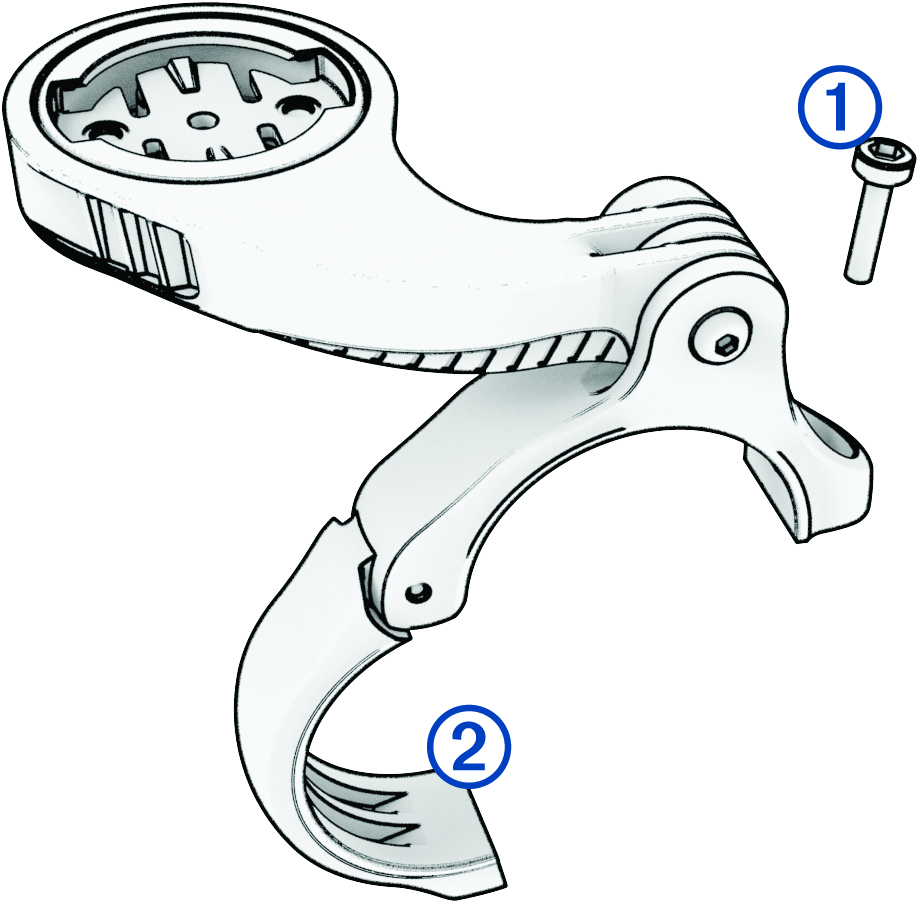
  2. Use the 3 mm hex key to remove the screw Callout number 1 from the handlebar connector Callout number 2.

    Mountain bike mount with callouts
  3. Select an option:
    • If the handlebar diameter is 25.4 mm or 26 mm, place the thicker pad around the handlebar.

    • If the handlebar diameter is 31.8 mm, place the thinner pad around the handlebar.

    • If the handlebar diameter is 35 mm, do not use a rubber pad.

  4. Place the handlebar connector around the handlebar, so that the mount arm is above the bike stem.
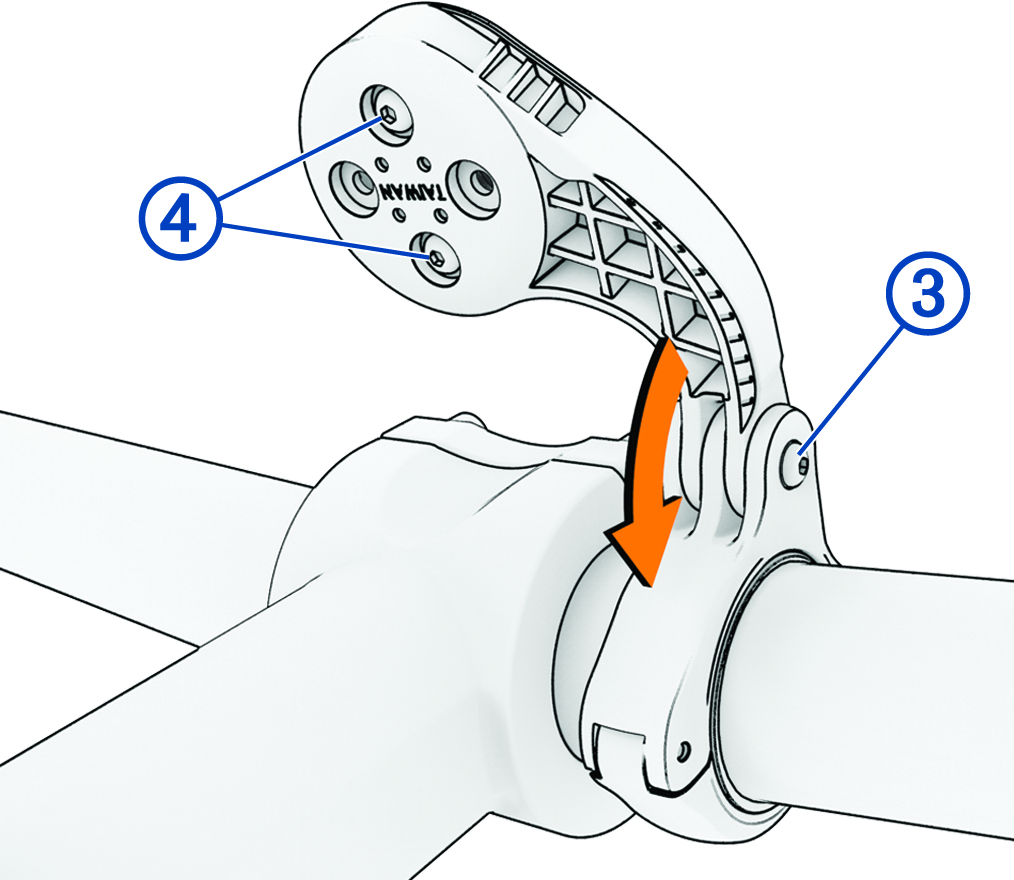
  5. Use the 3 mm hex key to loosen the screw Callout number 3 on the mount arm, position the mount arm, and tighten the screw.
    NOTE: Garmin® recommends tightening the screw so the mount arm is secure, with a maximum torque specification of 20 lbf-in. (2.26 N-m). You should check the tightness of the screw periodically.

    Mountain bike mount with callouts
  6. If necessary, use the 2 mm hex key to remove the two screws on the back side of the mount Callout number 4, remove and rotate the connector, and replace the screws to change the orientation of the mount.
  7. Replace and tighten the screw on the handlebar connector.
    NOTE: Garmin recommends tightening the screw so the mount is secure, with a maximum torque specification of 7 lbf-in. (0.8 N-m). You should check the tightness of the screw periodically.
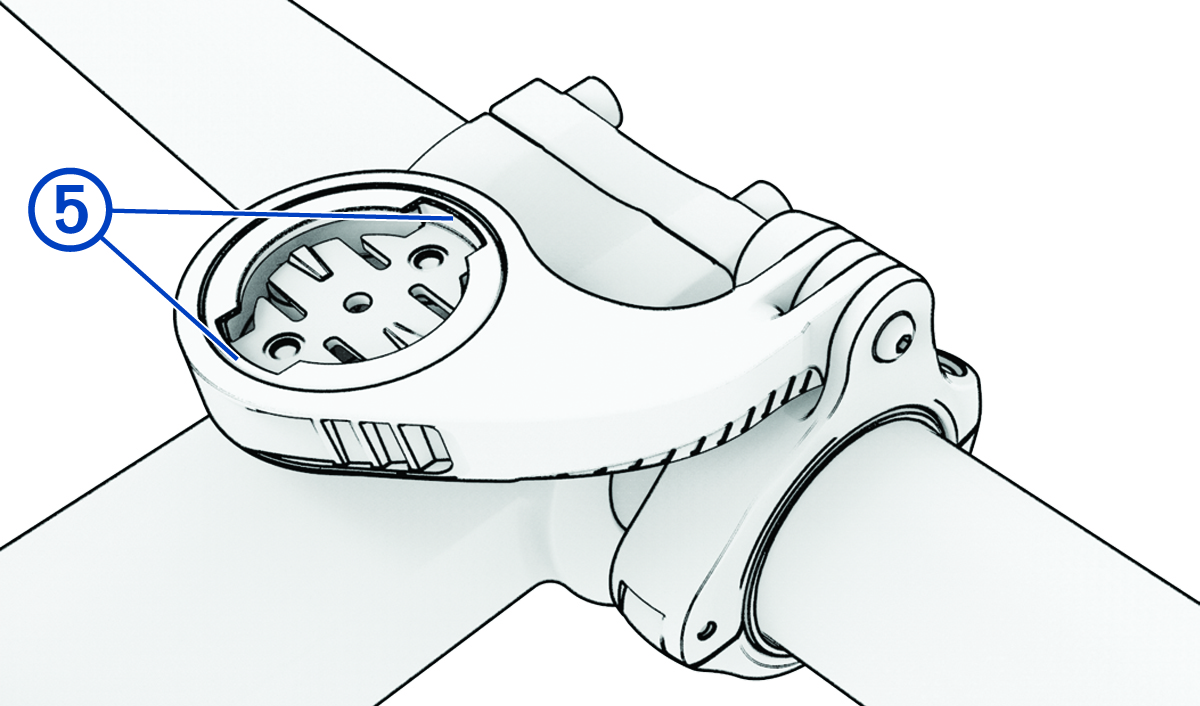
  8. Align the tabs on the back of the Edge device with the bike mount notches Callout number 5.

    Mountain bike mount with callouts
  9. Press down slightly and turn the Edge device clockwise until it locks into place.

Releasing the Edge

  1. Turn the Edge clockwise to unlock the device.
  2. Lift the Edge off the mount.
GUID-08ACA9FC-DEE6-4C8D-8A95-F62181C512E9 v2
September 2024