Preparing for a Shot
 CAUTION
Failing to take one or more of the following actions could result in possible property damage or personal injury while using the device indoors:
- Ensure there is adequate ceiling height and that no objects can obstruct your backswing or follow through.
- Ensure that any net or impact screen is set up with adequate free space behind the net or screen.
- Ensure that any net or impact screen is high enough and extended enough to account for high-lofted shots or any errant shots.
- Ensure that any net or enclosure frame is padded to help reduce ball ricochet.
- Place the launch monitor approximately 1.5 ft. (0.5 m) to the side of the desired tee location (Launch Monitor Placement Considerations).
- Press the button to turn on the launch monitor.
- Start a golf simulator game mode (Using the Golf Simulator Features).
- Place the ball at the desired tee location.
- If necessary, adjust the position of the ball so it appears within the hitting area on the launch monitor’sdisplay.
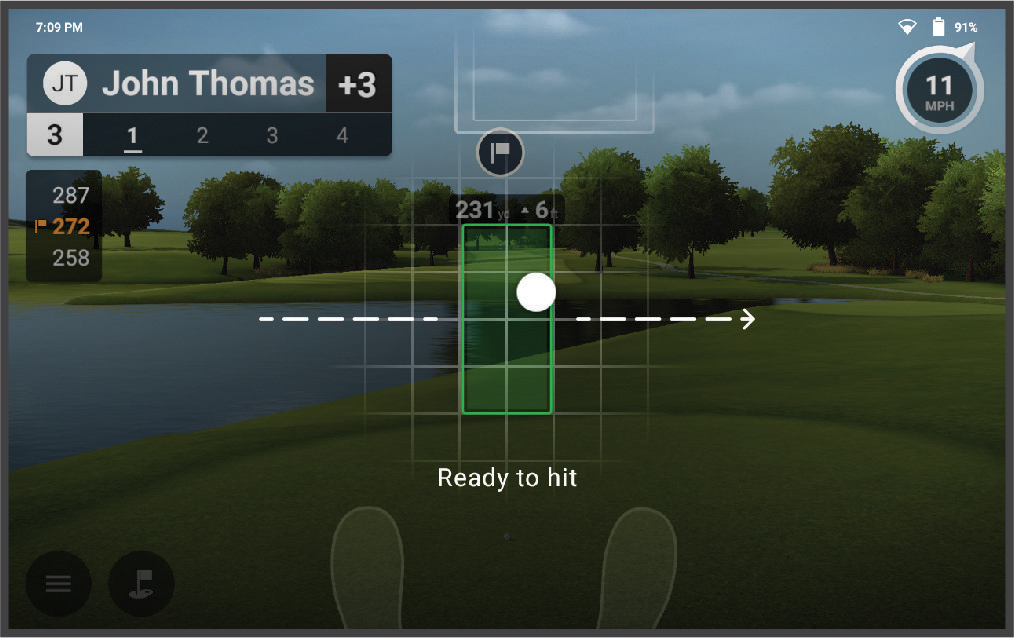
TIP: You can move the ball to any location within the hitting area. It may be helpful to move it during your session if the current location becomes worn.
NOTE: The shape of the hitting area varies depending on whether club data is enabled.
- If necessary, adjust the target alignment (Adjusting the Target Alignment).
NOTE: The target line is parallel to the front of the device by default. The ball and club angles are measured parallel to the target line.
- Wait for the status LED to become solid green, and take a shot.