Setting Up the Tire Pressure Sensors
Before you can set up the tire pressure sensors, you must have the battery and the numerical stickers included with each sensor. You also must have a compatible zūmo® device.
The sensors communicate wirelessly with your compatible zūmo device. You can monitor tire pressure and receive low-pressure alerts on your zūmo device.
-
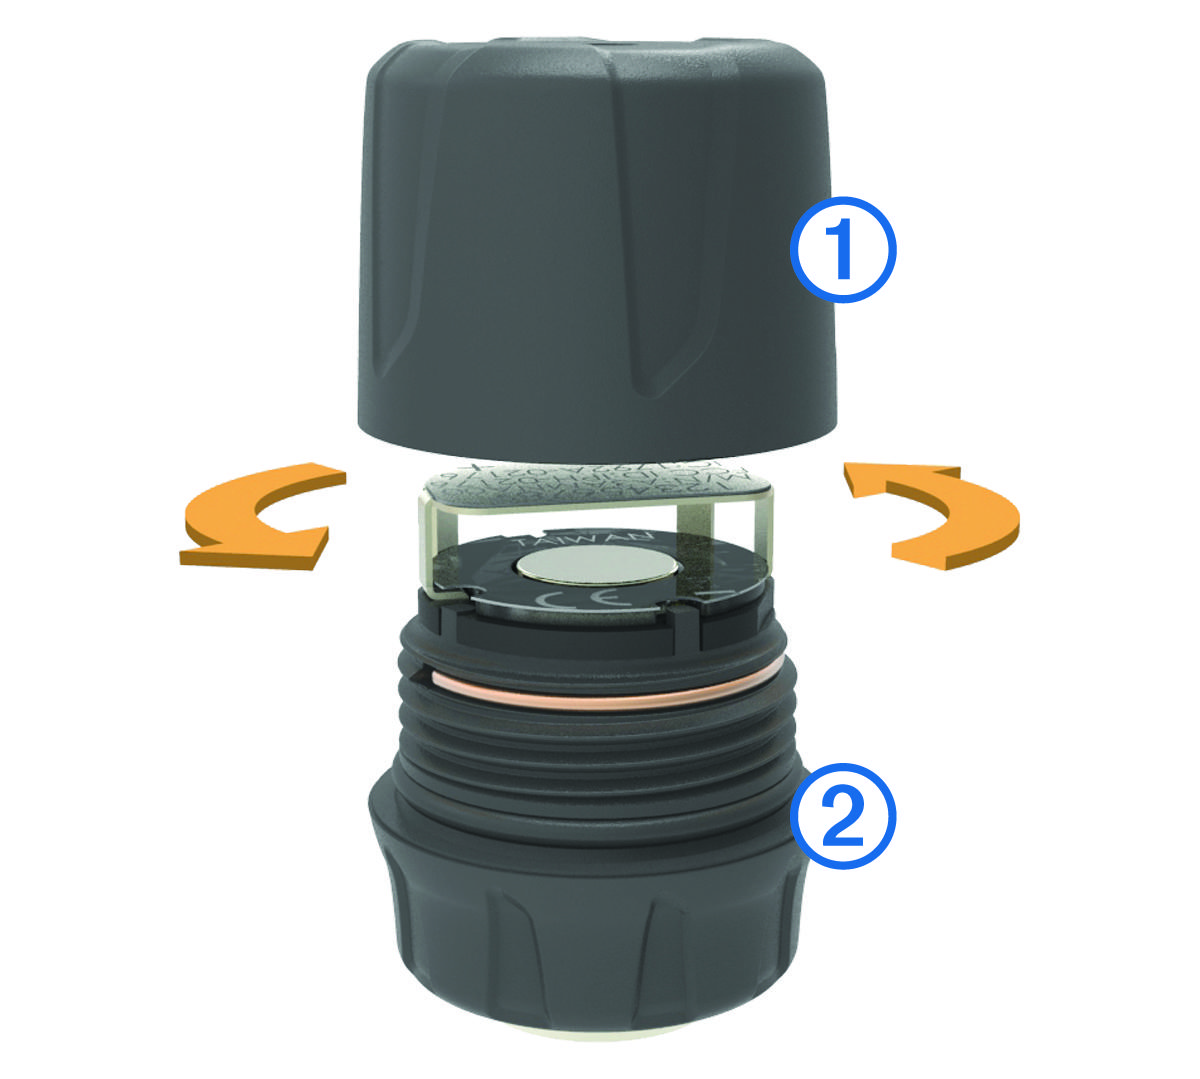
Remove the cap
 from the sensor
  by rotating the cap counter-clockwise.
-
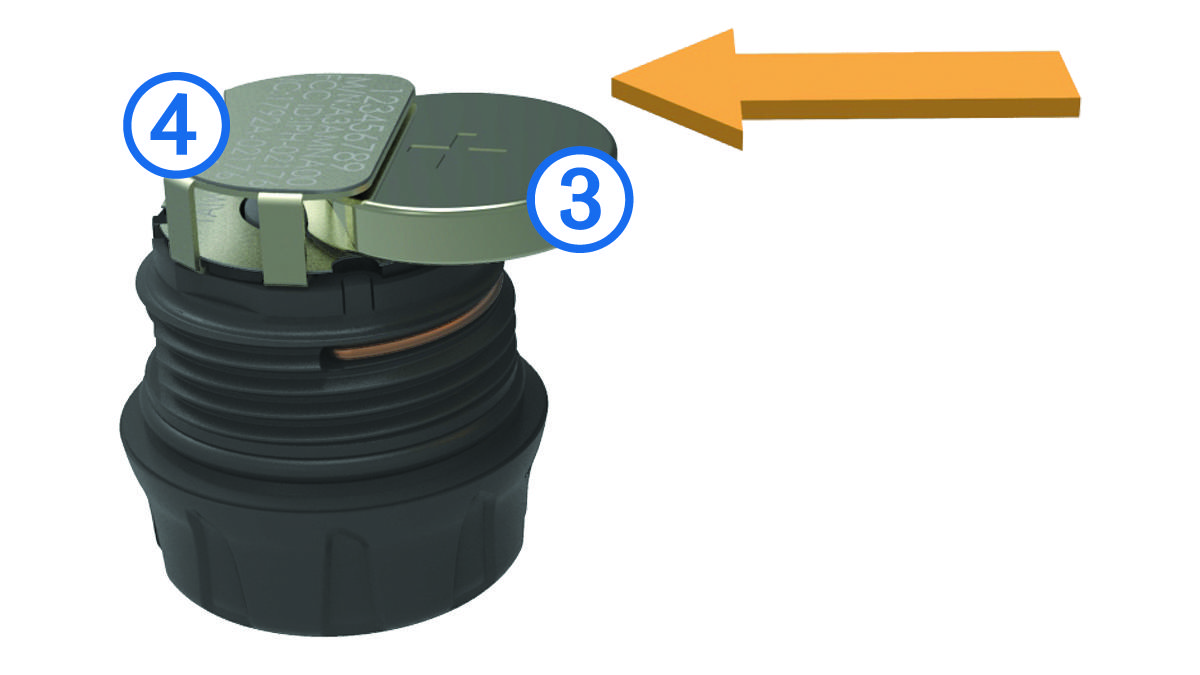
Within 30 seconds, on the sensor, insert the battery
 into the battery holder
  with the positive side facing up.
The zūmo device searches for the sensor and displays a confirmation message when the sensor pairs successfully.
TIP: If the sensor does not pair successfully, you should remove the sensor battery, and repeat steps 6 and 7.