Where To Screen
This screen allows you to quickly access all of your navigation and personal data in one place, such as chart destinations, waypoints, routes, tracks, and boundaries.
You can access the navigation data screen at any time by selecting Where To from the menu bar.
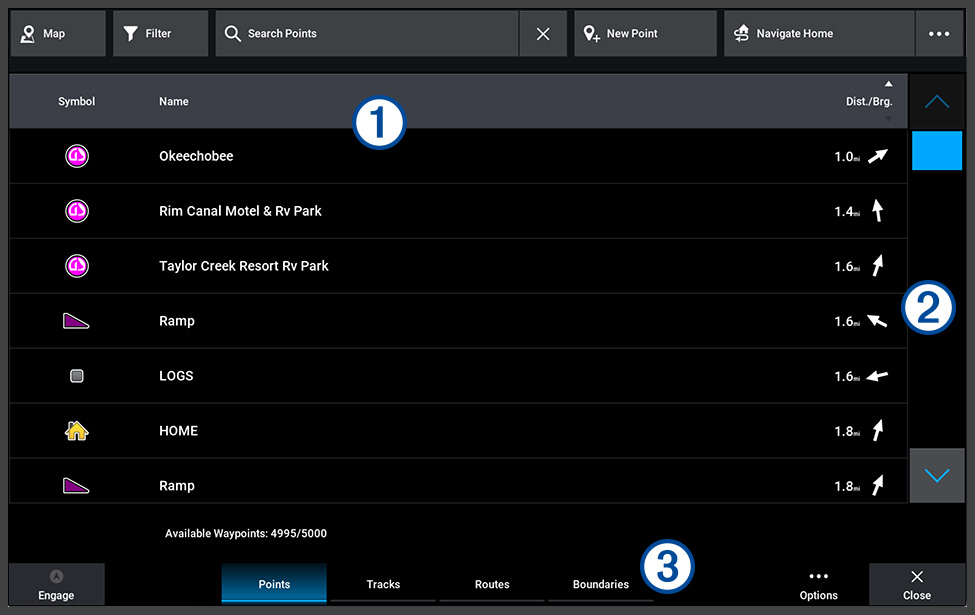
|
|
Shown only when viewing a list of reviewable items, such as points or boundaries. Select to switch to the map view to select a reviewable item from the map instead. |
|---|---|
|
|
Shown only when viewing the map. Select to switch to a list view to show a list of items instead. |
|
|
Select to filter the items shown in the selected category by providing limiting criteria. |
|
|
Select to search for an item in the selected category by typing in text. You can
select |
|
|
Shown when viewing items from the Points category. Select to add a new waypoint (Waypoints). |
|
|
Shown only when viewing items from the Tracks category. Select to save the current track (Tracks). |
|
|
Shown only when viewing items from the Routes category. Select to create a new route (Routes). |
|
|
Shown only when viewing items from the Boundaries category. Select to add a new boundary (Boundaries). |
|
|
Shown after you define your home location. Select to begin navigating home. You can
select |
|
|
Select to define your home location. |
|
|
Shows the map or a list of items you can review, edit, and set as a navigation destination, if applicable. You can select labels in the header row, such as Name or Length to sort by that column. |
|
|
Scrolls the list of items. |
|
|
Selects the category of items to show in the list or on the map. The selected category changes the options available along the top of the Where To screen. |


 to clear the search window after entering text.


