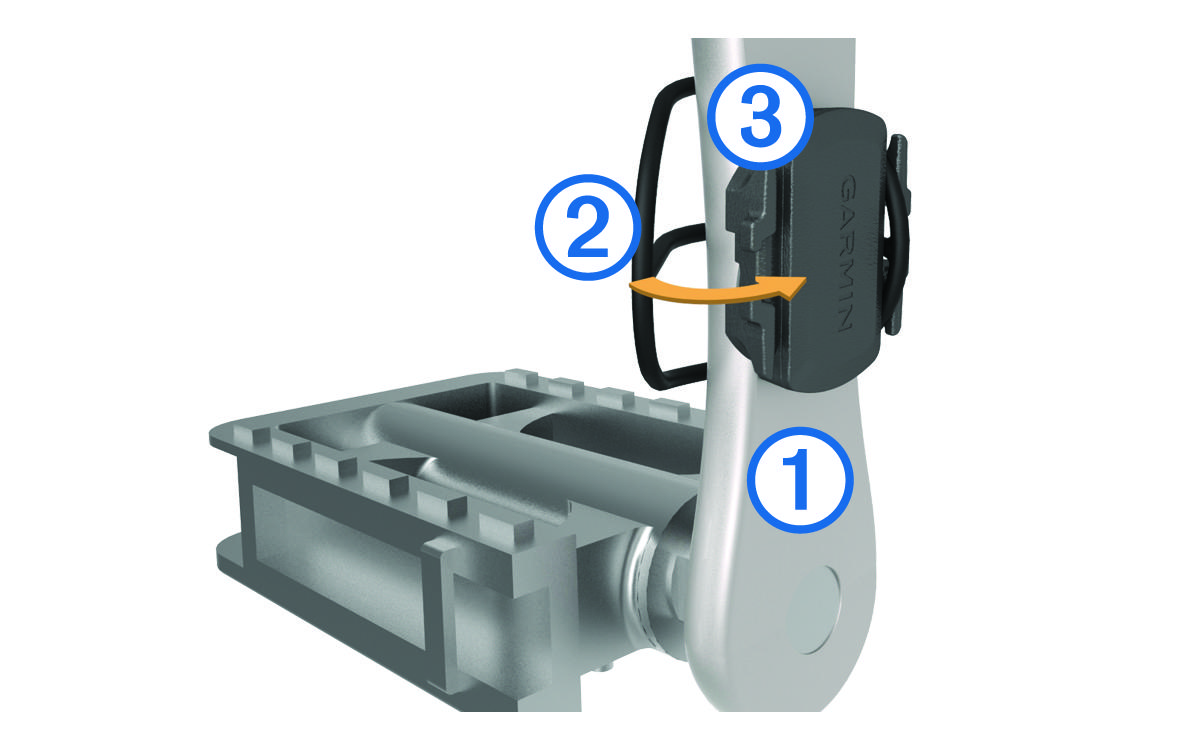
Installing the Cadence Sensor

NOTE: If you do not have this sensor, you can skip this task.
TIP: Garmin® recommends you secure your bike on a stand while installing the sensor.
  1. Select the band size that fits your crank arm Callout number one securely.

    The band you select should be the smallest one that stretches across the crank arm.

  2. On the non-drive side, place and hold the flat side of the cadence sensor on the inside of the crank arm.
  3. Pull the bands Callout number two around the crank arm, and attach them to the hooks Callout number three on the sensor.

    Cadence sensor with callouts
  4. Rotate the crank arm to check for clearance.

    The sensor and bands should not contact any part of your bike or shoe.

    NOTE: The LED flashes green for five seconds to indicate activity after two revolutions.
  5. Take a 15 minute test ride and inspect the sensor and bands to ensure there is no evidence of damage.
Copyright © Garmin. All rights reserved.GUID-D543C968-08D6-4FAF-B907-D70963D29E87 v3