Replacing the Cadence Sensor Battery
The device uses one CR2032 battery. The LED flashes red to indicate a low battery level after two revolutions.
-
On the back of the sensor, push out the lever
 and use the tab
  to rotate the cover counter-clockwise until the marker
  points to unlocked
  .
NOTE: Some models do not have the lever and tab on the back of the sensor. You still have to rotate the battery cover counter-clockwise.
.
NOTE: Some models do not have the lever and tab on the back of the sensor. You still have to rotate the battery cover counter-clockwise.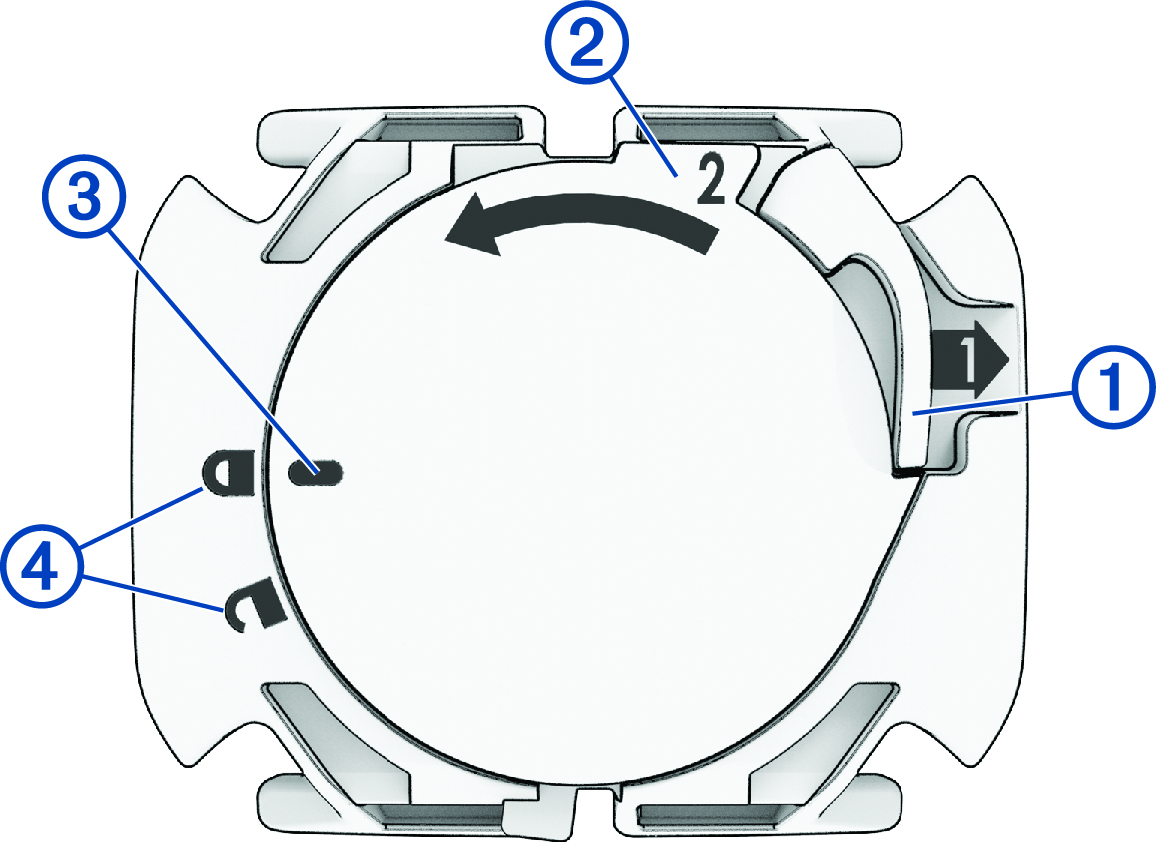
Replacing the Cadence Sensor Battery
NOTE:
Use these instructions for product models that have a coin slot on the battery door.
The device uses one CR2032 battery. The LED flashes red to indicate a low battery level after two revolutions.
-
Locate the circular battery cover on the back of the sensor.

-
Remove the cover and the battery .