Steering Actuator Routine Maintenance and Storage Information
To keep the autopilot functioning properly, it is recommended that you perform routine maintenance to the steering actuator throughout the boating season.
You must use high-quality marine-grade grease that is compatible with nitrile seals when lubricating the mounting and connection points. You must use AeroShell® 64 grease when lubricating the leadscrew inside the actuator tube. Any other type of grease may harden and cause the actuator to seize.
-
Once or more per season (depending on use), you should remove the steering actuator from the mount and complete these actions:
-
Clean the pivoting mount points to remove all grease and any rust.
-
Lubricate the leadscrew inside the actuator tube (Lubricating the Actuator Drive Rod).
-
Clean and apply high-quality marine-grade grease that is compatible with nitrile seals to critical locations where movement and friction occur, including:
- Mount pivot points
- Tiller-pin connector and tiller bolt
-
Clean the cable connectors, and re-apply dielectric grease to remove and prevent corrosion.
-
-
When you store the boat for the off-season, you should complete the above maintenance actions, then fully retract the actuator rod into the tube to protect it.
Lubricating the Actuator Drive Rod
You should add lubrication to the actuator drive rod at least once per boating season.
Performing maintenance while in motion, operating with the cover removed, or inserting fingers into the opening could cause serious personal injury or property damage.
You must use AeroShell 64 grease when lubricating the leadscrew inside the actuator tube. Any other type of grease may harden and cause the actuator to seize.
-
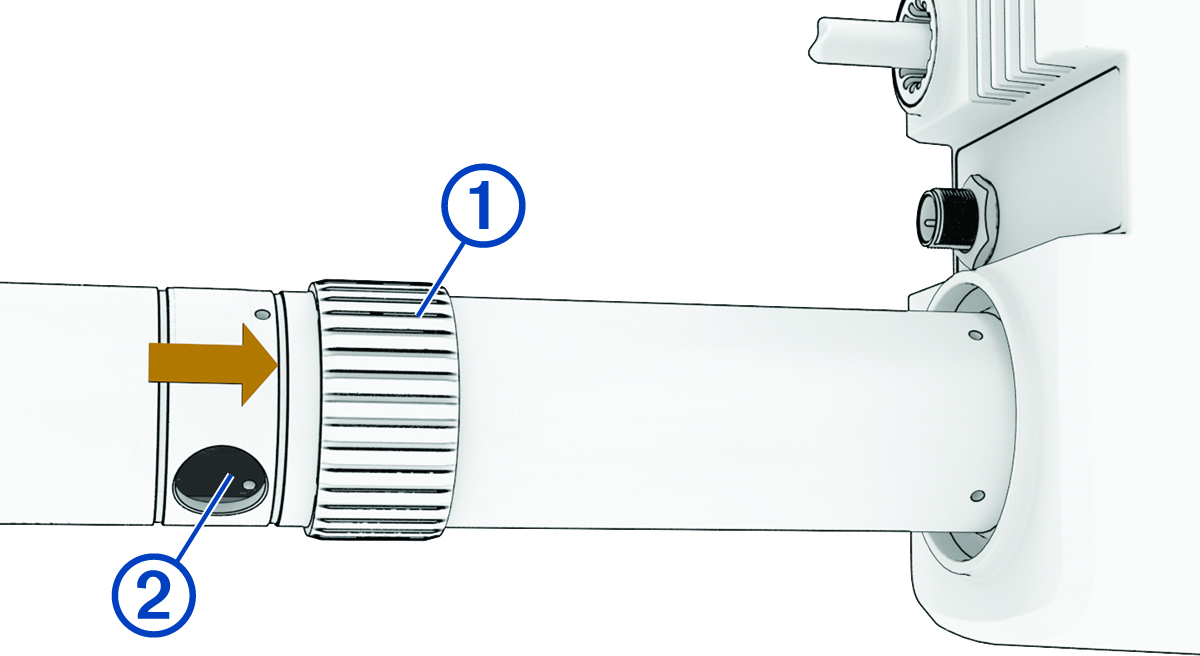
Pull the rubber service port cover down the tube to reveal the service
port .
Tips for Reducing Load
You may receive an error message if the actuator is experiencing a higher-than-expected load. This error can be caused by different factors, so if you receive this message, you should examine the installation to find and correct the cause.
-
Check the steering system for any binding or excessive resistance caused by steering components.
-
Verify that the actuator is sized appropriately for the vessel.
-
Make sure that the actuator and steering components have been properly maintained.
If the error persists after you have examined the installation and ruled out the above factors, the actuator may require service. Contact Garmin® Product Support for assistance.