Installation
Mounting Your Device in an ATV or Side-by-Side
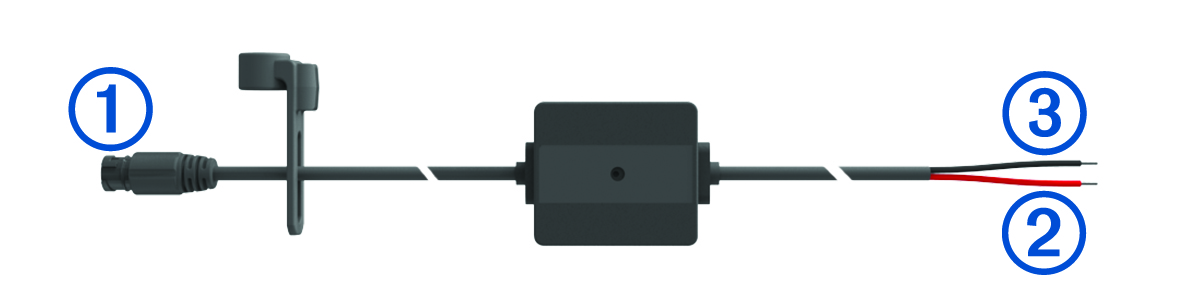
Power Cable Overview
See the Important Safety and Product Information guide in the product box for product warnings and other important information.
Garmin® strongly recommends having an experienced installer with the proper knowledge of electrical systems install the device. Incorrectly wiring the power cable can result in damage to the vehicle or the battery and can cause bodily injury.
|
|
Mount connector |
|---|---|
|
|
12 to 24 Vdc system power (red) |
|
|
System ground (black) |
Mounting Considerations
-
The device must be mounted close to the bus bar or battery and within the range of the supplied power cable.
-
The mounting location must allow for the routing and connection of all cables.
-
Excess wire should be bundled and secured using the included zip ties.
-
The electrical contacts must be free from paint.
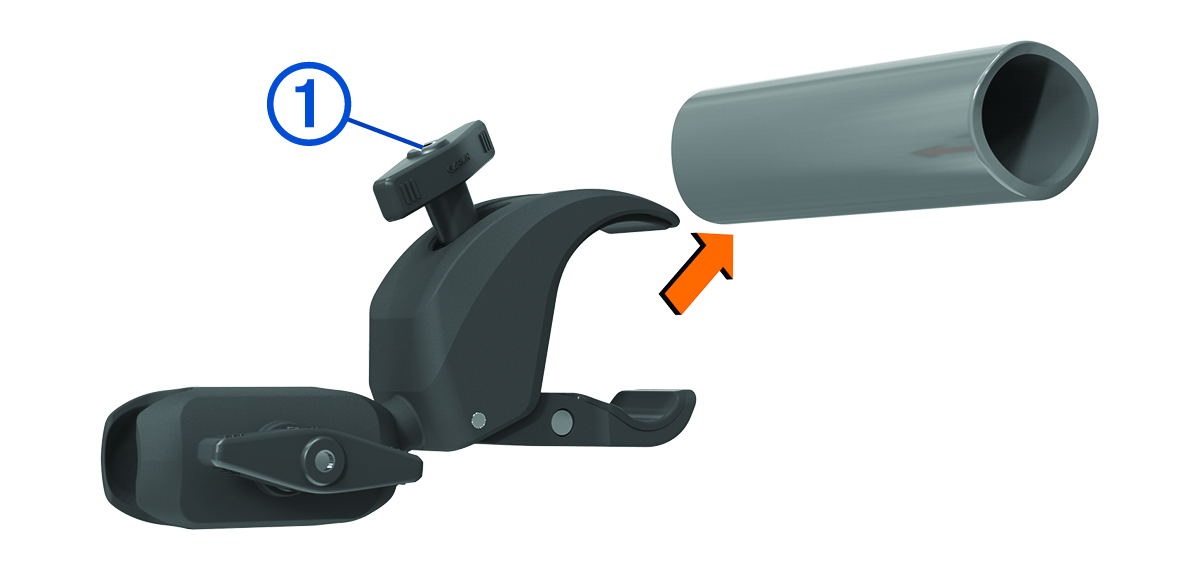
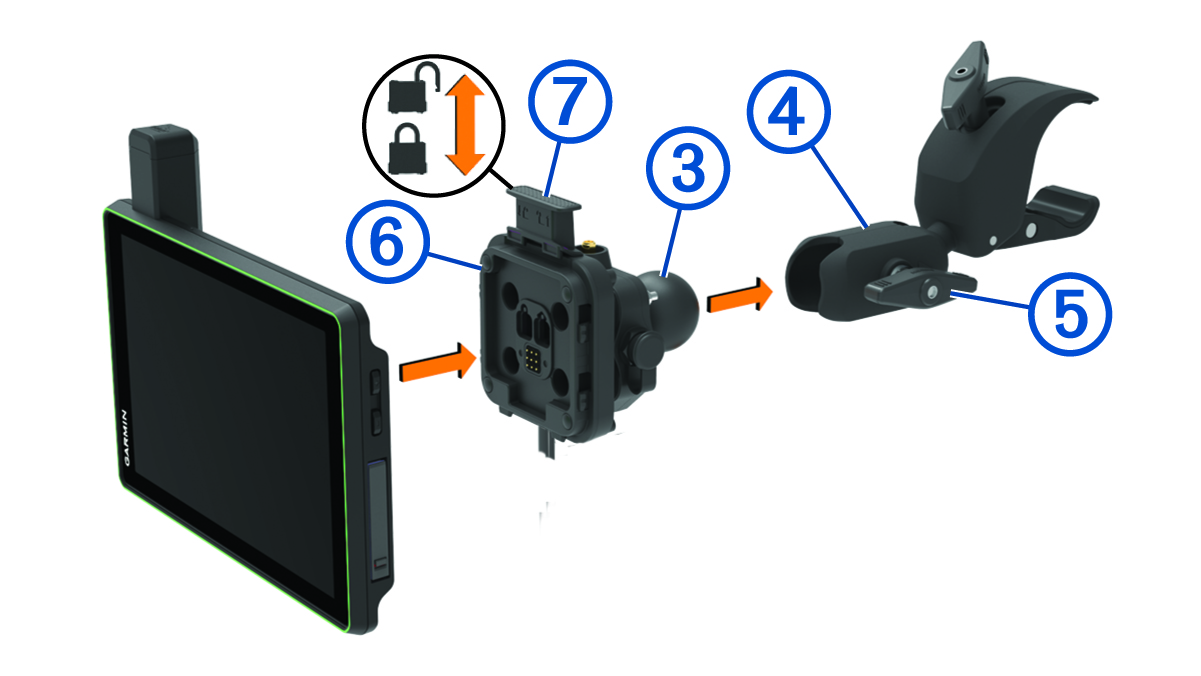
Mounting the Device on a Roll Bar
Both the device and its mount contain magnets. Under certain circumstances, magnets may cause interference with some internal medical devices and electronic devices, including pacemakers, insulin pumps, or hard drives in laptop computers. Keep the device away from medical devices and electronic devices.
-
Loosen the knob on the roll bar mount.
-
Insert the ball on the Group Ride mount into the double-socket arm .
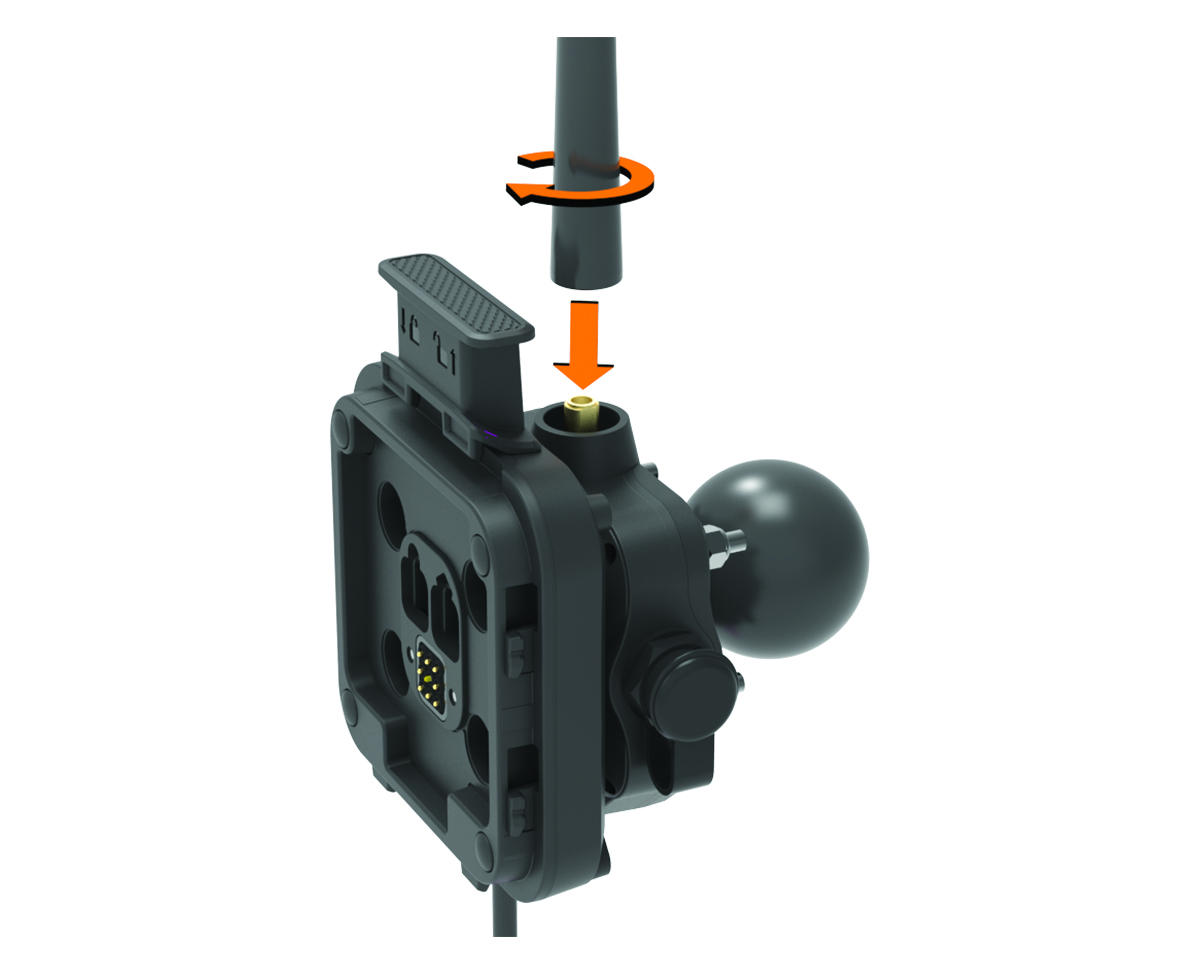
Mounting the Antenna
You can use the external antenna mount to mount your antenna in a more suitable location for your vehicle, such as a roll bar at the rear of your vehicle, to receive better radio reception. For the best results, use this method for vehicles that have a roll cage.
-
Screw down and tighten the antenna cable onto the Group Ride mount .
-
Using a flat head screwdriver or
5/16 in. (8 mm) nut driver, loosen the bolt on the external antenna mount until the ring separates.

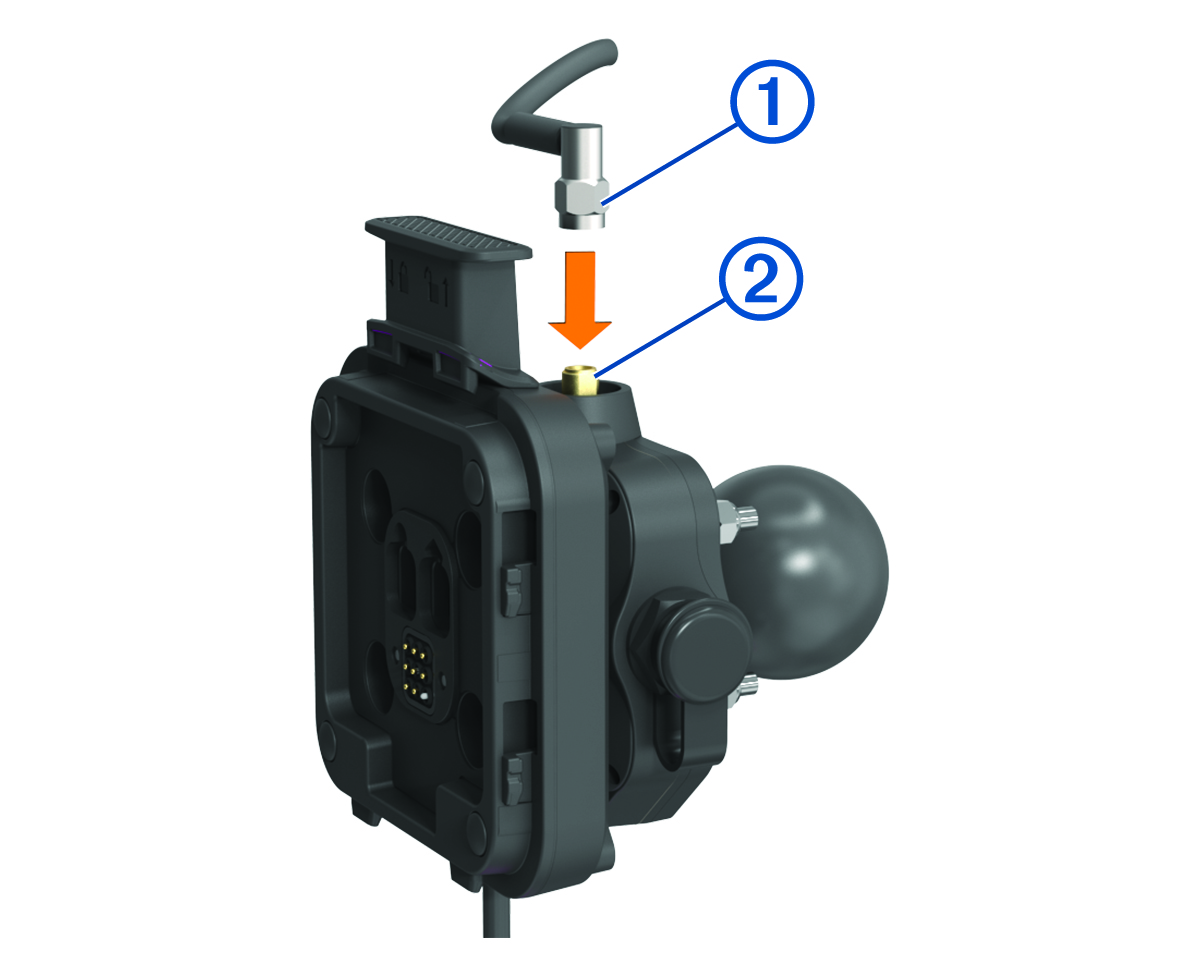
Installing the Antenna on the Group Ride Mount
For the best range performance, use the external antenna mount. You can mount the antenna directly onto the Group Ride mount when it is not possible to use the external antenna mount (Mounting the Antenna).
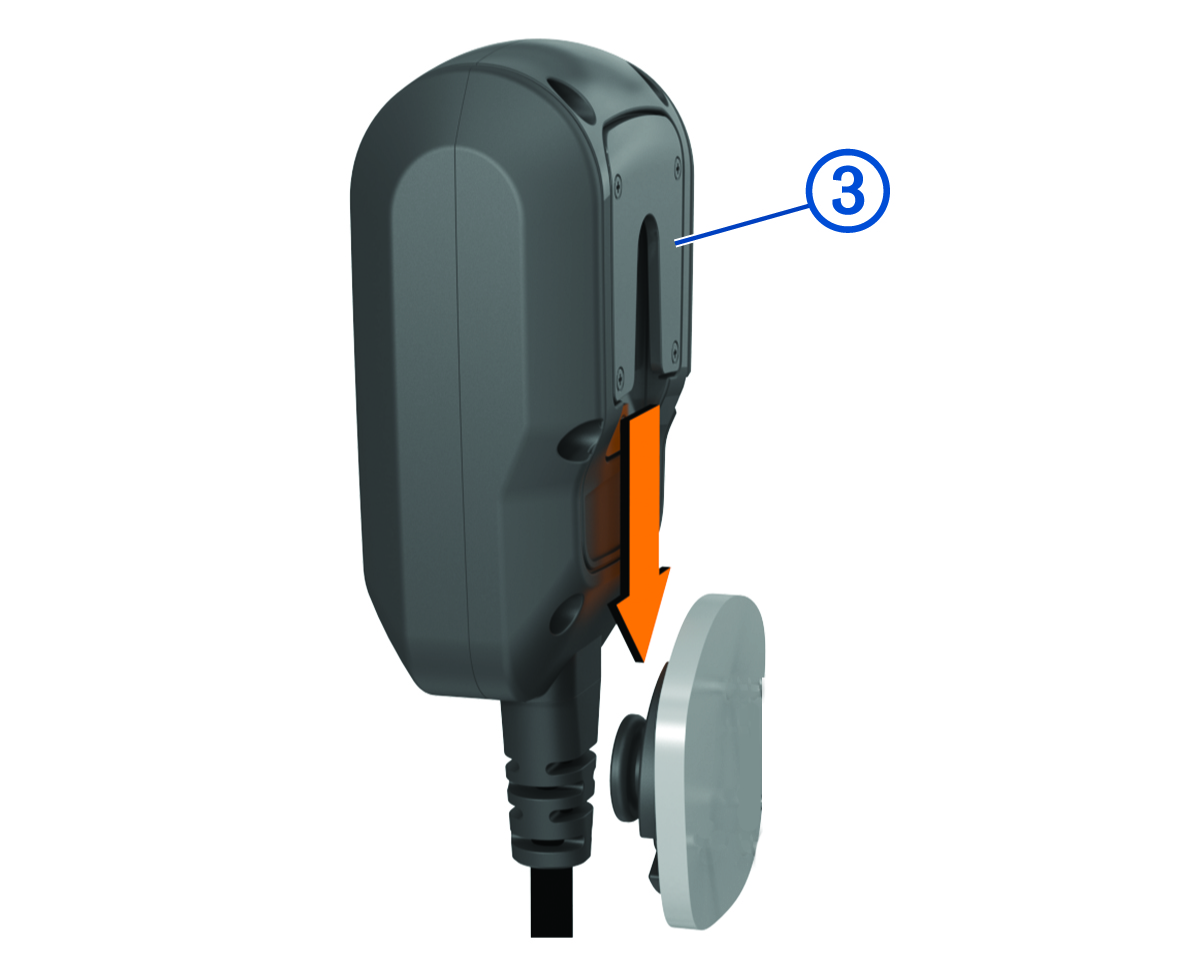
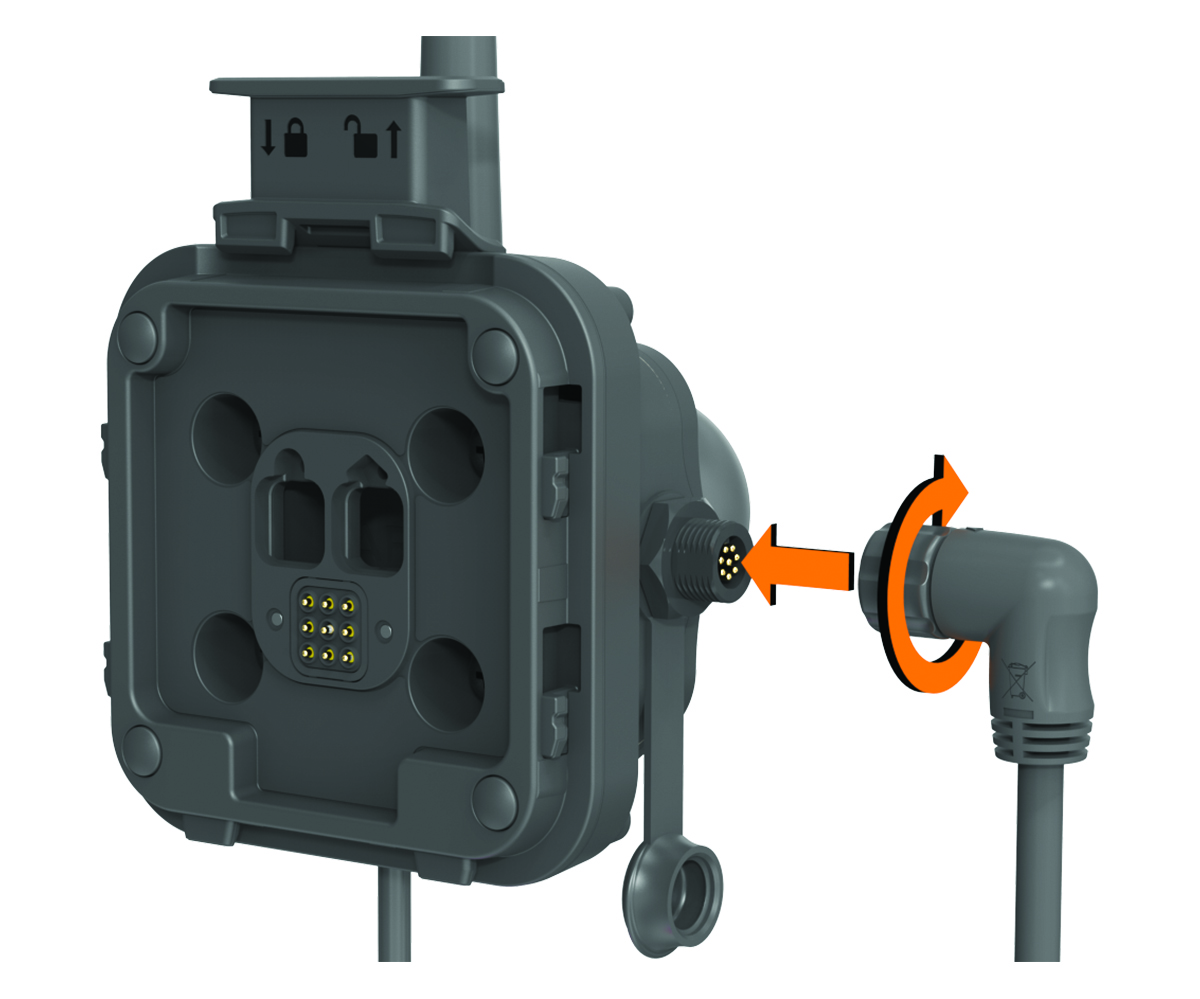
Installing the Fist Microphone and Mount
Before you can attach the fist microphone mount to your dashboard, you must select a suitable location on the dashboard.
It is your responsibility to ensure the mounting location complies with all applicable laws and ordinances, and does not block your view of the road during the safe operation of your vehicle.
Avoid wires, gauges, air bags, air bag covers, HVAC, and other items when drilling pilot holes and attaching the mount to the vehicle. Garmin is not responsible for any damages or consequences arising from the installation.
-
Align and insert the connector on the fist microphone onto the Group Ride mount.
-
Place the mount on the selected location.

-
Slide the fist microphone onto the mount.