Surface Mounting the Device
You can mount the device on the surface using only a passthrough hole for the cable if you do not want to cut a larger hole to flush mount it.
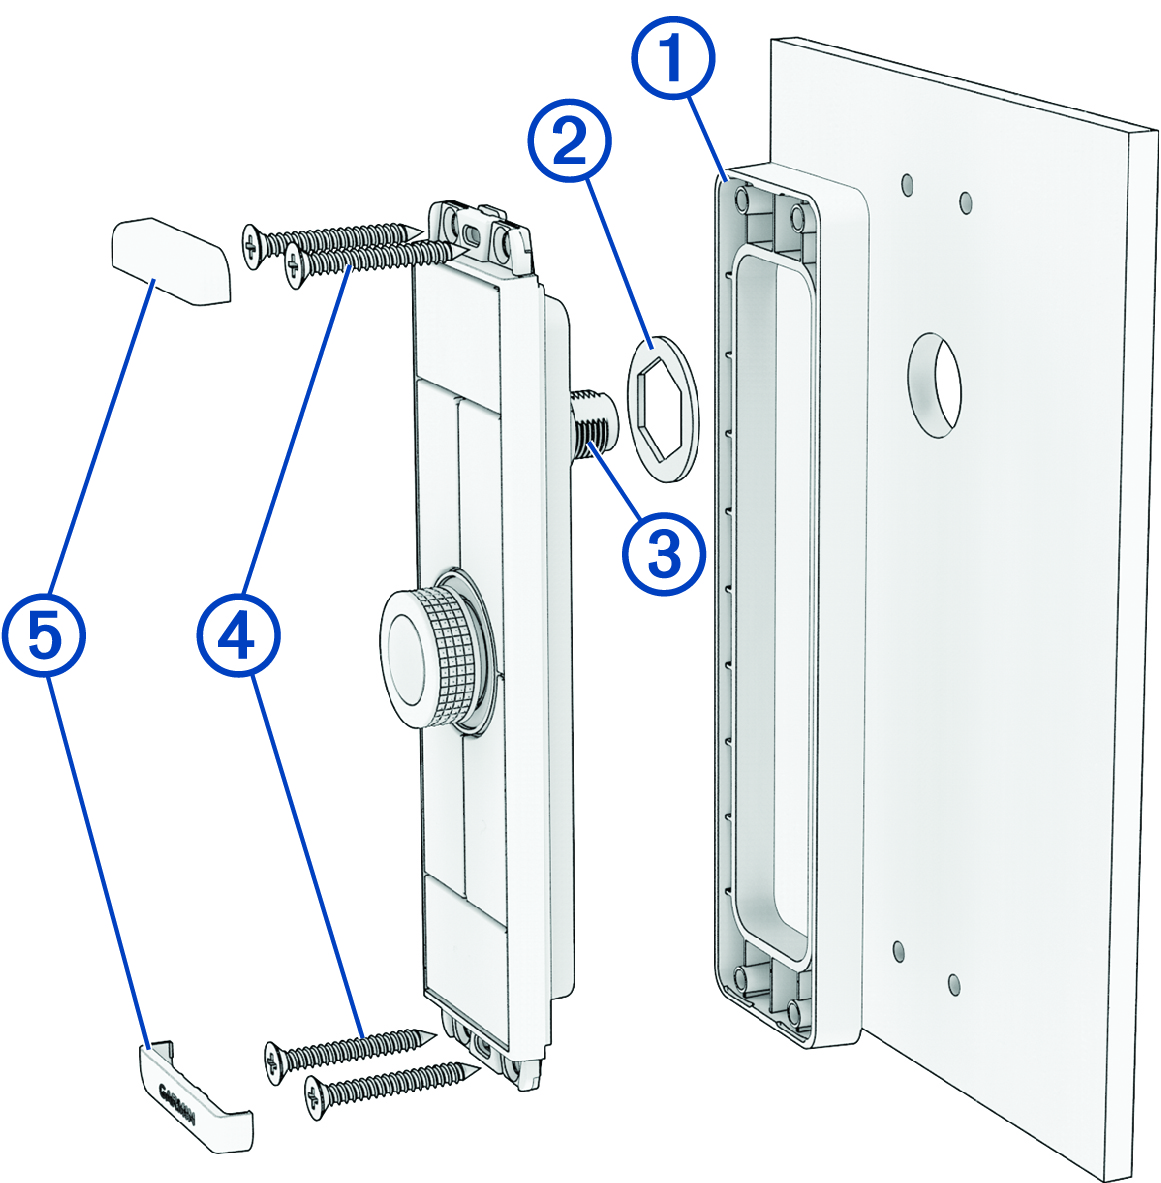
NOTE:
The image used in this procedure shows a vertical version of the device. The same steps apply for the horizontal version.
-
Place the included spacer
 on the back of the device.
-
Place the included ring gasket
 around the connector on the back of the device.
-
If you will not have access to the back of the device after you mount it, route the
NMEA 2000 drop cable through the hole, and connect it to the port on the device
 .
.
-
Secure the device to the mounting surface using the included self-tapping, countersunk wood screws
 .
NOTE: Two lengths of screws are included in the product package. You should use the longer set of screws when surface mounting the device.
.
NOTE: Two lengths of screws are included in the product package. You should use the longer set of screws when surface mounting the device. -
Snap the trim caps
 into place.