Going Diving
-
From the watch face, press
 .
.
-
Review the settings on the dive pre-check screen, and press
until the primary dive data screen appears.
NOTE: If necessary, you can press
 to edit the dive activity options, such as the gas, water type, and alerts.
-
Select an option:
-
Press
to scroll through the data screens and dive compass.
-
Press
to view the in-dive menu.
-
-
When you are ready to end the dive, ascend to the surface.
Your rate of ascent appears on the gauge.
 Green
Green
Good. Ascent is less than 7.9 m (26 ft.) per minute.
 Yellow
Moderately high. Ascent is between 7.9 and 10.1 m (26 and 33 ft.) per minute.
 Red
Red
Too high. Ascent is greater than 10.1 m (33 ft.) per minute.
-
Select an option:
-
For a Scuba Dive activity, wait for the Auto Save Timeout timer to count down.
NOTE: When you ascend to 1 m (3.3 ft.), the Auto Save Timeout timer begins counting down. You can press, and select
Stop Dive to save the dive before the timer finishes counting down.
-
For an Apnea Dive activity, press
, and select
Stop Dive.
The watch saves the dive activity.
-
Navigating with the Dive Compass
-
During a
Scuba Dive activity, press
to view the dive compass.
-
Press
, and select
to set the heading.
The compass indicates your directional heading with a green mark.
TIP: You can quickly set the heading by holding and
.
-
Press
, and select
Compass.
Performing a Safety Stop
You should perform a safety stop during every dive to help reduce the risk of decompression sickness.
-
After a dive of at least 11 m (35 ft.), ascend to 5 m (15 ft.).
Safety stop information appears on the data screens.
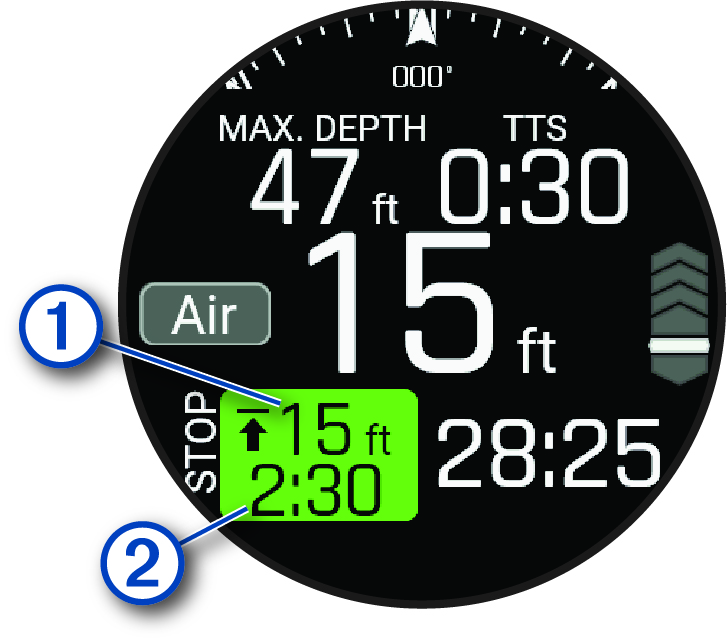
The safety stop ceiling depth.
The safety stop timer.
When you are within 1 m (5 ft.) of the ceiling depth, the timer starts counting down.
Performing a Decompression Stop
You should always perform all the required decompression stops during a dive to help reduce the risk of decompression sickness. Missing a decompression stop adds significant risk.
-
When you exceed the no-decompression limit (NDL) time, begin your ascent.
Decompression stop information appears on the data screens.
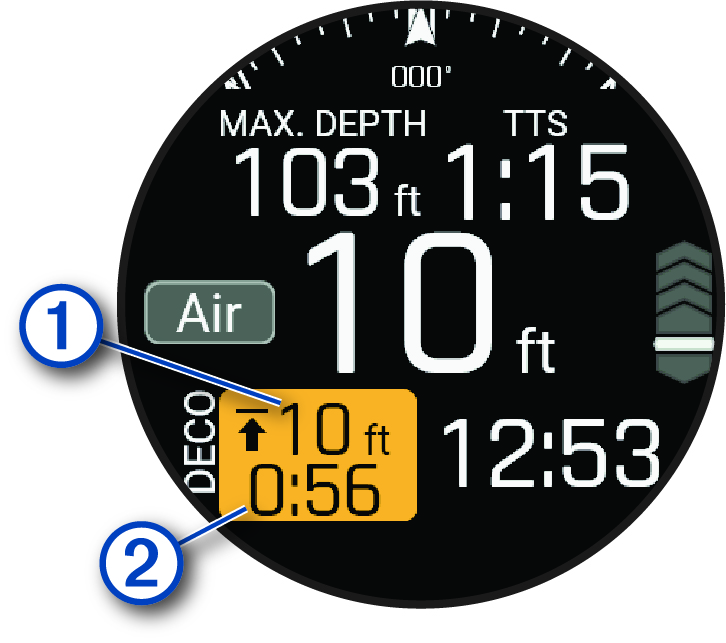
The decompression stop ceiling depth.
The decompression stop timer.
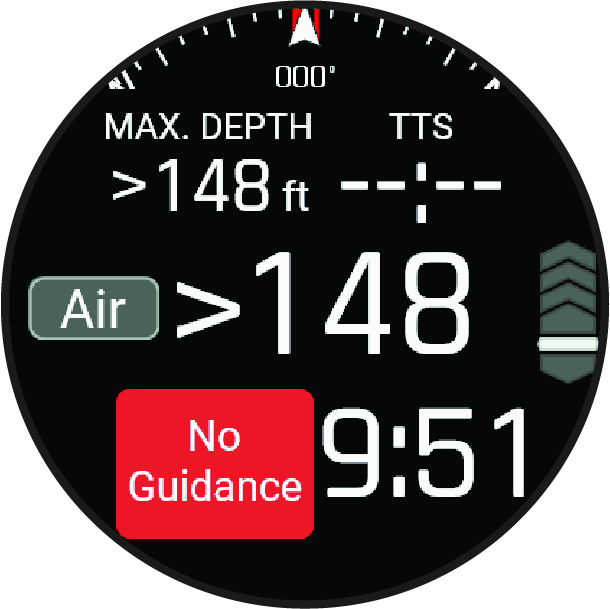
Exceeding the Depth Limit
If your watch exceeds its dive depth rating of 40 m (131.2 ft) and a dive depth limit of 45 m (147.6 ft), the watch will stop reporting depth measurements until you ascend above the depth limit.
If your watch exceeds the depth limit of 45 m (147.6 ft) during a dive, you will be unable to start any additional scuba diving activities for the next 24 hours.
Your watch is dive certified up to a dive depth rating of 40 m (131.2 ft.). When you exceed a dive depth limit of 45 m (147.6 ft.), the watch stops reporting the depth, and No Guidance appears on the screen. When you ascend above 45 m (147.6 ft.), the watch continues reporting the depth. Information that requires accurate tissue loading is unavailable for the remainder of the dive, including no decompression limit (NDL) time, stop times, and time to surface (TTS).
After exceeding the depth limit in a dive, the Scuba Dive activity is unavailable for 24 hours to prevent inaccurate guidance. You cannot disable the Deco Lockout feature after violating the dive depth rating of the watch (Advanced Dive Settings).