Putting on the CIRQA Smart Band

  1. Unfold the band.
  2. Form a loop by threading the band through the retaining bar.

    Diagram of the band being placed into a loop
  3. Place your arm or wrist into the loop.
  4. Select an option:
    • If you are wearing the band on your wrist, fasten the end of the band onto a hook and loop section.
    • If you are wearing the band on your arm, proceed to step 5.
  5. Slide the band onto your upper arm.

    Position of the band on an arm

    The arm band should be above your elbow.

  6. Bend your arm, and fasten the end of the band onto a hook and loop section.

    Diagram of the device being placed on an arm
  7. If necessary, remove the band from your arm, and adjust the band so it is comfortable (Tips for Wearing the Band).
  8. Position the module where it will not interfere with your activities or be laid on during sleep.

Tips for Wearing the Band

CAUTION

Some users may experience skin irritation after prolonged use of the band, especially if the user has sensitive skin or allergies. If you notice any skin irritation, remove the band and give your skin time to heal. To help prevent skin irritation, ensure the band is clean and dry, and do not overtighten the band on your arm.

The CIRQA™ smart band should be lightly snug on the arm or wrist while remaining comfortable.

  • For larger arms and wrists, fasten the strap closer to the retaining bar.
  • Check your band fit to minimize discomfort.
    NOTE: It may take time to find a comfortable fit.
  • Wear the band above your wrist bone.

    Device on the wrist
  • Do not overtighten the band on the arm or wrist.
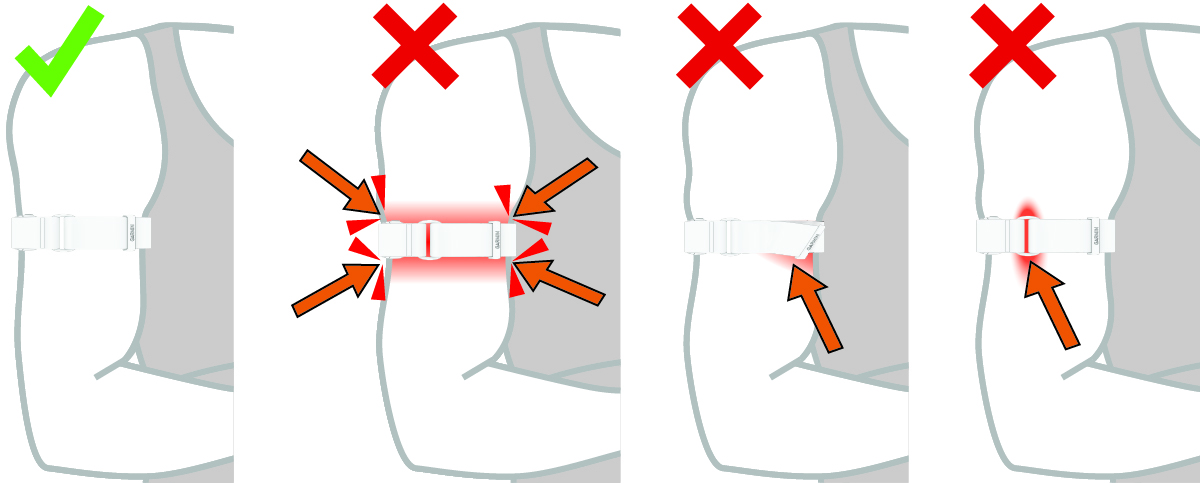
    Correct and incorrect band positions on the arm
  • Position the module on the outside of the arm.
    TIP: You can adjust the module closer to the inside of your arm if that is more comfortable.
  • Avoid laying directly on top of the module.
  • Avoid tight clothing that could compress the band.
  • Wash the band regularly, and before wearing it for the first time (Machine Washing).
GUID-D3BE589F-1A6C-4B6F-9ABC-07DB9AA6C739 v1
July 2026