Mounting the Speakers
Before mounting the speakers, you must choose a location following the guidelines above.
- Trim the template and make sure it fits in the selected location.
- Orient the template so the text is level.
- Secure the template to the selected location.
- Using a drill bit appropriate for the mounting surface, drill a hole inside the dashed line on the template to prepare the mounting surface for cutting.
- Using a jigsaw or rotary tool, cut the mounting surface along the inside of the line on the template.
- Place the speaker in the cutout to test the fit.
- If necessary, use a file and sandpaper to refine the size of the cutout.
- After the speaker fits correctly in the cutout, ensure the mounting holes on the speaker line up with the pilot holes on the template.
- If the mounting holes on the speaker do not line up, mark the new hole locations.
-
Using an appropriately sized drill bit for the mounting surface and screw type, drill the holes.
NOTICE
Do not drill the pilot holes through the holes on the speaker. Drilling through the speaker may damage it.
- Remove the template from the mounting surface.
-
Route speaker wire (not included) from the source to the speaker location (Speaker Wiring).
NOTE: Avoid routing the speaker wire near sources of electrical interference.
-
For LED models, route the appropriate wire from the speaker location to the location of the LED controller or the battery (LED Wiring).
NOTE: Avoid routing the speaker wires bundled with the LED wires.
- Connect the speaker wires to the included wiring harness while observing polarity.
- For LED models, connect the LED wires to the included wiring harness.
- Connect the wiring harnesses to the appropriate connectors on the speaker.
-
Place the speaker in the cutout with the connectors toward the bottom.
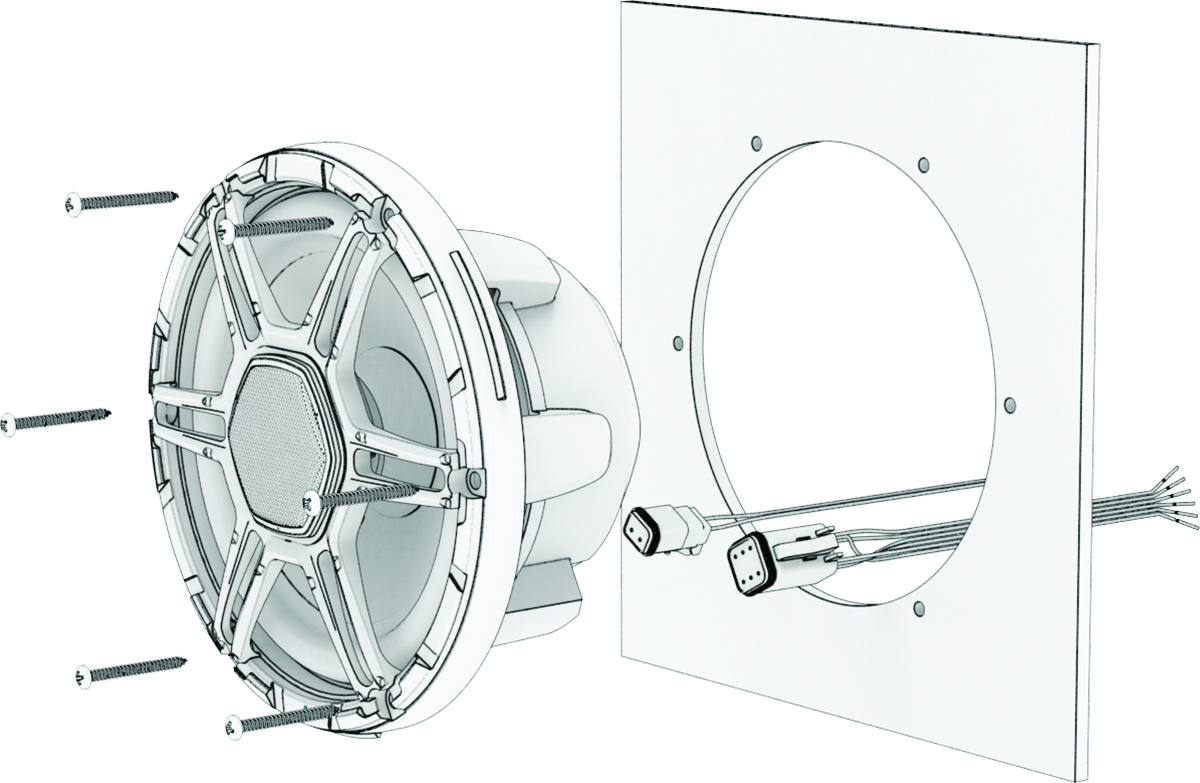
- Secure the speaker to the mounting surface using the included screws.