Going for a Ride
Your first ride on the Tacx® NEO Bike Plus trainer should be a short, manual training ride. You should learn how to use the basic features and get comfortable with the controls and settings.
-
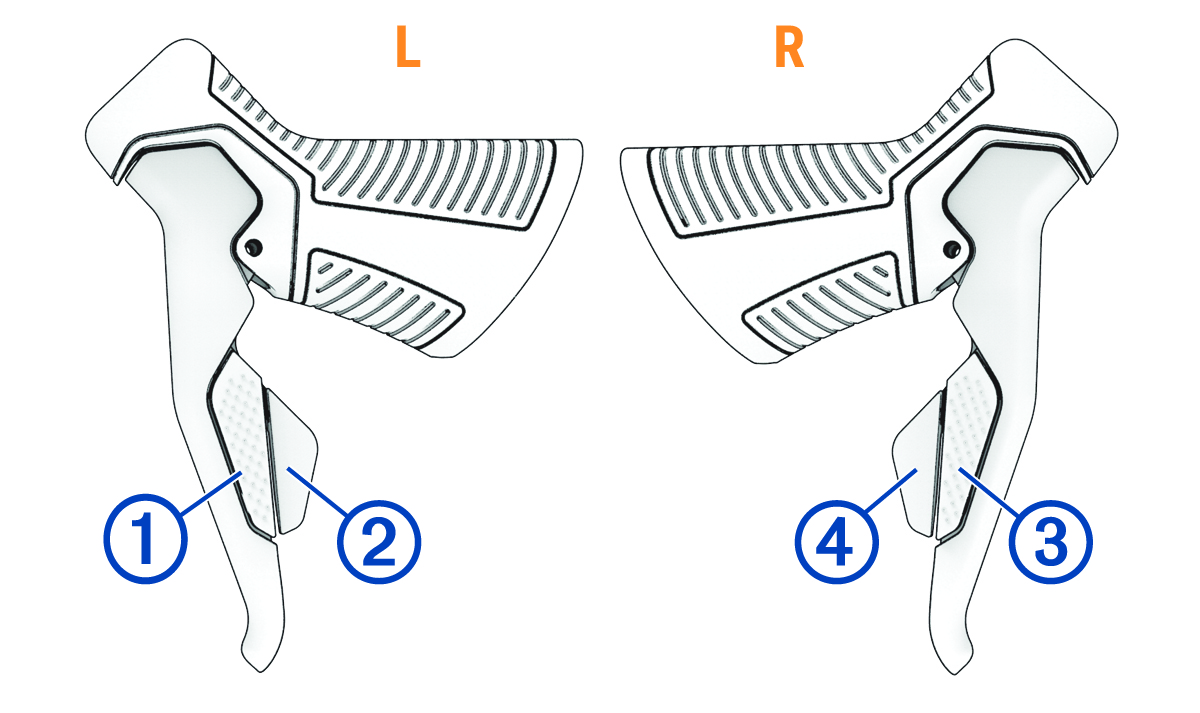
Use the shifters to change the front and rear gears:
-
Press to shift the front gear up.
-
Press to shift the front gear down.
-
Press to shift the rear gear down.
-
Press to shift the rear gear up.
The list includes the default shifter functions. You can customize the shifters to behave like Campagnolo® , Shimano®, or SRAM® shifters (Customizing the Trainer Settings from the App).
-
-
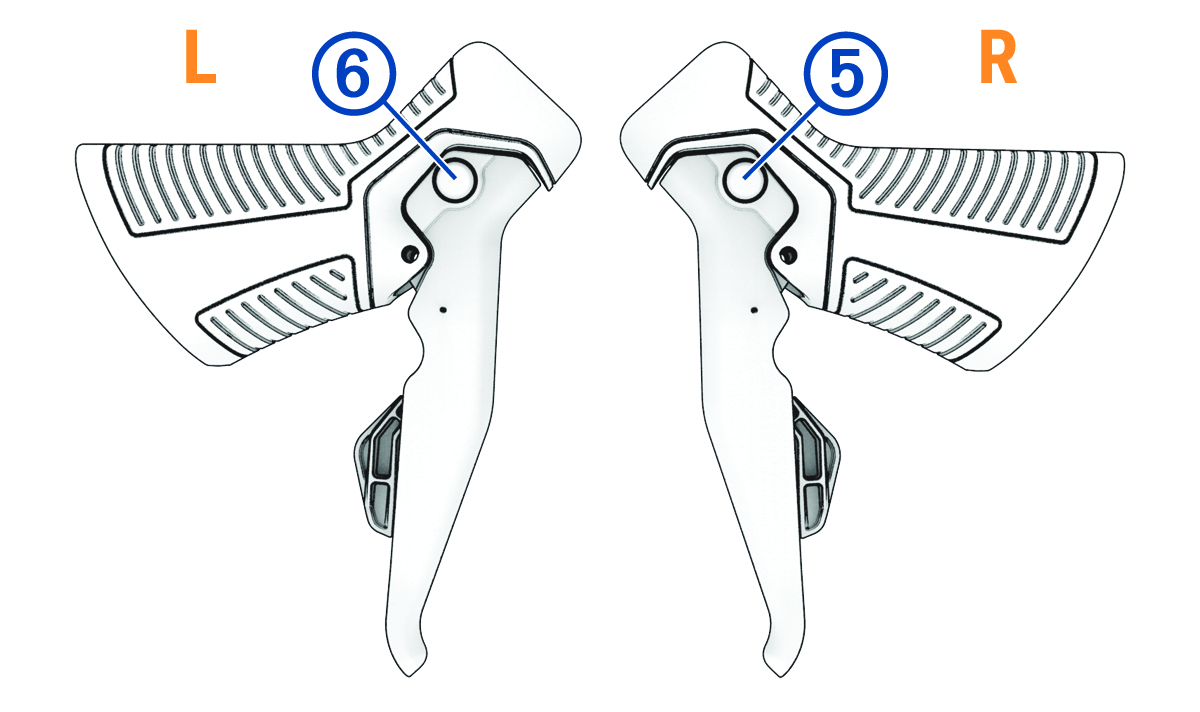
Hold both control buttons to select a manual training mode (Training Modes).
Adjusting the Fan Speed
After you pair your trainer to the Tacx Training app and start an activity, the fan behavior is determined by the settings in the app (Customizing the Trainer Settings from the App). You can also manually adjust the fan speed.
Training Modes
You can choose a training mode when you are doing a manual (stand alone) workout on your Tacx NEO Bike Plus trainer. Training modes are not available if you are connected to the Tacx Training app or another third-party app.
|
Symbol |
Mode |
Description |
|---|---|---|
|
|
Slope |
Training is based on a fixed incline so you can simulate gradients and hills. You can use the control buttons to set the incline and use the shifters to change gears. |
|
|
Power |
Training is based on a fixed power output value so you can ride at a controlled and constant effort level. You can use the control buttons to set the value. |
|
|
Resistance |
Training is based on 20 possible resistance levels so you can ride without a specific target, such as a spin class. You can use the control buttons to change the resistance level. |


Floor LED
The floor LED changes colors during training.
|
LED Color |
Status |
|---|---|
|
Blue |
The trainer is active and working properly. |
|
Purple |
Indicates medium power output. |
|
Red |
Indicates high power output. |
|
Green |
When you stop pedaling for 5 minutes, the LED flashes green one time before going into standby mode (Standby Mode). |
|
Off |
The trainer is off or in standby mode. |
Standby Mode
- External Power Connected
-
After 5 minutes of no activity, the trainer goes into standby mode.
- No External Power
-
After 10 seconds of no activity, the trainer goes into standby mode.