Introduction
See the Important Safety and Product Information guide in the product box for product warnings and other important information.
Always inspect your equipment before using a bow or firearm. You are responsible for understanding and complying with any applicable regulations for using a bow or firearm.
Always understand your target and what lies beyond your target before taking a shot. Failure to account for your shooting environment could cause property damage, injury, or death.
Only access the information displayed on the device with a glance. Always maintain awareness of your shooting environment and do not stare at the display or become distracted by the display. Failure to account for your shooting environment could cause property damage, injury, or death.
Do not interact with the device while handling your weapon. Doing so could cause distraction or reduce awareness of your shooting environment, which could lead to an accident resulting in serious personal injury or death.
Device Overview
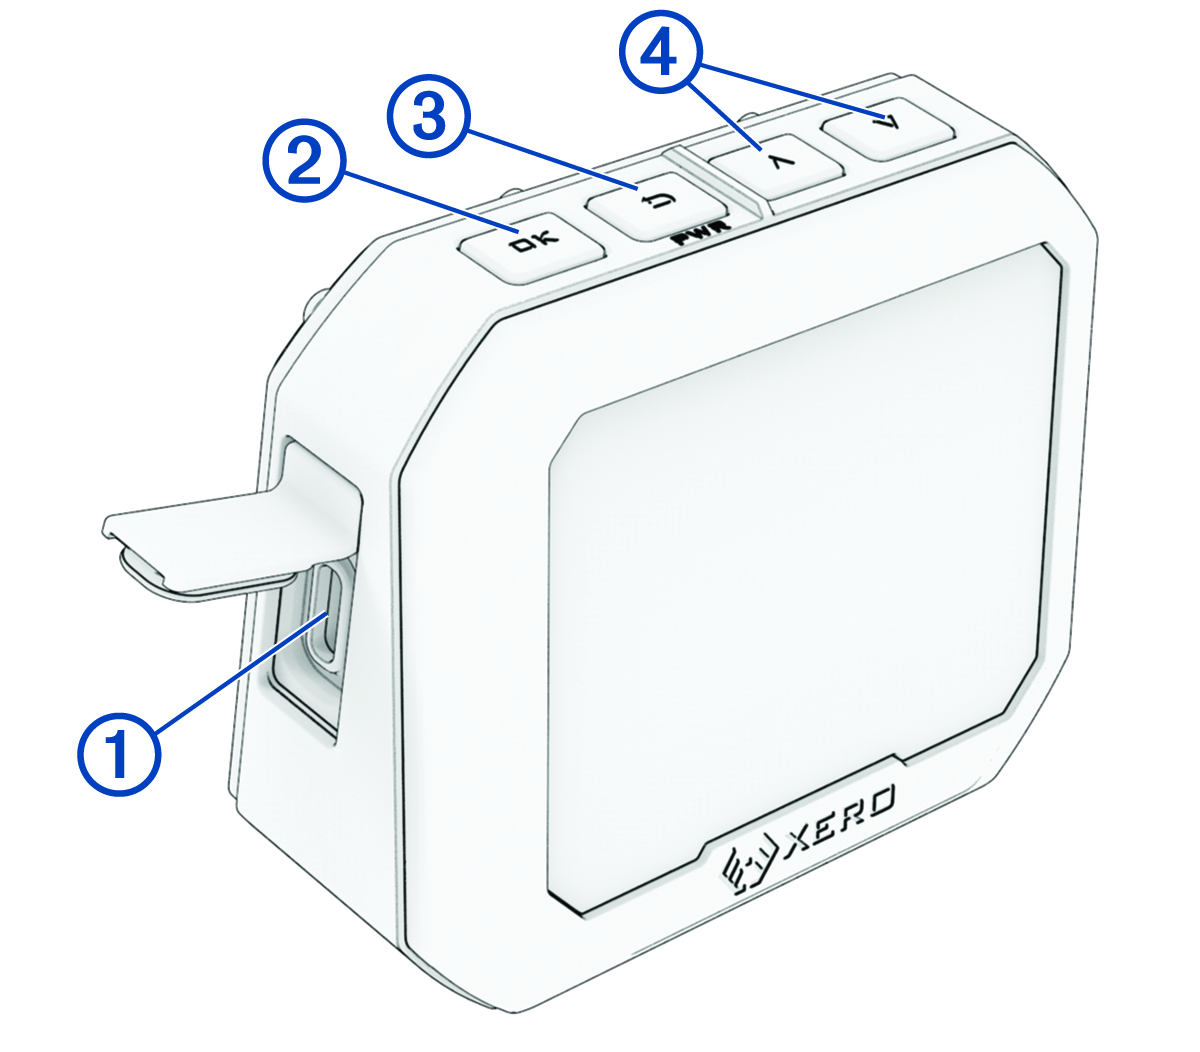
 USB-C® port (under weather cap)
-
Connect the USB-C cable to charge the device or download software updates using your computer.
 OK
OK
-
Press to select menu options.

 (PWR)
(PWR)
-
Press to turn the device on.
Press to return to the previous screen.
Hold for two seconds to turn off the device.


-
Press to scroll through the menu.
Installing the Tripod
The Xero® C1 chronograph tripod mount uses 1/4 in.-20 thread size and is compatible with most tripods.
into the bottom of the
Xero C1 chronograph.

Charging the Device
This product contains a lithium-ion battery. To prevent the possibility of personal injury, product damage, or other property damage caused by battery exposure to extreme heat, store the device out of direct sunlight.
To prevent corrosion, thoroughly dry the USB port, the weather cap, and the surrounding area before charging or connecting to a computer.
The device is powered by a built-in lithium-ion battery that you can charge using a standard AC adapter or a USB port on your computer.
Turning the Device On or Off
- To turn on the device, press PWR.
- To turn off the device, hold PWR for 2 seconds.