Getting Started
See the Important Safety and Product Information guide in the product box for product warnings and other important information.
Stereo Controls
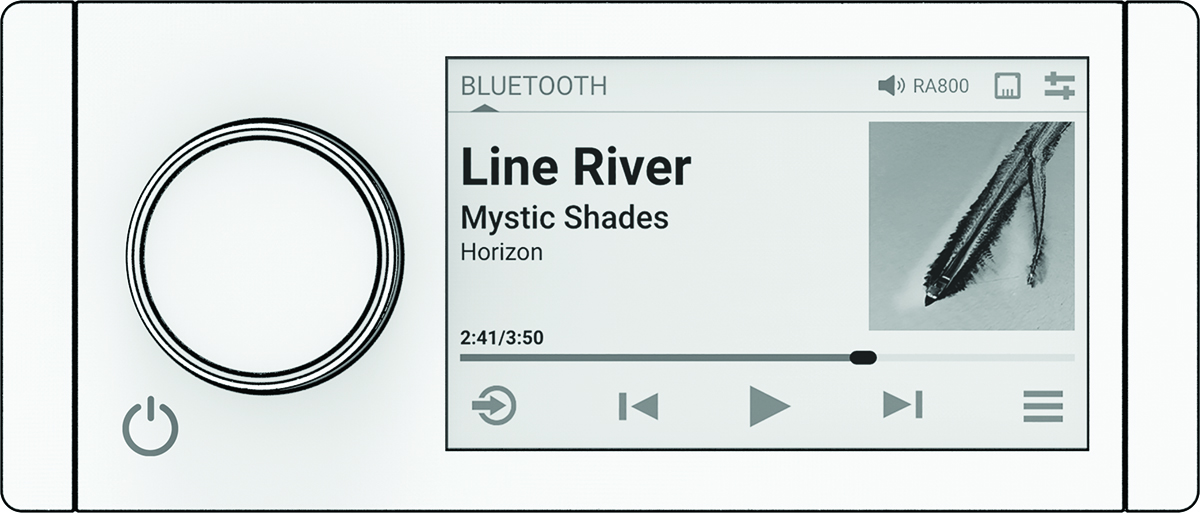
|
Dial |
|
|---|---|
|
|
Press to change the source. TIP:
You can turn the dial to browse, and press the dial to select the source. You can also swipe the screen up and down, and touch a source on the screen.
Press and hold to open the GROUPS menu when connected to a Fusion PartyBus™ network (Fusion PartyBus Networking). |
|
|
Press to open the menu. |
|
|
|

Playback Controls
The on-screen playback controls may change depending on the source selected.
|
|
Press to pause media playback. |
|---|---|
|
|
|
|
|
|
|
|
|
|
(AM and FM sources) |
Press to cycle through the tuning modes (auto or manual) and presets. Press and hold to save the current station as a preset. |
|
(DAB source) |
Press to switch between manual tuning mode and presets. Press and hold to scan for DAB stations. |
|
(Aux and ARC sources) |
Press to increase the gain. |
|
(Aux and ARC sources) |
Press to decrease the gain. |






Gesture Screen
After about fifteen seconds, a screen appears showing media information and album art only. You can use the touchscreen to interact with this screen.
-
You can swipe left or right to change the track or preset.
-
You can touch the screen for about one second to pause playback or mute the audio, depending on the source.
-
You can swipe down to return to the playback controls screen.
Entering Text
-
In a field that allows you to enter text, select
 to erase the existing characters.
-
If necessary, select
 or
or
 to use numerals, symbols, or lower-case letters when available.
- Touch a character to select it.
-
Select
 to save the new text.
Using the Dial to Select Items
You can use the dial to highlight and select items on the screen.
- Turn the dial to highlight an item on the screen.
- Press the dial to select the highlighted option.
Stereo Screen
The information displayed on the screen varies depending on the source selected. The on-screen playback controls may change depending on the source selected (Playback Controls). This example shows a track playing on a device connected using Bluetooth® wireless technology.
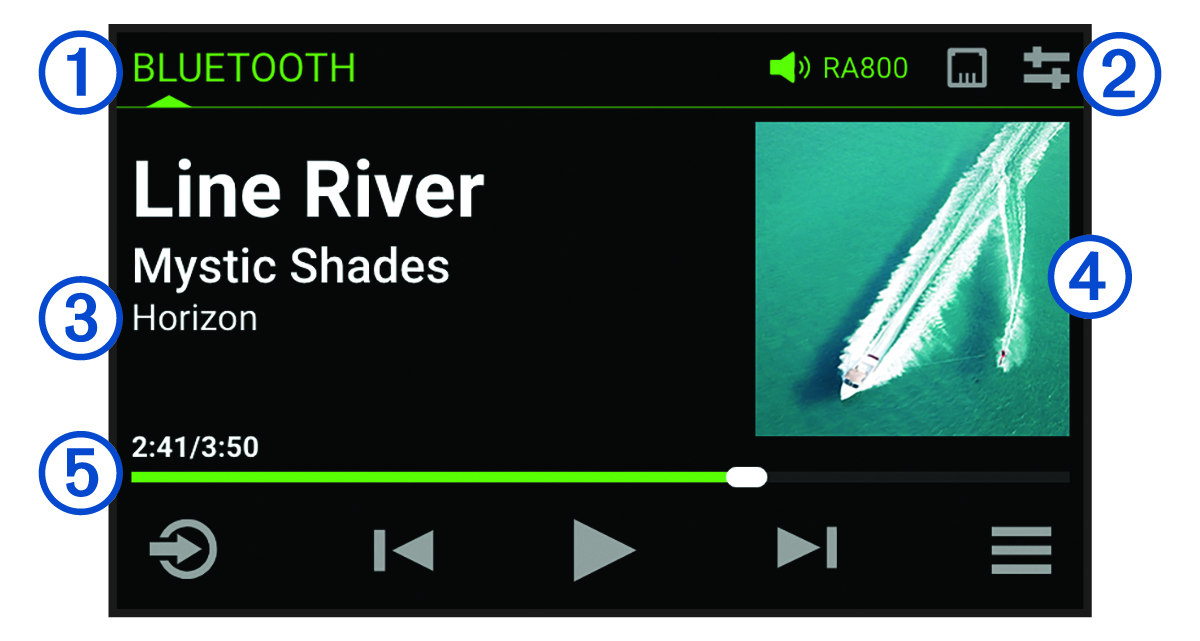
|
|
Source name |
|---|---|
|
|
Active zone, status icons, and shortcuts ( Status Icons) TIP:
Touch an icon to open the applicable page.
|
|
|
Track details (if available) |
|
|
Album art (if available from a compatible source) |
|
|
Elapsed time, track duration, and the current track number out of the total number of tracks in the playlist (if available) |
Status Icons
You can touch a status icon to open the relevant screen.

|
Opens the volume screen. |
|---|---|

|
Opens the PRESET screen. |
     
|
Opens the network settings. NOTE:
You cannot access the network settings if this stereo is part of a group.
|
Naming the Device
You should provide a unique name for this device so you can easily identify it when viewing devices on the Fusion PartyBus network.
For further customization, you can provide unique names for the sources on each stereo and turn off unused sources (General Settings).
-
Select
 > SETTINGS.
-
Select
DEVICE NAME, and select an option:
-
Select a pre-defined name from the list.
-
Select CUSTOM NAME, and enter a unique name for the device.
-
Setting the Home Zone
The home zone is the speaker zone that you adjust by default when you turn the dial.
-
Select
> SETTINGS.
- Select .
- Select a zone.
Selecting a Source
-
Select
 .
.
Adjusting the Backlight and Dial Brightness
-
Select
> BRIGHTNESS.
- Adjust the brightness level.