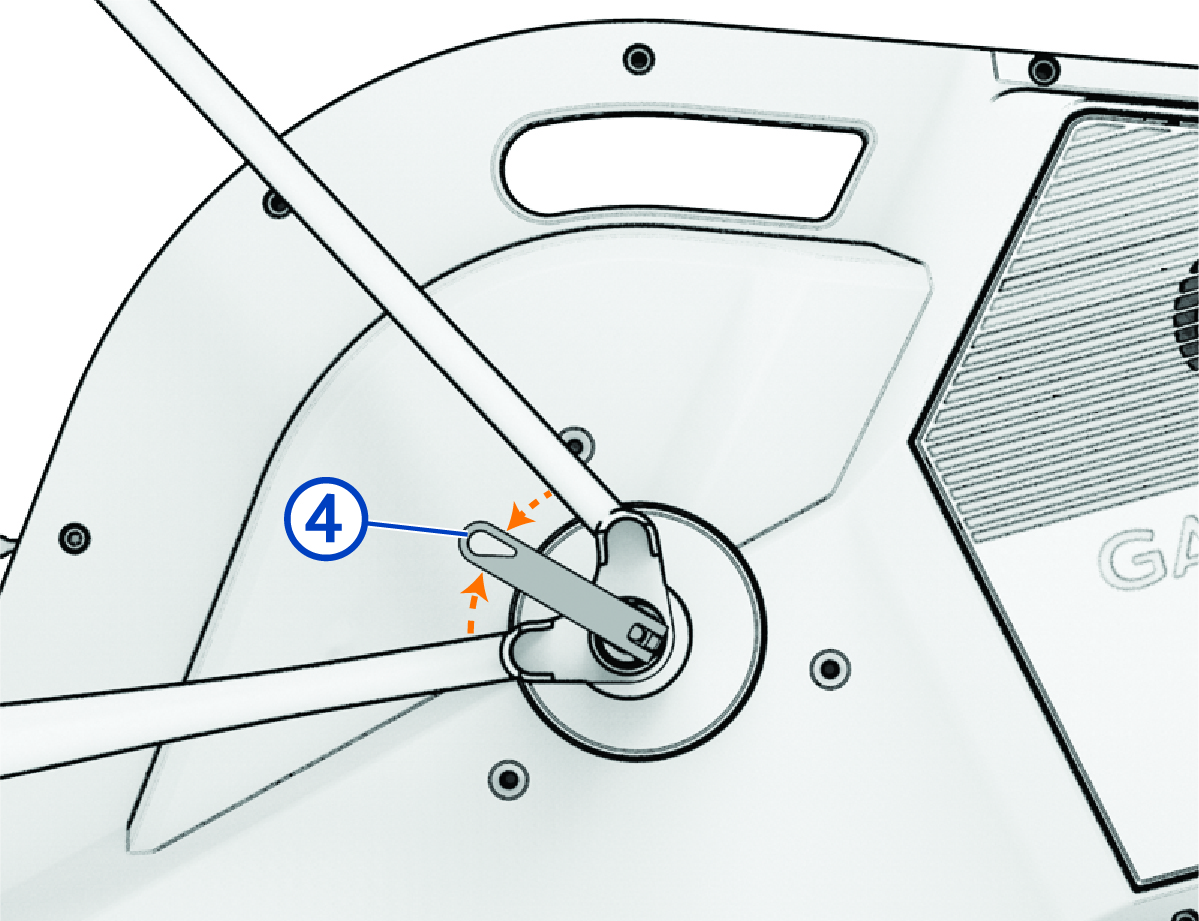
Attaching Your Quick Release Axle Bike
-
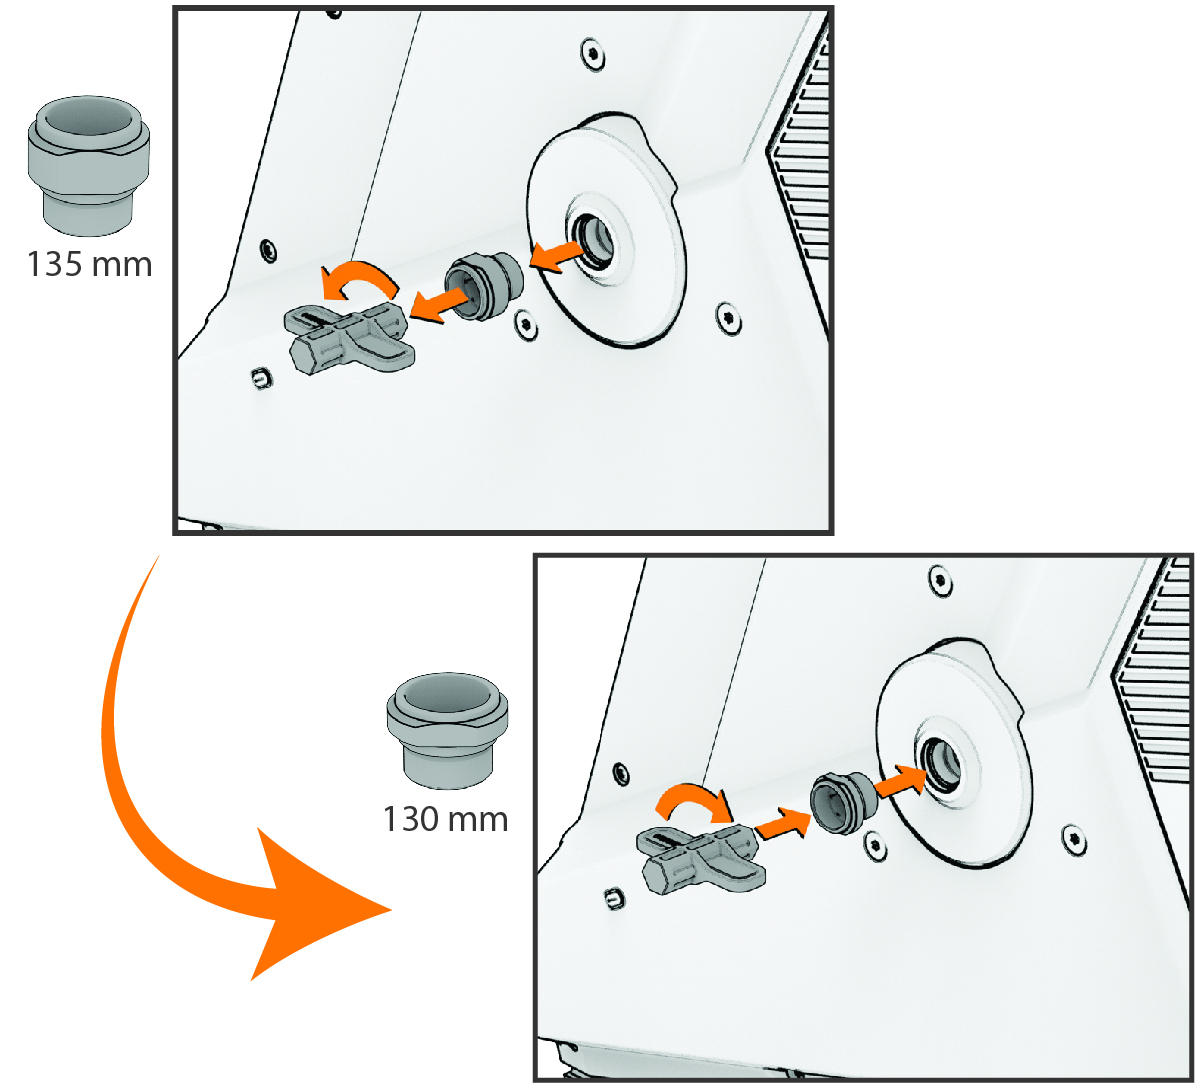
Open the installation kit
 , and select the
NDS/130 QR end cap support and the blue tool.
, and select the
NDS/130 QR end cap support and the blue tool.
-
Use the blue tool to remove the existing end cap support on the non-drive side.
-
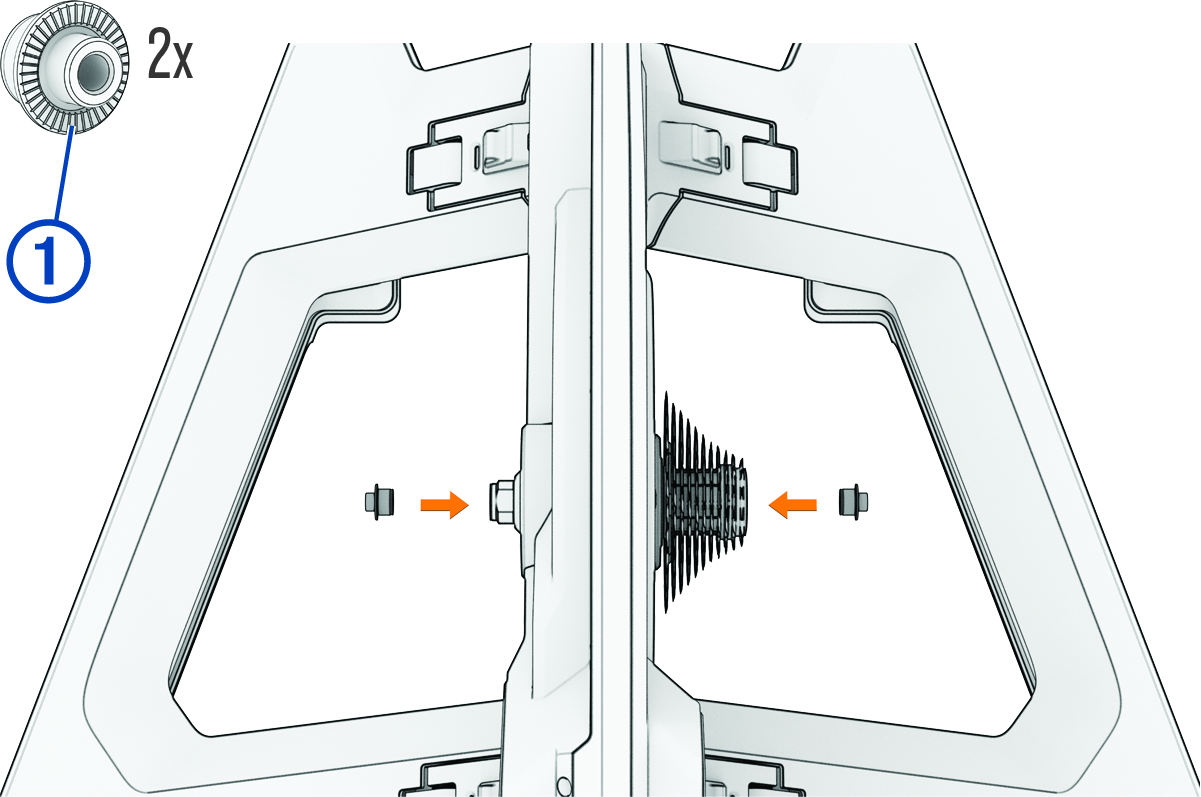
Open the installation kit , and select the
QR end caps.
-
Snap the end caps into the end cap supports.
-
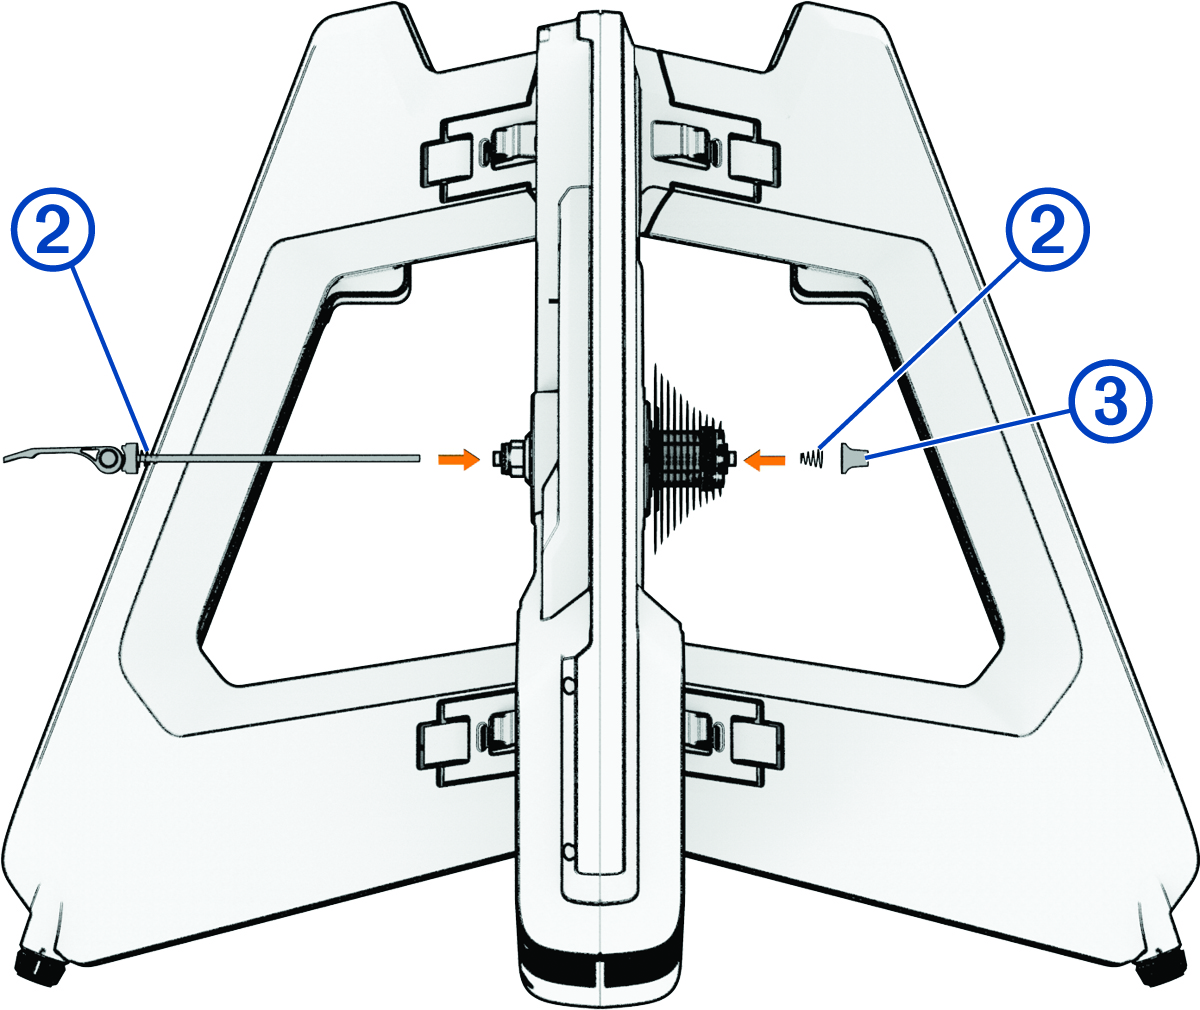
Place the conical springs on the skewer.
-
Tighten the cap, and close the quick release handle .
TIP: Close the handle between the frame bars so it's easier to grip.