Connecting the Device to Vehicle Power
-
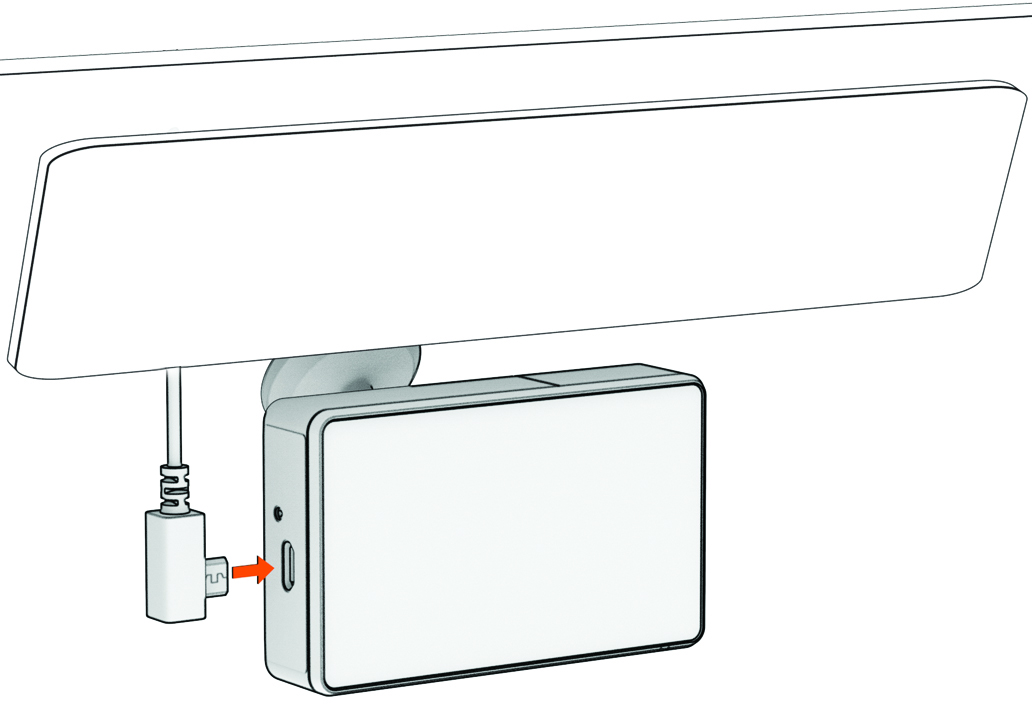
Plug the power cable into the USB port on the camera.
You can use either of the included cables to provide power to the camera. The longer 4 m (13 ft.) cable connects with the cable pointing up. The shorter 1.5 m (5 ft.) cable connects with the cable pointing down.
-
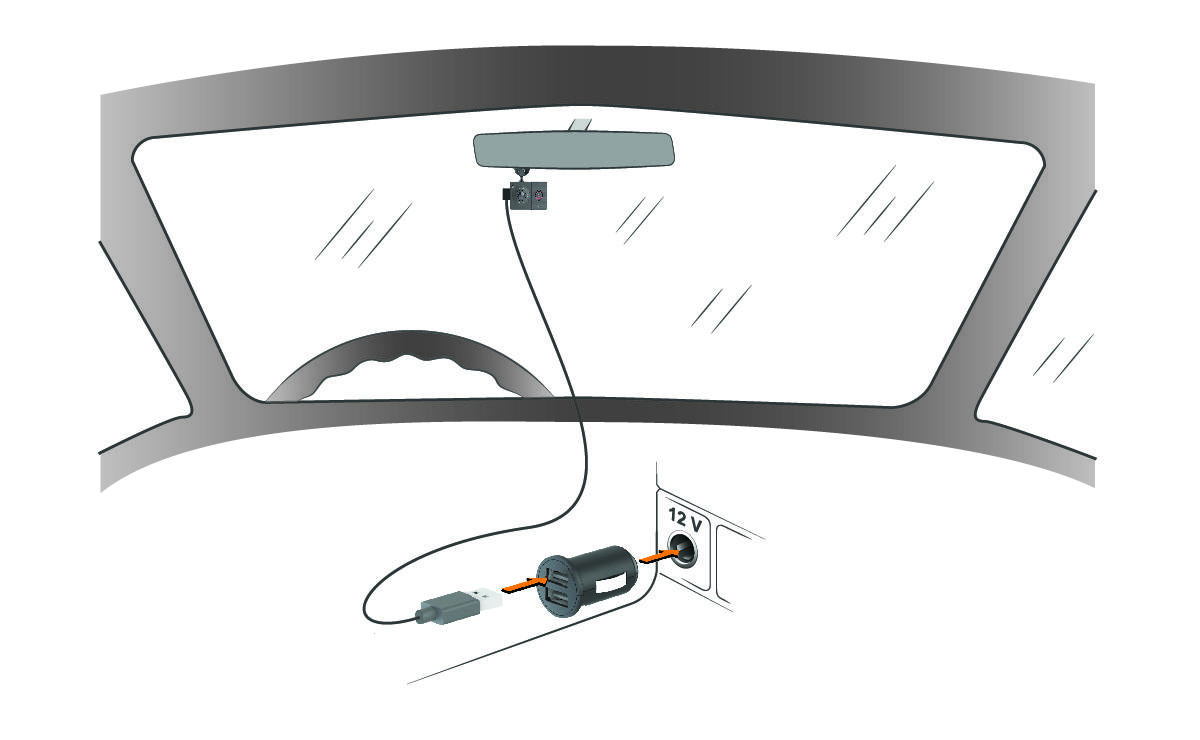
Route the power cable to your vehicle power outlet.
NOTE: You should power the camera using the included vehicle power adapter and avoid using a vehicle USB port. A vehicle USB port may not provide enough power for reliable camera operation. Also, the camera may enter USB mass storage mode if you connect it to a vehicle USB port using the shorter cable. The camera cannot record video or connect to your smartphone while it is in USB mass storage mode.
The longer, lightweight power cable is designed to be routed upward and out of sight. To hide the 4 m (13 ft.) cable, route it behind the vehicle trim along the windshield, doorframe, or dash.
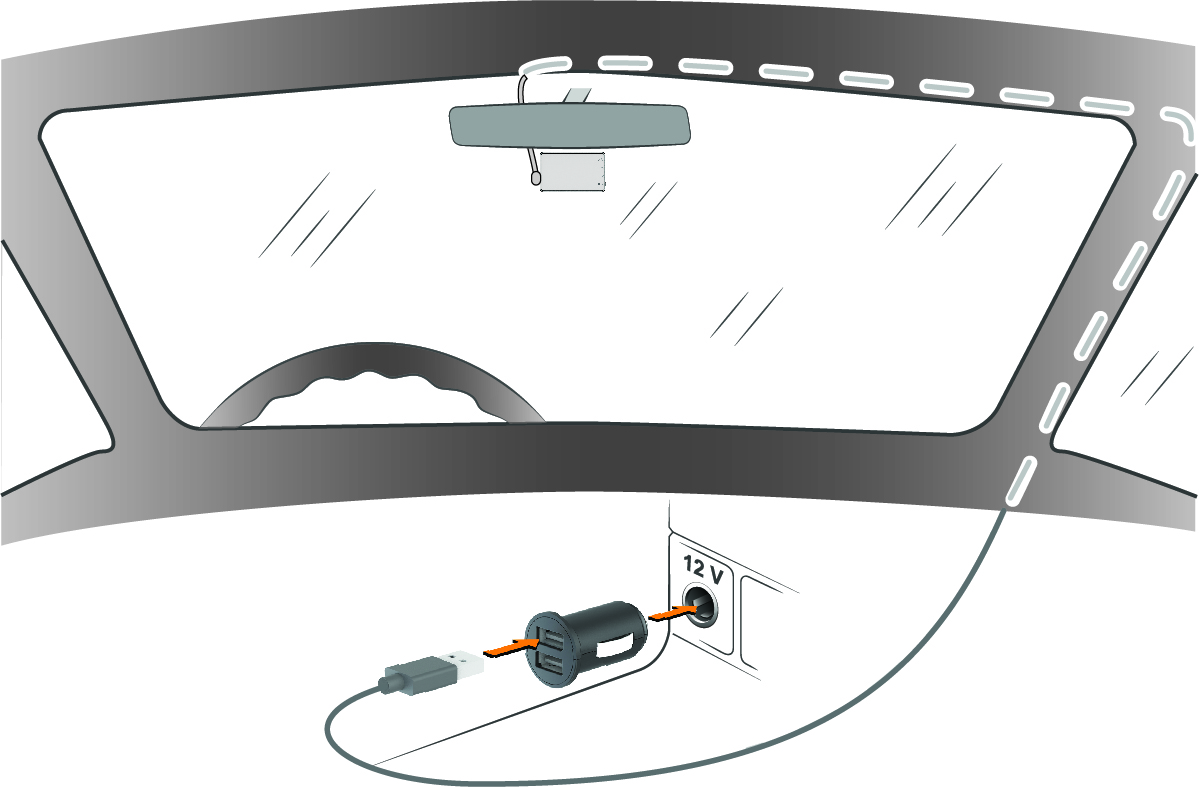
The shorter cable is designed to be routed down to your vehicle power supply.