Safety and Tracking Features
 CAUTION
The safety and tracking features are supplemental features and should not be relied on as a primary method to obtain emergency assistance. The Garmin Connect app does not contact emergency services on your behalf.
NOTICE
To use these features, the Edge 1050 device must have GPS enabled and be connected to the Garmin Connect app using Bluetooth technology. You can enter emergency contacts in your Garmin Connect account.
The Edge 1050 device has safety and tracking features that must be set up with the Garmin Connect app.
For more information about safety and tracking features, go to Garmin.com.sg/legal/idtermsofuse.
Assistance: Allows you to send a message with your name, LiveTrack link, and GPS location (if available) to your emergency contacts.
Incident detection: When the Edge 1050 device detects an incident during certain outdoor activities, the device sends an automated message, LiveTrack link, and GPS location (if available) to your emergency contacts.
LiveTrack: Allows friends and family to follow your races and training activities in real time. You can invite followers using email or social media, allowing them to view your live data on a web page.
GroupRide: Allows you to create and access shared courses, group messaging, and live location data with other riders.
GroupTrack: Allows you to keep track of your connections using LiveTrack directly on screen and in real time.
Incident Detection
CAUTION
Incident detection is a supplemental feature available only for certain outdoor activities. Incident detection should not be relied on as a primary method to obtain emergency assistance. The Garmin Connect app does not contact emergency services on your behalf.
NOTICE
Before you can enable incident detection on your device, you must set up emergency contact information in the Garmin Connect app. Your paired phone must be equipped with a data plan and be in an area of network coverage where data is available. Your emergency contacts must be able to receive text messages (standard text messaging rates may apply).
When an incident is detected by your Edge device with GPS enabled, the Garmin Connect app can send an automated text message and email with your name and GPS location, if available, to your emergency contacts.
A message appears on your device and paired phone indicating your contacts will be informed after 30 seconds have elapsed. If assistance is not needed, you can cancel the automated emergency message.
Turning Incident Detection On and Off
NOTE: Your paired phone must be equipped with a data plan and be in an area of network coverage where data is available.
- Select
 > Safety & Tracking > Incident Detection.
 - Select the activity profile to enable incident detection.
NOTE: Incident detection is enabled by default for certain outdoor activities. Depending on the terrain and your riding style, false positives can occur.
Assistance
CAUTION
Assistance is a supplemental feature and should not be relied on as a primary method to obtain emergency assistance. The Garmin Connect app does not contact emergency services on your behalf.
NOTICE
Before you can enable the assistance feature on your device, you must set up emergency contact information in the Garmin Connect app. Your paired phone must be equipped with a data plan and be in an area of network coverage where data is available. Your emergency contacts must be able to receive text messages (standard text messaging rates may apply).
When your Edge device with GPS enabled is connected to the Garmin Connect app, you can send an automated text message with your name and GPS location, if available, to your emergency contacts.
A message appears on your device indicating your contacts will be informed after a countdown has elapsed. If assistance is not needed, you can cancel the message.
Requesting Assistance
NOTICE
Before you can request assistance, you must enable GPS on your Edge device and set up emergency contact information in the Garmin Connect app. Your paired phone must be equipped with a data plan and be in an area of network coverage where data is available. Your emergency contacts must be able to receive emails or text messages (standard text messaging rates may apply).
- Hold
 for five seconds to activate the assistance feature.
The device beeps and sends the message after the five-second countdown is complete.
TIP: You can select  before the countdown is complete to cancel the message.
- If necessary, select Send to send the message immediately.
Adding Emergency Contacts
Emergency contact phone numbers are used for the safety and tracking features.
- From the Garmin Connect app, select
 .
. - Select Safety & Tracking > Safety Features > Emergency Contacts > Add Emergency Contacts.
- Follow the on-screen instructions.
Your emergency contacts receive a notification when you add them as an emergency contact, and can accept or decline your request. If a contact declines, you must choose another emergency contact.
Viewing Your Emergency Contacts
Before you can view your emergency contacts on your device, you must set up your rider information and emergency contacts in the Garmin Connect app.
Select > Safety & Tracking > Emergency Contacts.
Your emergency contacts’ names and phone numbers appear.
Cancelling an Automated Message
When an incident is detected by your device, you can cancel the automated emergency message on your device or your paired phone before it is sent to your emergency contacts.
Before the end of the 30-second countdown, hold Press and hold to cancel.
Sending a Status Update After an Incident
Before you can send a status update to your emergency contacts, your device must detect an incident and send an automated emergency message to your emergency contacts.
You can send a status update to your emergency contacts informing them you are not in need of assistance.
- Swipe down from the top of the screen, and swipe left or right to view the controls widget.
- Select Incident Detected > I’m Okay.
A message is sent to all emergency contacts.
LiveTrack
NOTICE
It is your responsibility to use discretion when sharing location information with others. Always ensure you are aware of and comfortable with the rider with whom you share your location information.
The LiveTrack feature lets you share your cycling activities with contacts from your phone and your social media accounts. While you are sharing, viewers can track your current location and view your live data on a web page in real time.
To use this feature, the Edge 1050 device must have GPS enabled and be connected to the Garmin Connect app using Bluetooth technology.
Turning On LiveTrack
Before you can start your first LiveTrack session, you must set up contacts in the Garmin Connect app.
- Select > Safety & Tracking > LiveTrack.
- Select an option:
- Select Auto Start to start a LiveTrack session each time you start this type of activity.
- Select LiveTrack Name to update the name of your LiveTrack session. The current date is the default name.
- Select Recipients to view recipients.
- Select Course Sharing if you want your recipients to see your course.
- Select Spectator Messaging if you want to allow your recipients to send you text messages during your cycling activity ().
- Select Extend LiveTrack to extend viewing of the LiveTrack session for 24 hours.
- Select Start LiveTrack.
Recipients can view your live data on a Garmin Connect tracking page.
Starting a GroupTrack Session
Before you can start a GroupTrack session, you must have a phone with the Garmin Connect app paired to your device ().
NOTE: This feature is required for group rides with the Edge 1030, 830, 530, and earlier bike computers.
For Edge 1040, 840, 540 and later bike computers, use the GroupRide feature ().
During a ride, you can see the riders in your GroupTrack session on the map.
- On the Edge bike computer, select > Safety & Tracking > GroupTrack to enable viewing connections on the map screen.
- From the Garmin Connect app, select or .
- Select Safety & Tracking > LiveTrack >
 > Settings > GroupTrack > All Connections.
 - Select Start LiveTrack.
- On the Edge bike computer, press
 , and go for a ride.
 - Scroll to the map to view your connections.
You can tap an icon on the map to view location and heading information for other riders in the GroupTrack session.
- Scroll to the GroupTrack list.
You can select a rider from the list, and that rider appears centered on the map.
Tips for GroupTrack Sessions
The GroupTrack feature allows you to keep track of other riders in your group using LiveTrack directly on the screen. All riders in the group must be your connections in your Garmin Connect account.
- Ride outside using GPS.
- Pair your Edge 1050 device with your phone using Bluetooth technology.
- In the Garmin Connect app, select or , and select Connections to update the list of riders for your GroupTrack session.
- Make sure all of your connections pair to their phones and start a LiveTrack session in the Garmin Connect app.
- Make sure all your connections are in range (40 km or 25 mi.).
- During a GroupTrack session, scroll to the map to view your connections.
- Stop riding before you attempt to view location and heading information for other riders in the GroupTrack session.
GroupRide
WARNING
While cycling, always maintain awareness of your surroundings, and operate the bicycle in a safe manner. Failure to do so could result in serious injury or death.
NOTICE
It is your responsibility to use discretion when sharing location information with other riders. Always ensure you are aware of and comfortable with the riders with whom you share your location information.
With the GroupRide feature on your Edge bike computer, you can create and access shared courses, group messaging, and live location data with other riders with compatible devices.
Starting a GroupRide Session
Before you can start a GroupRide session, you must have a phone with the Garmin Connect app paired to your device (). When prompted, you must also agree to share your live location with other riders.
- Select the GroupRide glance.
- Select
 .
. - Select Name, Date, or Start Time to edit the information.
- Select Add Course to share a course with other riders.
You can select from your saved courses, or you can select to create a new course ().
- Select Competitions to compete with other riders for rankings and awards.
- Select Generate Code.
Your Edge bike computer generates a code that you can send to other riders.
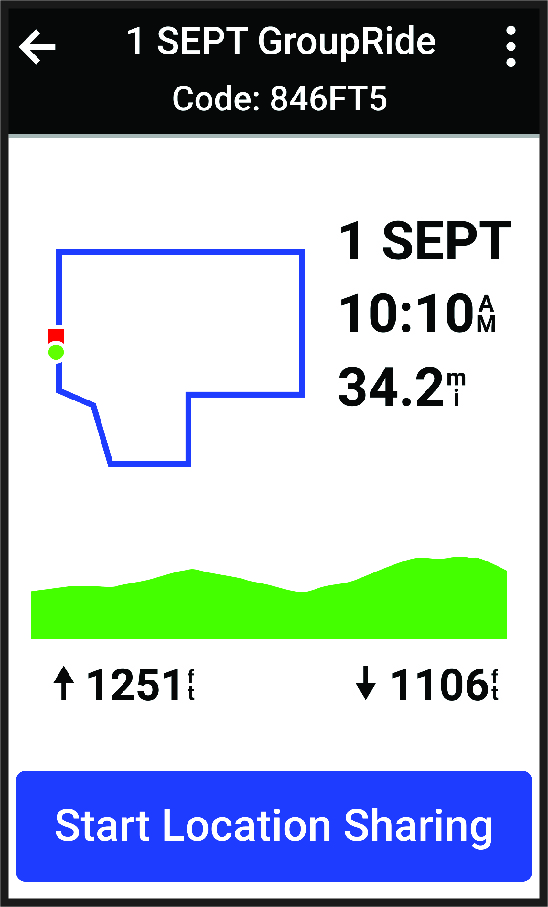
- Select > Share Code >
 .
. - Open the Garmin Connect app, and select View Code > Share.
- Select the method for sharing the code with other riders.
The Garmin Connect app shares the GroupRide code with your contacts.
- On the Edge bike computer, select Start Location Sharing.
- Press , and go for a ride.
The GroupRide data screen is added to the data screens for the active profile.
- Select a rider from the GroupRide data screen to view their position on the map, or scroll to the map to view all riders ().
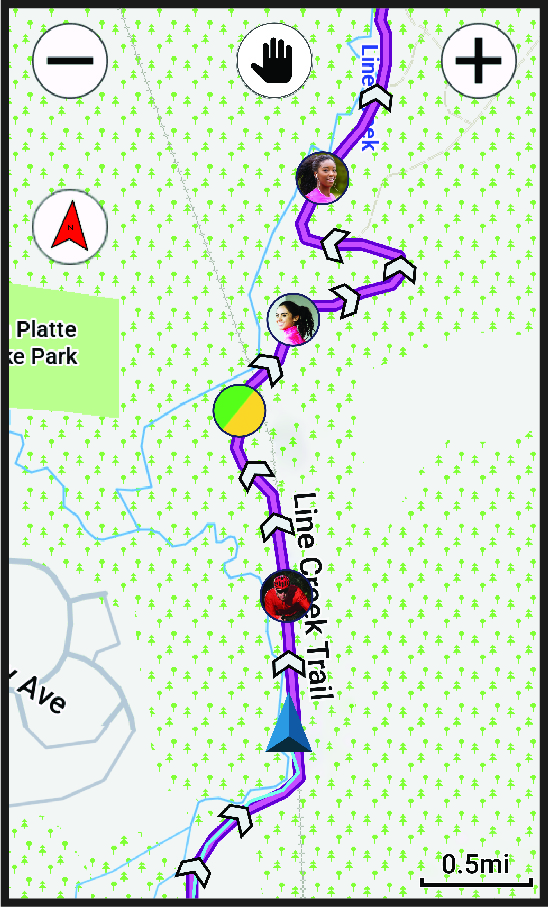
You can tap an icon on the map to view location, heading, and status information for other riders during the GroupRide session.
You can join a GroupRide session on your Edge bike computer when the GroupRide code is shared with you. You can enter the code prior to the start of the ride.
- Scroll to the GroupRide glance.
TIP: You can add the GroupRide glance to the glance loop ().
- Select Enter Code.
- Enter the 6-digit code, and select .
Your Edge bike computer automatically downloads the course.
- On the day of the ride, select Start Location Sharing.
- Press , and go for a ride.
Sending a GroupRide Message
You can send a message to other riders during a GroupRide session.
- From the GroupRide data screen on your Edge bike computer, select
 >
>  .
. - Select an option:
- Select a message from the list of preset text responses.
- Select Type Message to send a customized message.
NOTE: You can customize the preset text responses in the device settings in the Garmin Connect app. After customizing settings, you must sync your data to apply the changes to your Edge bike computer.
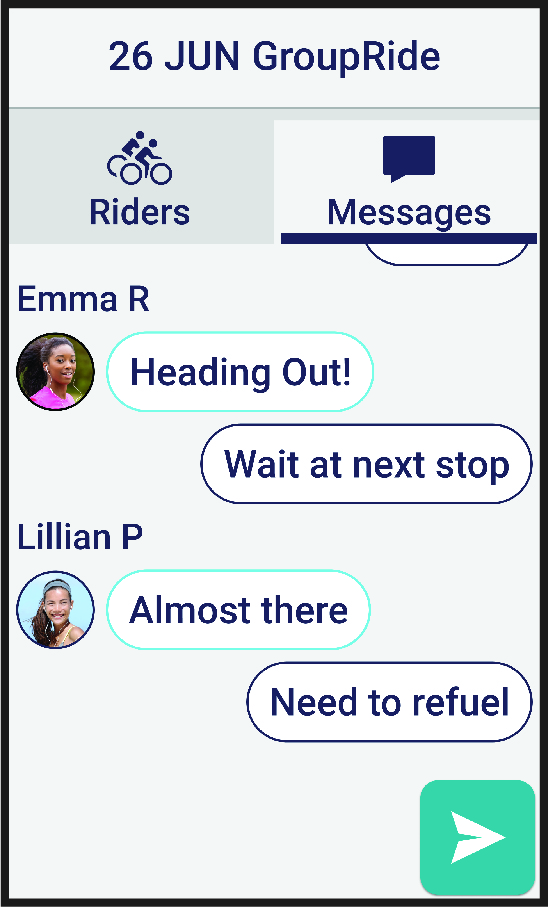
NOTE: You can scroll up to the top of the message screen to view older messages, including any messages sent before you joined the GroupRide session ().
During a ride, you can see the riders in your GroupRide session on the map.
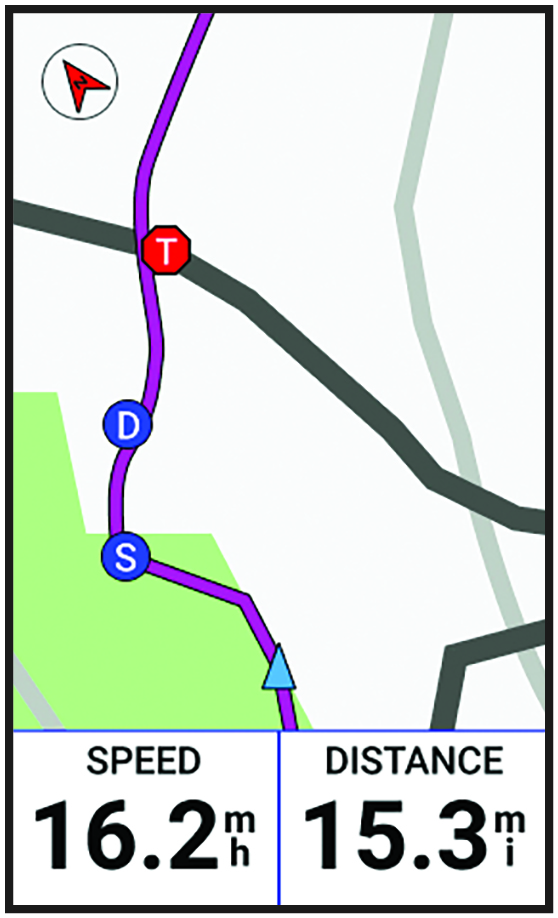
TIP: The letters inside the map icons correspond to the initials of the rider’s first name.
Icon
|
ICON |
Shape |
Color |
Moving |
Connected on the Garmin Connect App |
|
|
Circle |
White |
Yes |
No |
|
|
Circle |
Blue |
Yes |
Yes |
|
|
Square |
White |
No |
No |
|
|
Square |
Red |
No |
Yes |
|
|
Circle |
Gray |
Unknown |
Unknown |


NOTE: To customize the map settings, from the GroupRide page select .
Leaving a GroupRide Session
In order for your Edge bike computer to remove you from the other riders’ maps and lists, you must have an active internet connection.
You can leave a GroupRide session anytime.
Select an option:
- During the ride, swipe down to view the controls widget, and select Leave GroupRide.
- From the GroupRide page, select Leave GroupRide.
- Press > Save to stop the activity time and complete your activity.
TIP: The Edge bike computer automatically removes the GroupRide session when it expires ().
- Ride outside using GPS.
- Pair your compatible Edge bike computer with your phone using Bluetooth technology.
- Group riders can add a GroupRide session to their device at any time, and then join the session on the day of the ride. Sessions expire 24 hours after the start time.
- To share the GroupRide code during the ride, select
 from the GroupRide data screen on the Edge bike computer.
 - When you receive a GroupRide message, you can select
 to mute all message prompts for that GroupRide session.
 - The rider list refreshes every 15 seconds and shows details for the 25 closest riders within 40 km (25 mi). To view additional riders outside the 40 km (25 mi) radius, select Show More.
- During the ride, swipe down to view the controls widget for more options.
- Stop riding before you attempt to view location and heading information for other riders in the GroupRide session ().
Live Event Sharing
Live event sharing allows you to send messages to friends and family during an event, providing real-time updates including cumulative time and last lap time. Before the event, you can customize the list of recipients and the message content in the Garmin Connect app.
Turning On Live Event Sharing
Before you can use live event sharing, you must set up the LiveTrack feature in the Garmin Connect app.
NOTE: LiveTrack features are available when your device is connected to the Garmin Connect app using Bluetooth technology, with a compatible Android phone.
- Turn on your Edge bike computer.
- In the Garmin Connect app, select > Safety & Tracking > Live Event Sharing.
- Select Devices, and select your Edge bike computer.
- Select the toggle switch to enable Live Event Sharing.
- Select Done.
- Select Recipients to add people from your contacts.
- Select Message Options to customize the message triggers and options.
- Go outside, and select a GPS biking profile on your Edge 1050 bike computer.
Live event sharing is enabled for 24 hours.
NOTE: Your paired phone must be equipped with a data plan and be in an area of network coverage where data is available.
Spectator messaging is a feature that allows your LiveTrack followers to send you text messages during your cycling activity. You can set up this feature in the LiveTrack settings of the Garmin Connect app.
Blocking Spectator Messages
If you want to block spectator messages, Garmin recommends turning them off before you start the activity.
Select > Safety & Tracking > LiveTrack > Spectator Messaging.
Setting the Bike Alarm
You can turn on the bike alarm when you are away from your bike, such as on a stop during a long ride. You can control the bike alarm from your device or the device settings in the Garmin Connect app.
- Select > Safety & Tracking > Bike Alarm.
- Create or update your passcode.
When you disable the bike alarm from your Edge device, you are prompted to enter the passcode.
- Swipe down from the top of the screen, and on the controls widget, select Set Bike Alarm.
If the device detects motion, it sounds an alarm and sends an alert to your connected phone.
Playing Audio Prompts During an Activity
Before you can play audio prompts on your phone, you must have a phone with the Garmin Connect app paired to your Edge bike computer. During an audio prompt, the phone mutes the primary audio to play the announcement.
You can enable the Edge bike computer to play motivational status announcements during a ride or other activity. Audio prompts can play on your device or phone, and include the lap number and lap time, navigation, power, pace or speed, and heart rate data. You can also customize the volume level.
- Select > System > Sounds.
- Use the Voice Prompts slider bar to adjust the volume.
- Select Voice Prompts.
- Select an option:
- To choose where to play the audio prompts, select Audio Output.
- To change the language or the dialect of the voice prompts, select Dialect.
NOTE: If you set audio prompts to play on your phone, you must update the dialect through your phone’s settings.
- To change the voice of the prompts to male or female, select Voice.
- To hear alerts to help you navigate to your destination, select Navigation Alerts.
- To hear prompts when you start and stop the timer, including the Auto Pause feature, select Timer Events.
- To hear a prompt for each lap, select Lap Alert.
- To hear workout alerts play as an audio prompt, select Workout Alerts.
- To hear activity alerts play as an audio prompt, select Activity Alerts.
- To customize prompts with power data, select Power Alert.
- To customize prompts with your pace and speed information, select Pace/Speed Alert.
- To customize prompts with your heart rate information, select Heart Rate Alert.